Projects and Archives

The RDMS Project environment can be used to store data sets that are intended to be published. Therefore, datasets that are part of a publication, such as an article, poster, book (chapter), thesis, conference proceeding, and software, should be stored in this area. Furthermore, stricter permission management and user roles exist compared to Team Drives. The reason for this is to make sure that the datasets that are converted to a project comply with the quality requirements of becoming a publication. On the other hand, additional policies on the data can be implemented upon request by the users. An example of a policy would be: "Revoke access of participants after XX months".
Once a project is completed, an archiving workflow can be initialized. During this archiving workflow, the data is checked by the responsible persons, is enriched with metadata, and finally put as a data package in a fixed state. Currently, RDMS does not have the functionality to publish these data packages. This user manual and the users will be updated once publishing becomes available.
An RDMS Project is managed by a Project Admin, a Metadata Manager, and a Data Manager, where the same person can hold all these roles. The Project Admin or the Data Manager manages the access rights to files and folders of the project. The Metadata Manager manages the project's metadata and verifies it during the archiving stage. Please refer to the archiving workflow section for more information about the archiving procedure and the roles of Project Admin, Metadata Manager, and Data Manager.
Creating a Project
There are two ways of creating an RDMS Project:
- Creating a new project from scratch.
- Creating a project from an existing folder in the RDMS.
Note: You need to have the correct privileges within the RDMS to be able to create projects. If you do not see the buttons as described below, your account is missing these required privileges. You can contact rdms-support@rug.nl to request the privileges to create projects.
Creating a new Project from scratch
From the main menu on the left-hand side, click on the data manager icon. This will open the Data Management menu on the left side of the interface.

Click on the ![]() button in the top-left of the Data Management menu, and select the "New Project" option.
button in the top-left of the Data Management menu, and select the "New Project" option.

A new window will be opened where you can specify the name of your project, the name of the corresponding project folder, and a project description. Note that both the name of the project and the name of the project folder can be identical. Afterwards, click on the "Add Project" button to continue with creating your new project.

After successful project creation, you will be redirected to your project.

Now you can transfer data to this project. Please refer to the data management section, which describes how to transfer data in/out of the RDMS on different operating systems. Note that the path /rug/home/Projects/<your_project> is selected as the project destination.

The added data will become visible within your newly created project. You can click on it to see the contents.

Creating a new Project from a Folder
Instead of creating a new project from scratch, it is also possible to select an existing RDMS folder and create a project from it.
To create an RDMS Project from a folder, you have to first open the data management tab (see above). After clicking on the ![]() button in the menu, select the "New Project from folder" option. A window will be opened where you can select a folder either from your Home Drive or Team Drive.
button in the menu, select the "New Project from folder" option. A window will be opened where you can select a folder either from your Home Drive or Team Drive.

Double-click on the folder from which you want to create a project, then proceed with "Next". In the next window, you can specify the name of your project and project folder, and also give a project description. Click on the "Create Project" button to continue creating your project. Your project and the folder will be visible on the dashboard.

Note: If a project is created from an existing folder, the content of that folder is automatically moved to the new project, and an internal link is placed in the original location of the folder.
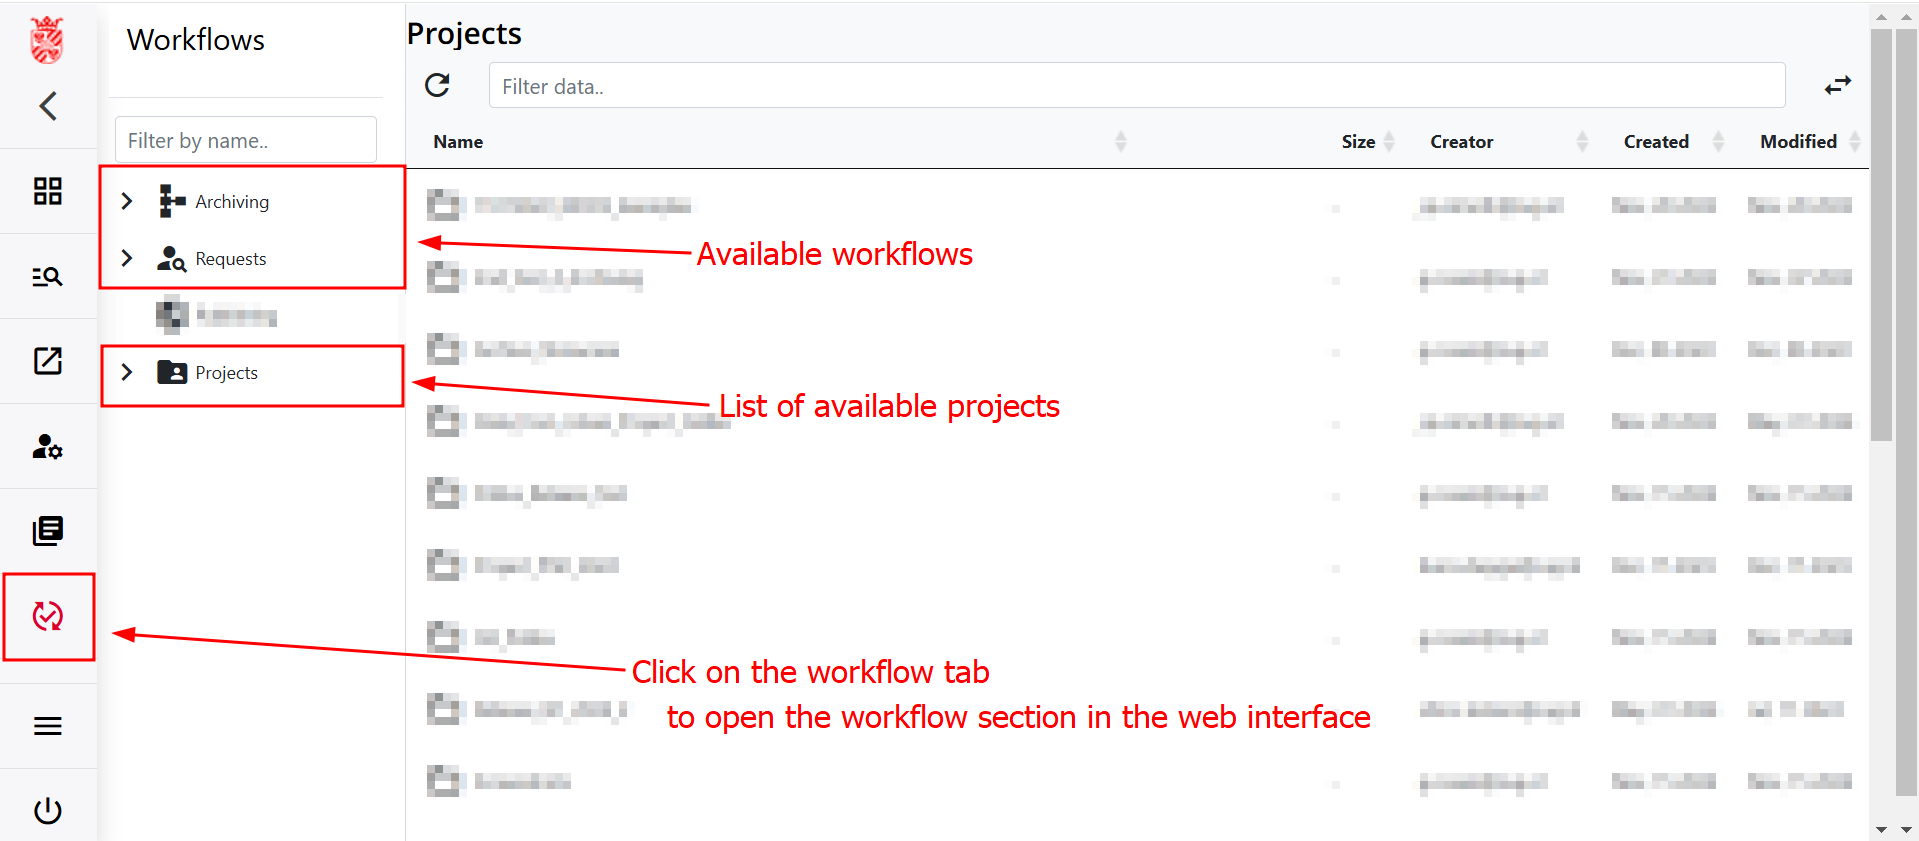
Using RDMS Workflows with Projects
The RDMS has a set of workflows designed to start from an existing project:
- Archiving Workflow: Start this workflow if the project is over and you want to freeze data in an archive.
- Project Participation Request: Start this workflow if you want to ask for access to an existing project.
To access these workflows, navigate to the sidebar menu and select the workflow tab as shown in the figure below. There, you can select which workflow you would like to start. From the workflow page, you can then select the project you want to run the workflow on. If you have the correct permissions, the workflow will start. The workflow page will guide you through each step you need to follow in order to complete the workflow.
Alternatively, you can also start the archiving workflow by navigating to the project you wish to archive, then selecting the options wheel and starting the archiving workflow from there. Once again, you need the correct permissions to start the workflow. The RDMS web interface will redirect you to the workflow page, where you can then follow the steps mentioned above.
For a more detailed description of each workflow, please read the Workflows in the RDMS page on this wiki.