Metadata Management via the Web Interface
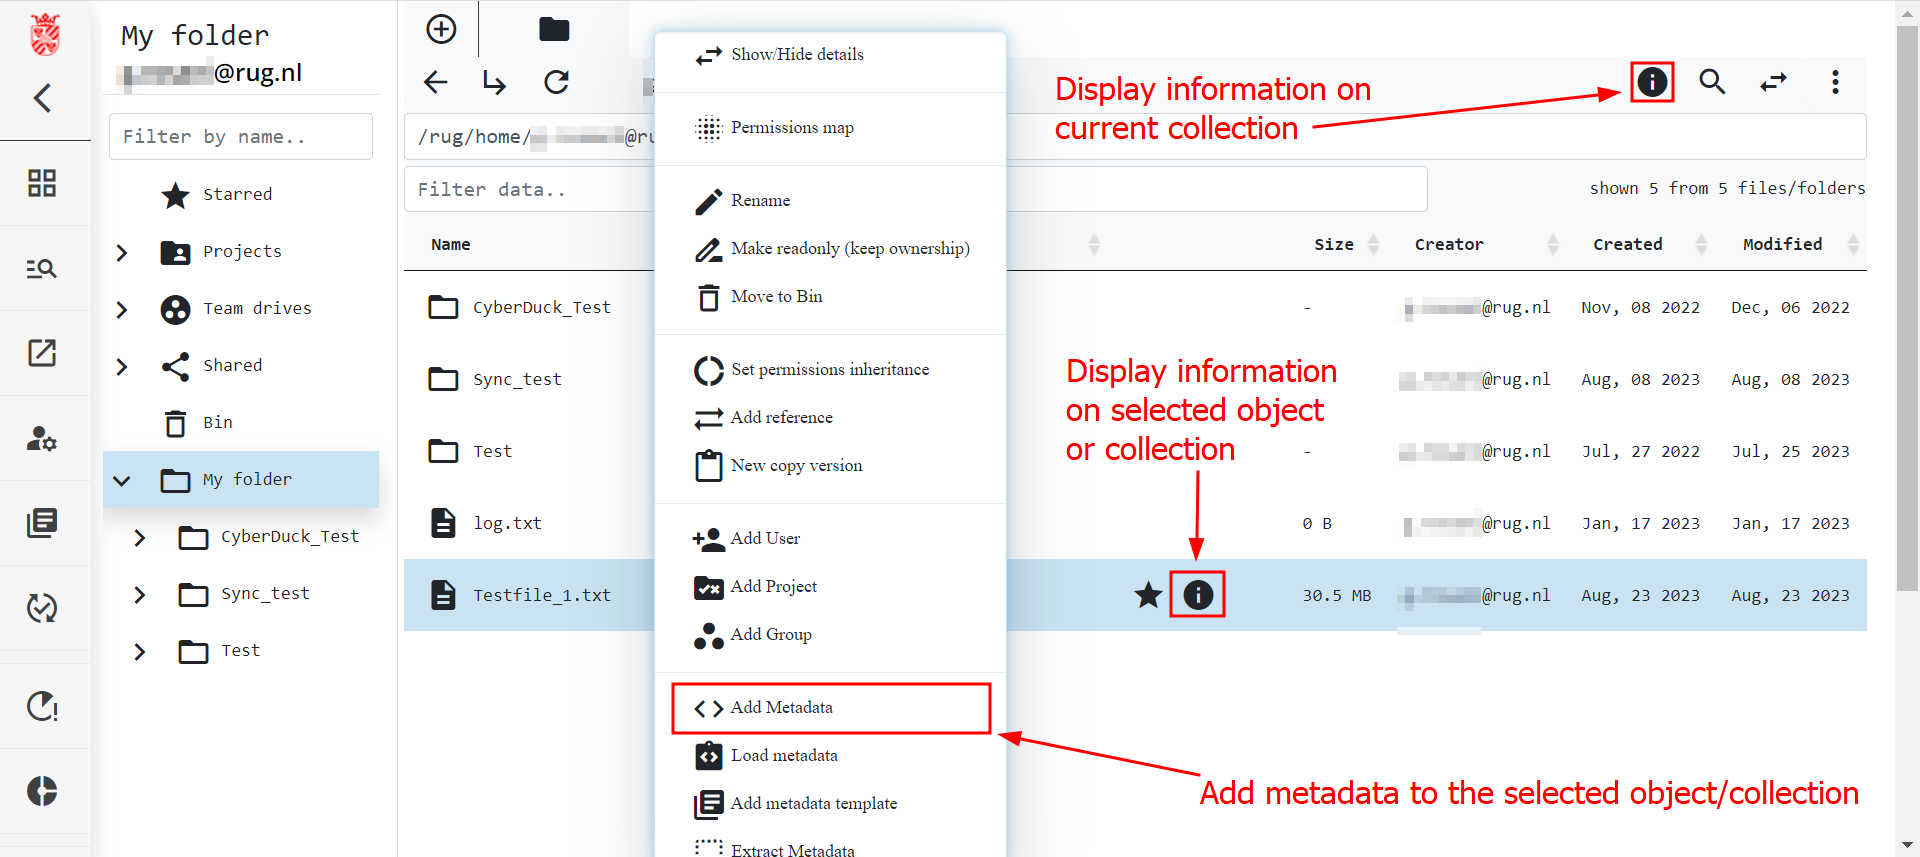
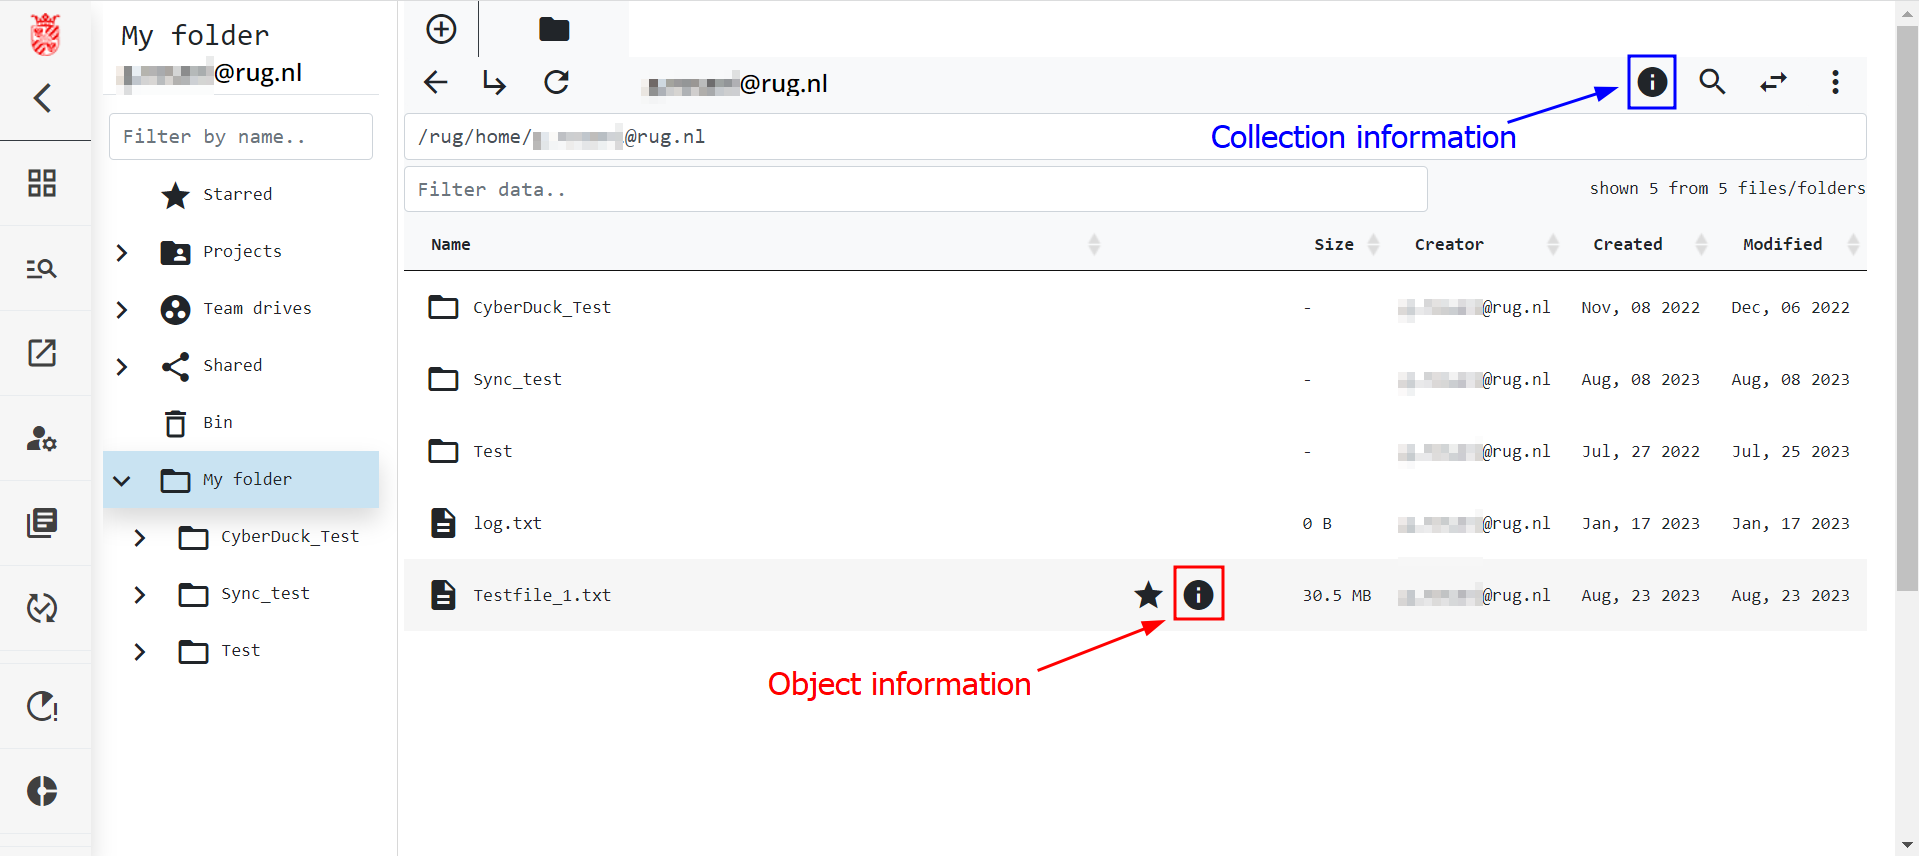
Using the web interface, you will have access to basic metadata functionality using a GUI. Specifically, you will be able to create, read, update, and delete (CRUD) metadata attached to your data. The web portal also allows for more complex handling of your metadata, but we will describe this in a different section when we talk about metadata templates. Below, we show the data browser of the web portal, where you can see the metadata generated by the system.

Create Metadata in the Web Interface


Read Metadata in the Web Interface

Update Metadata in the Web Interface


Delete Metadata in the Web Interface


Automatic Extraction of Metadata
What we described above is the functionality of the web portal to let the user add metadata entries by hand. However, there are files that require a large amount of metadata to be properly described. Such data often has the information needed to describe the stored data as metadata in its file header. The web portal offers the user the possibility to extract and import the metadata contained in the file header directly into the RDMS.
To access this functionality, right-click the file you wish to extract metadata from, then scroll down the menu to Extract metadata.

Once you click on the menu item, the system will display the message below to inform you of the formats that are currently supported for automatic metadata extraction. To check if the extraction was successful, follow the same steps as in Read Metadata and verify that the header in your file and the metadata in the RDMS overlap.

Note: The extract function of the web portal extracts information contained in the file header. If your file does not have a header, no information will be extracted, even when the system reports successfully finishing the extraction.
Supported File Formats for automated Metadata Extraction
Below you can find the list of file extensions for which automatic extraction is supported:
.dcm,.dcm30: DICOM (Digital Imaging and Communications in Medicine) images (dicomstandard.org).doc,.docx: Microsoft Word documents (microsoft.com).fits,.fit: FITS (Flexible Image Transport System) images (fits.gsfc.nasa.gov).hdr,.nii: NIfTI (Neuroimaging Informatics Technology Initiative) headers (nifti.nimh.nih.gov).jpeg,.jpg: Exif (Exchangeable image file format) (en.wikipedia.org/wiki/Exif).pdf: -'description': PDF (Portable Document Format) files (adobe.com/acrobat/about-adobe-pdf.html).ppt,.pptx: Microsoft Powerpoint documents (microsoft.com).tif,.tiff: Exif (Exchangeable image file format) (en.wikipedia.org/wiki/Exif).txt: ASCII text files containing key=value pairs.xls,.xlsx: Microsoft Excel documents (microsoft.com)
If the file type you wish to extract metadata from has a readable file structure and is not present in the list above, we can probably add that file type to the list of supported extensions. Please send an e-mail to RDMS support to let us know that you wish for a file type to be added to the list.
Import Metadata
Metadata can also be imported from a local file using the web portal. The Name, Value, and Extra Value are called AVUs for Attribute, Value, Unit combinations in this context. AVUs are defined in a so-called JSON structure as a .txt file or a .json file. Multiple AVUs can be added at once with this approach.
The structure of the file should be as follows:
[
{"Attribute" : "Author",
"Value": "Tester_1",
"Unit": ""
},
{"Attribute" : "Distance",
"Value": "100",
"Unit": "km"
},
{"Attribute" : "Location",
"Value": "Groningen",
"Unit": ""
}
]
Metadata from a local file can be added to both collections and objects by right-clicking the target of interest and selecting the Load metadata option.

Upon selecting a file with AVUs in a JSON structure as indicated above, the metadata is automatically recognized and can be added by selecting the Load metadata button. In this example, a .txt file was used. Please note that multiple AVUs can be added at once.

Upon loading the AVU file, the metadata is displayed for the selected data.
