Metadata Templates
As described in the previous sections, every user of the RDMS can easily add metadata to their objects and collections either via the functionality in the web portal or using iCommands. Described here is another functionality of the web portal related to metadata management: the use of metadata templates.
As the name suggests, metadata templates are pre-configured metadata entry forms that the user can define in order to have a consistent way of recording metadata for a given data object or collection. For example, you could have a template attached to a collection recording the "Name of the PI", "Starting date", "Publication state", "Funding agency", etc. Such a template could be used to record information on the projects of a research group, such that the same information is always reliably recorded. Another example would be a template attached to a data object recording the "Acquisition method", "Instrument used", "Temperature", "Humidity", "Reagents", "Researcher responsible", or other values. Such a template could be used to record the instrument settings used to obtain the data object.
The advantage of a template over manual entry of metadata is that the user has a pre-defined list of entries. This reduces the risk of forgetting to record a given value or to have objects with different metadata entries, even though they should have been matching.
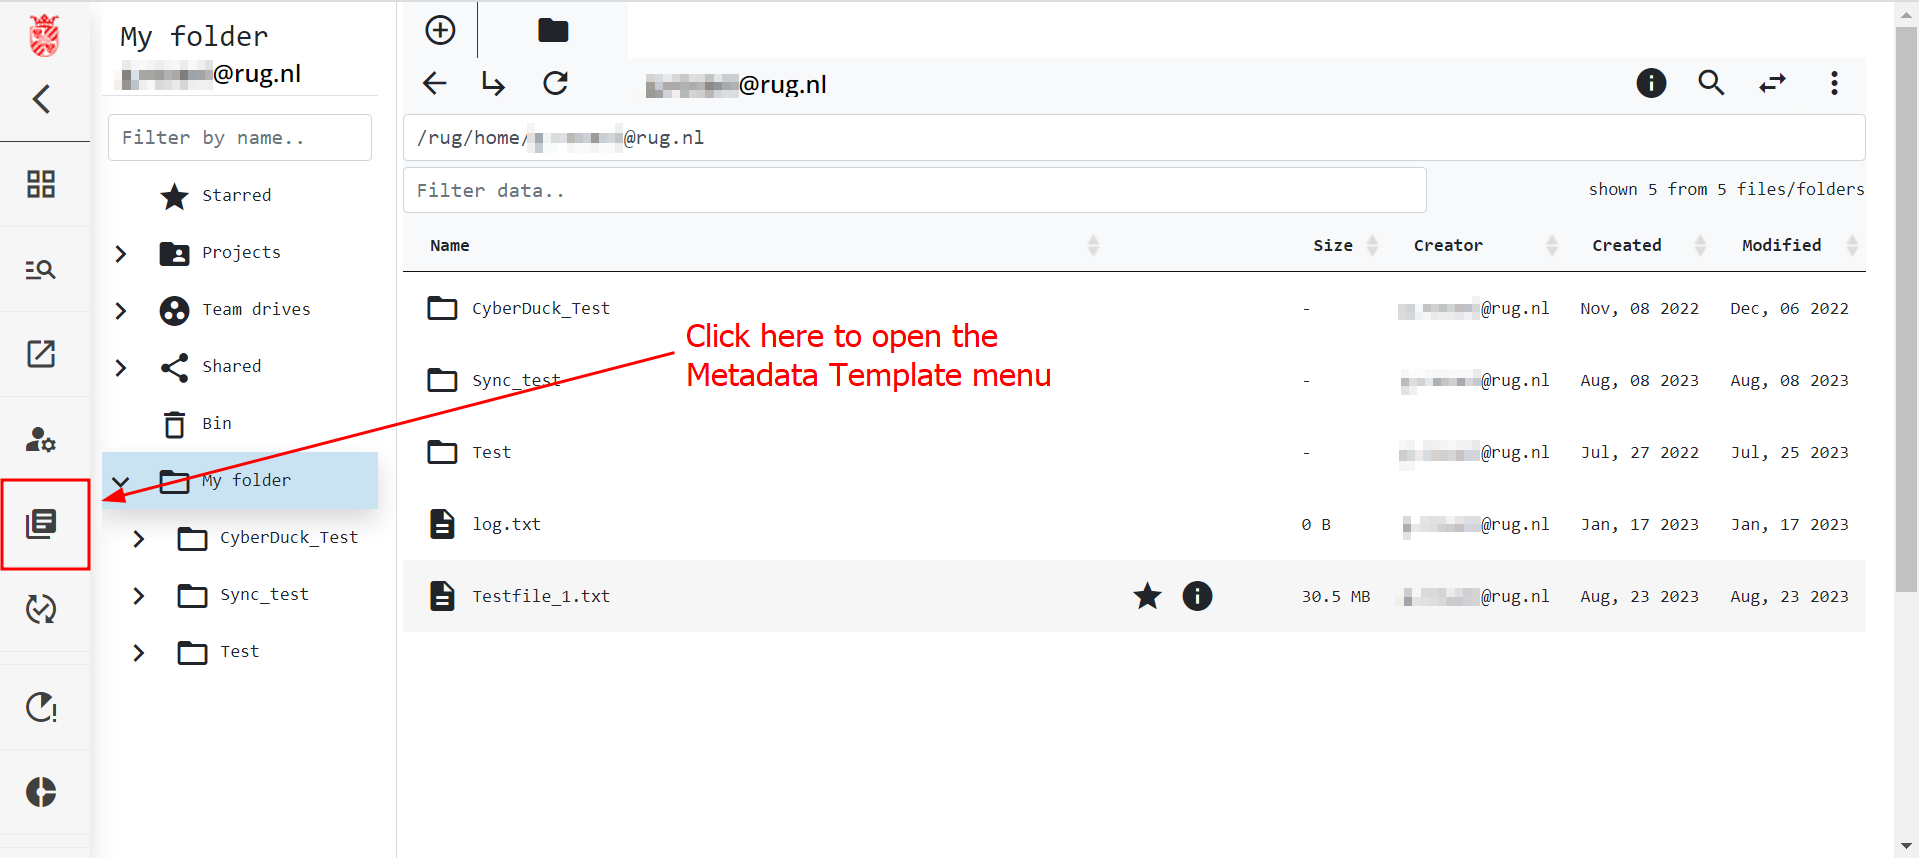
In the web portal, the menu to access the creation and management of metadata templates is located as shown in Figure 1.
<html> <center></html> Figure 1 <html> </center></html>
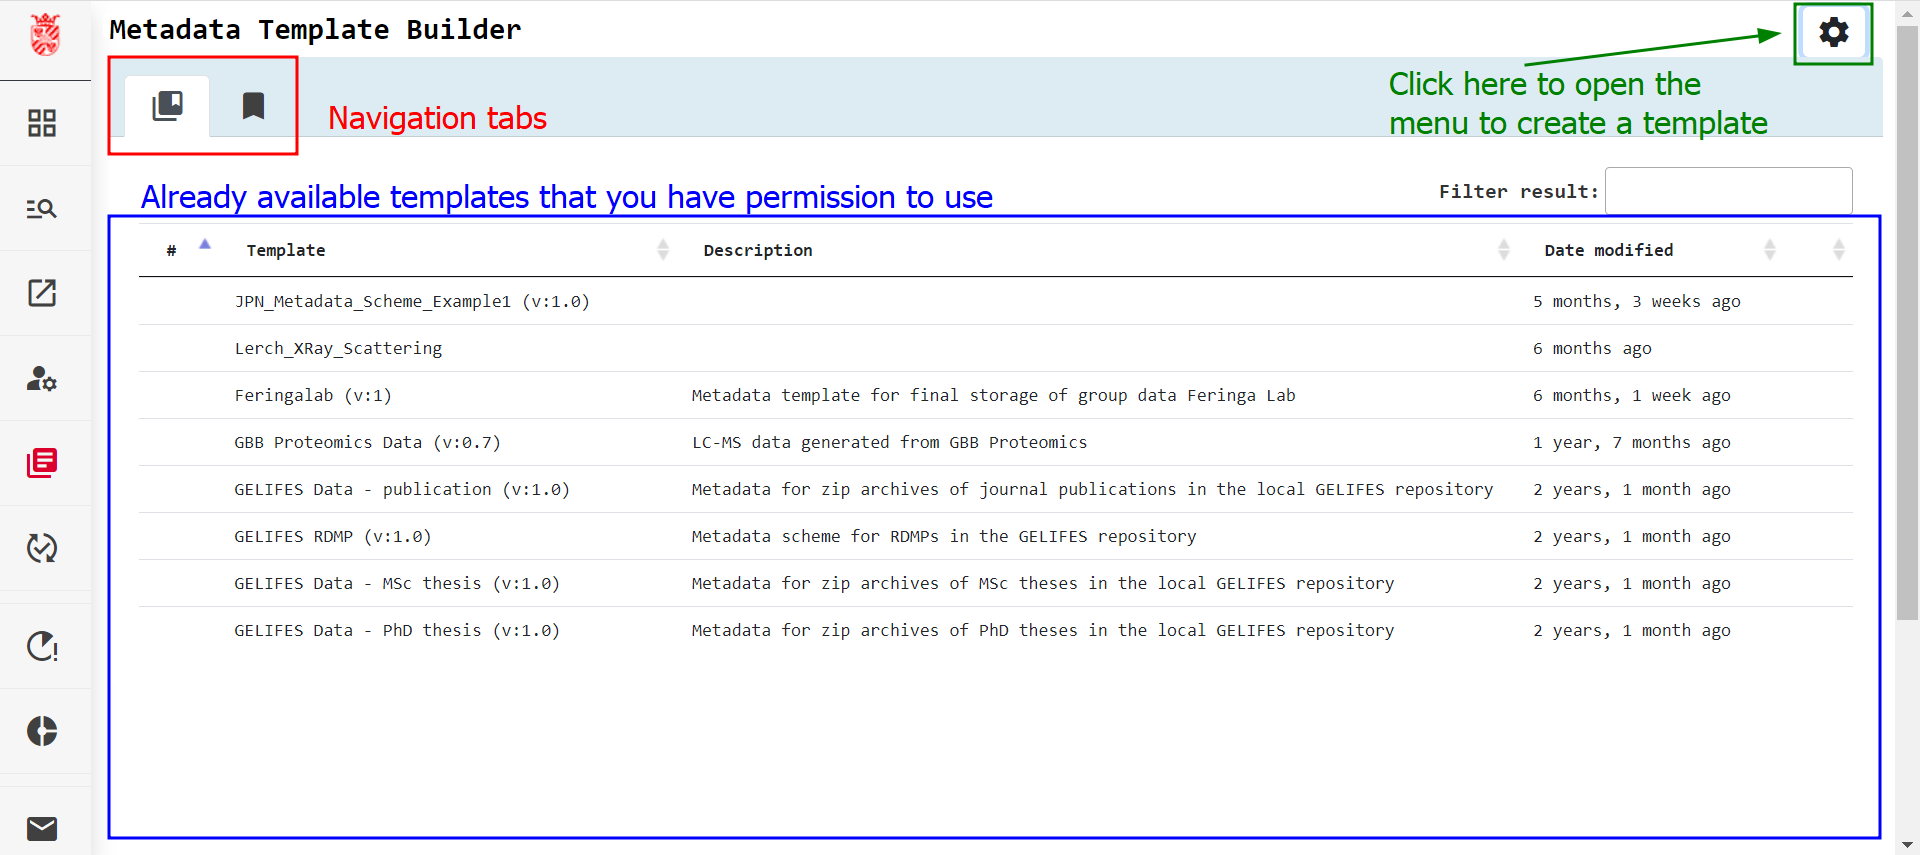
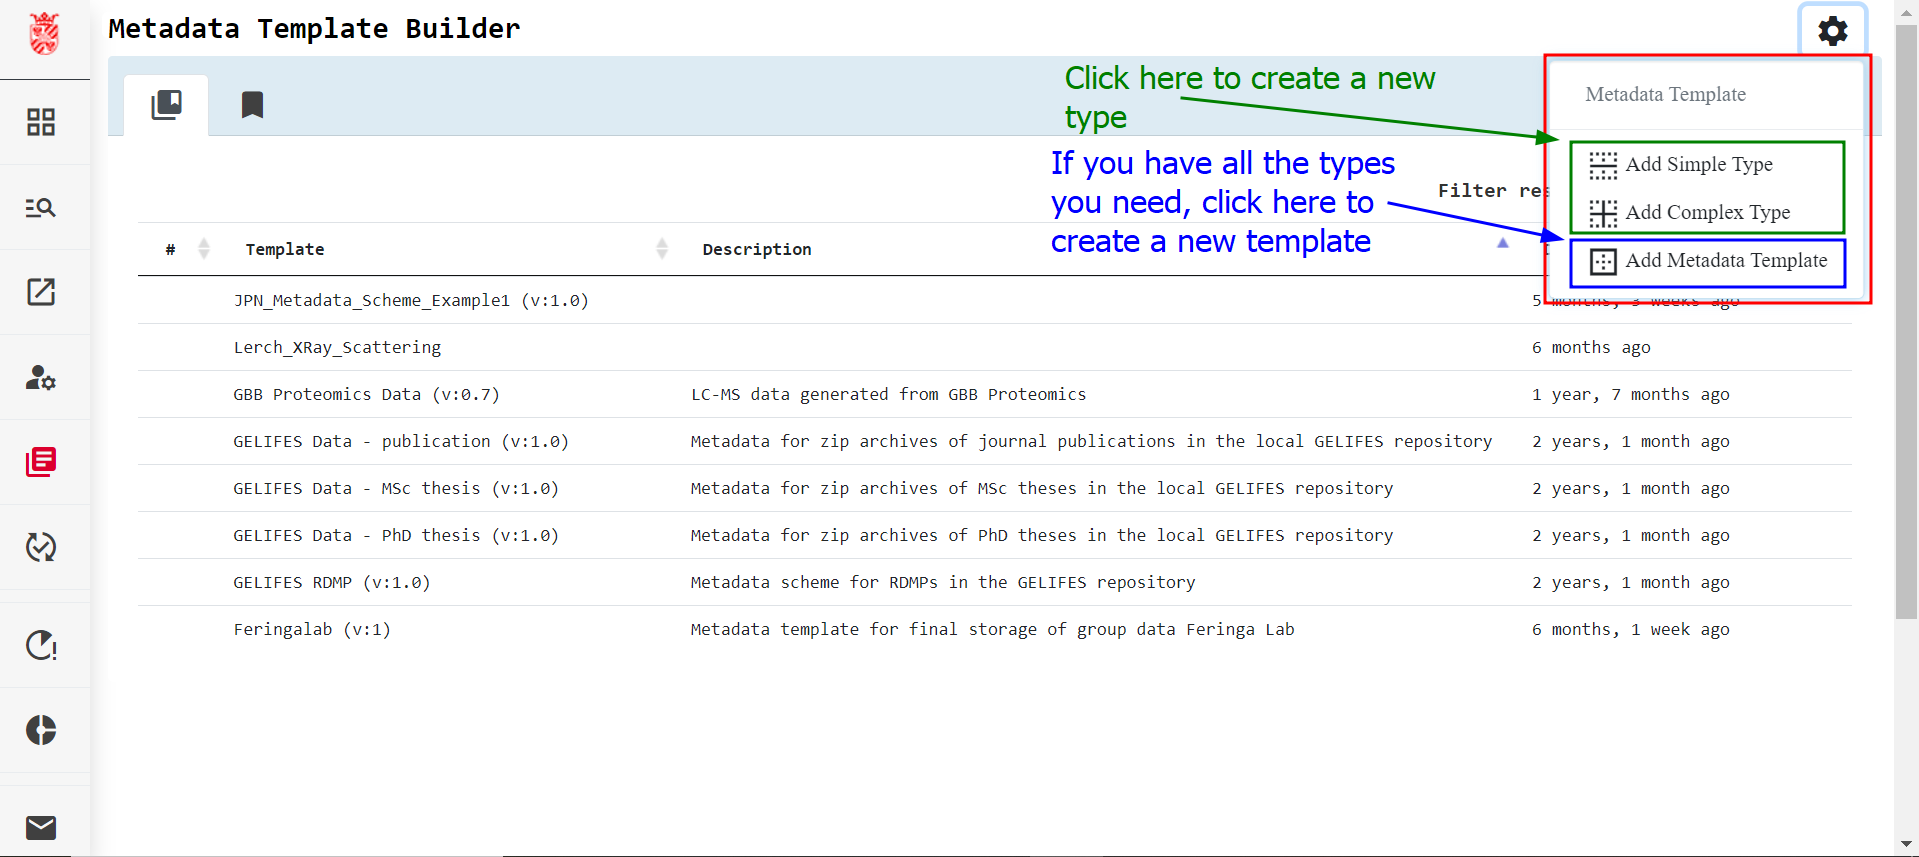
Once you click on the menu icon, you will be redirected to the Metadata Template Settings page of the web portal, as shown in Figure 2. Here you can see all metadata templates and types that are available to you and you can build your own templates and types by selecting the green highlighted gear icon.
<html> <center></html> Figure 2 <html> </center></html>
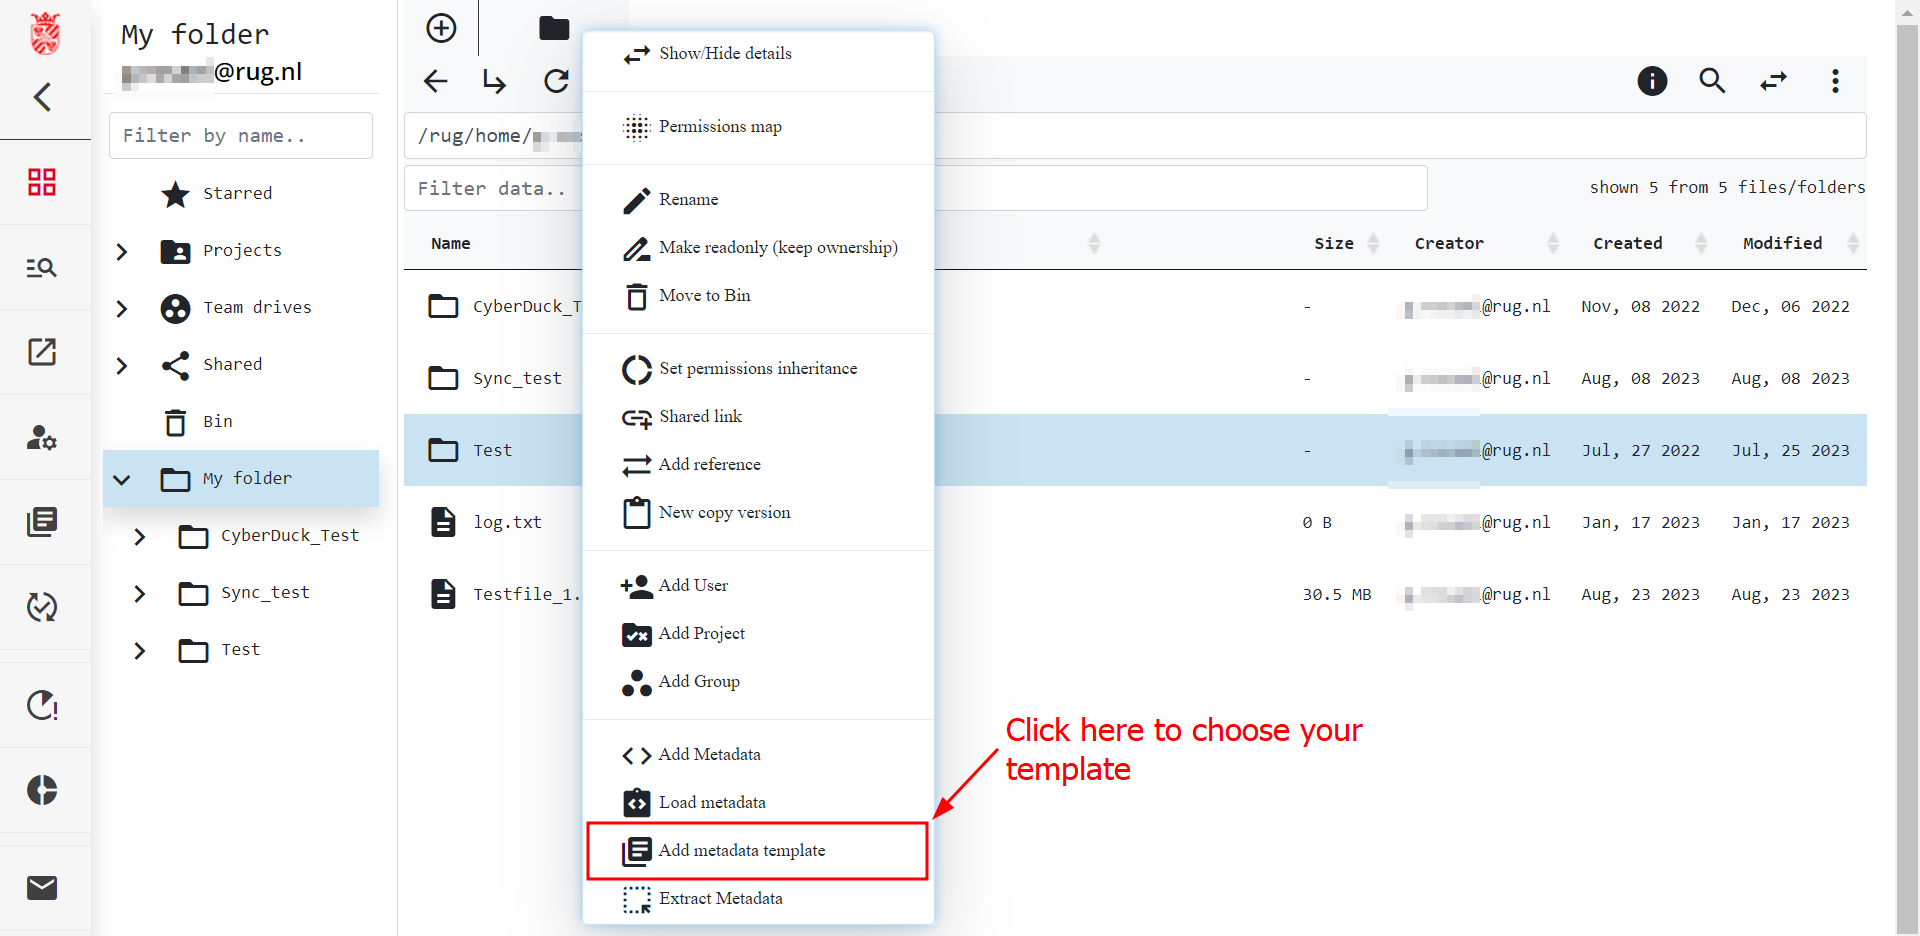
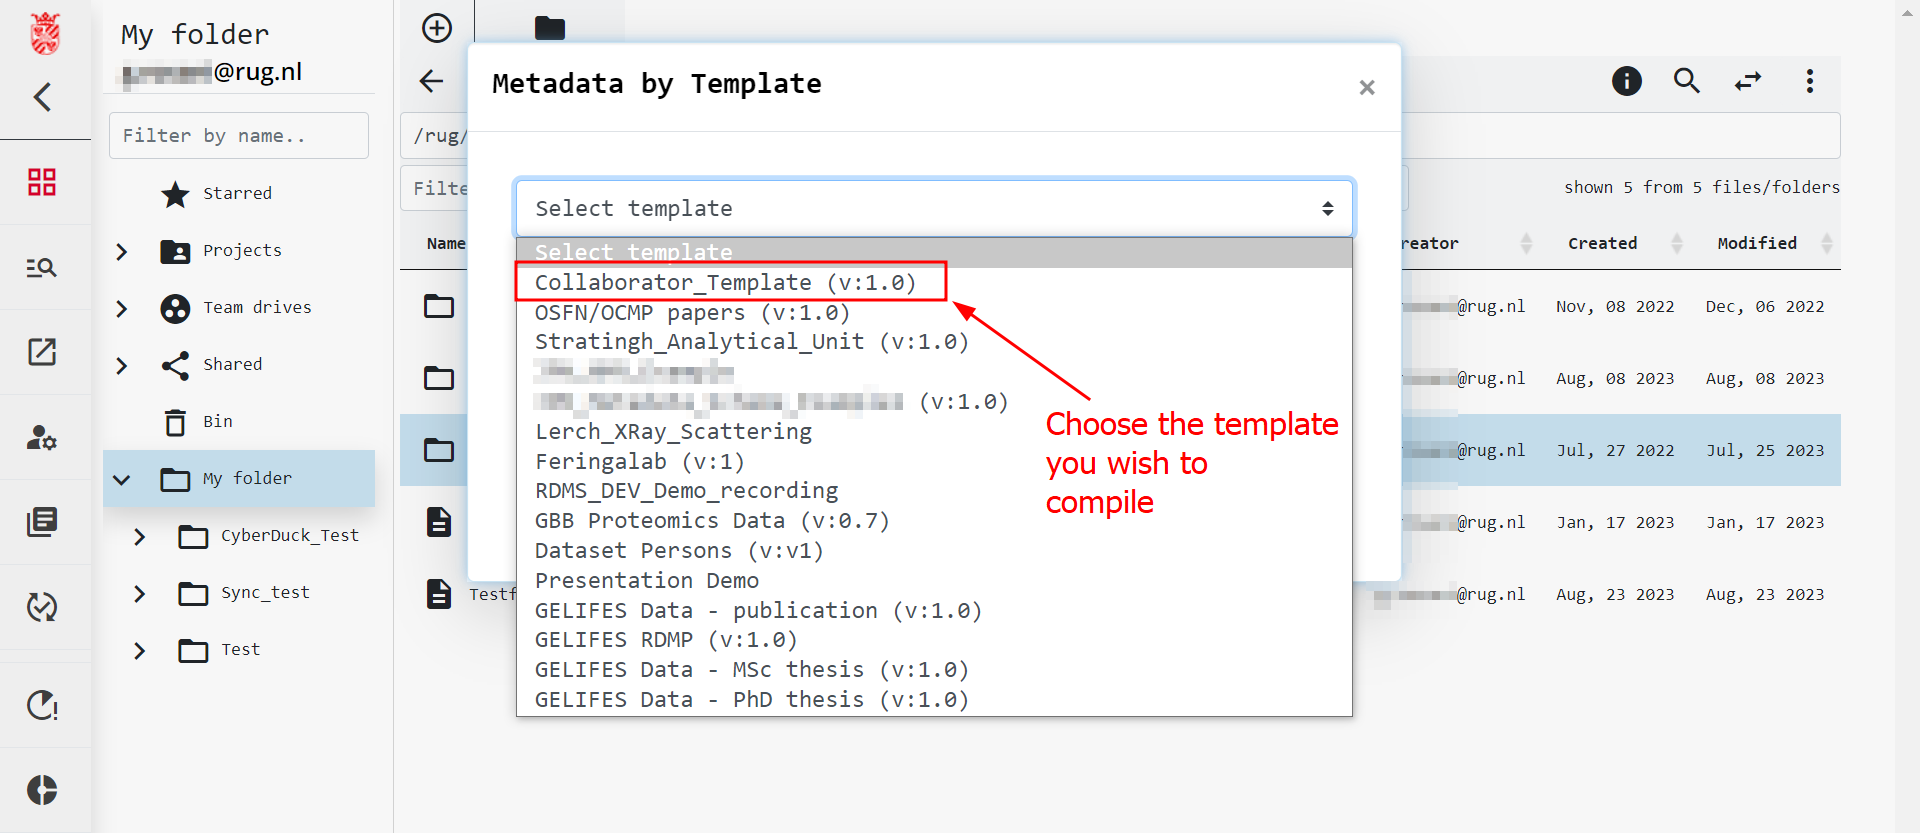
On the top of the menu in the red box there are two tabs, for Templates and Metadata Types respectively. The primary tab of Templates is already selected when you first open the Metadata Template Settings page and lists all the templates that are available to you, either because they are public, they have been shared with you, or because you created them. The second tab for Metadata Types does the same. If a template or a type has a ![]() icon on their left, it means that you are able to edit the template/type.
icon on their left, it means that you are able to edit the template/type.
In order to create a Metadata Type or a Metadata Template click on the gear icon shown in Figure 2 in green. The menu in the red box will appear and you will have the choice to either create a Metadata Type or a Metadata Template. In the next sections, we will explain how all three options work.
<html> <center></html> Figure 3 <html> </center></html>
How to Create Metadata Types
The RDMS web portal makes standard metadata types available to all users.
The standard types available to all users are:
multiline string: allows for the input of multiple lines of text.int: allows and limits the input to an integer number.float: allows and limits the input to a real or decimal number.date: allows and limits the input to a date.string: allows for the input of a single line of text.boolean: allows your entry to be eithertrueorfalse.
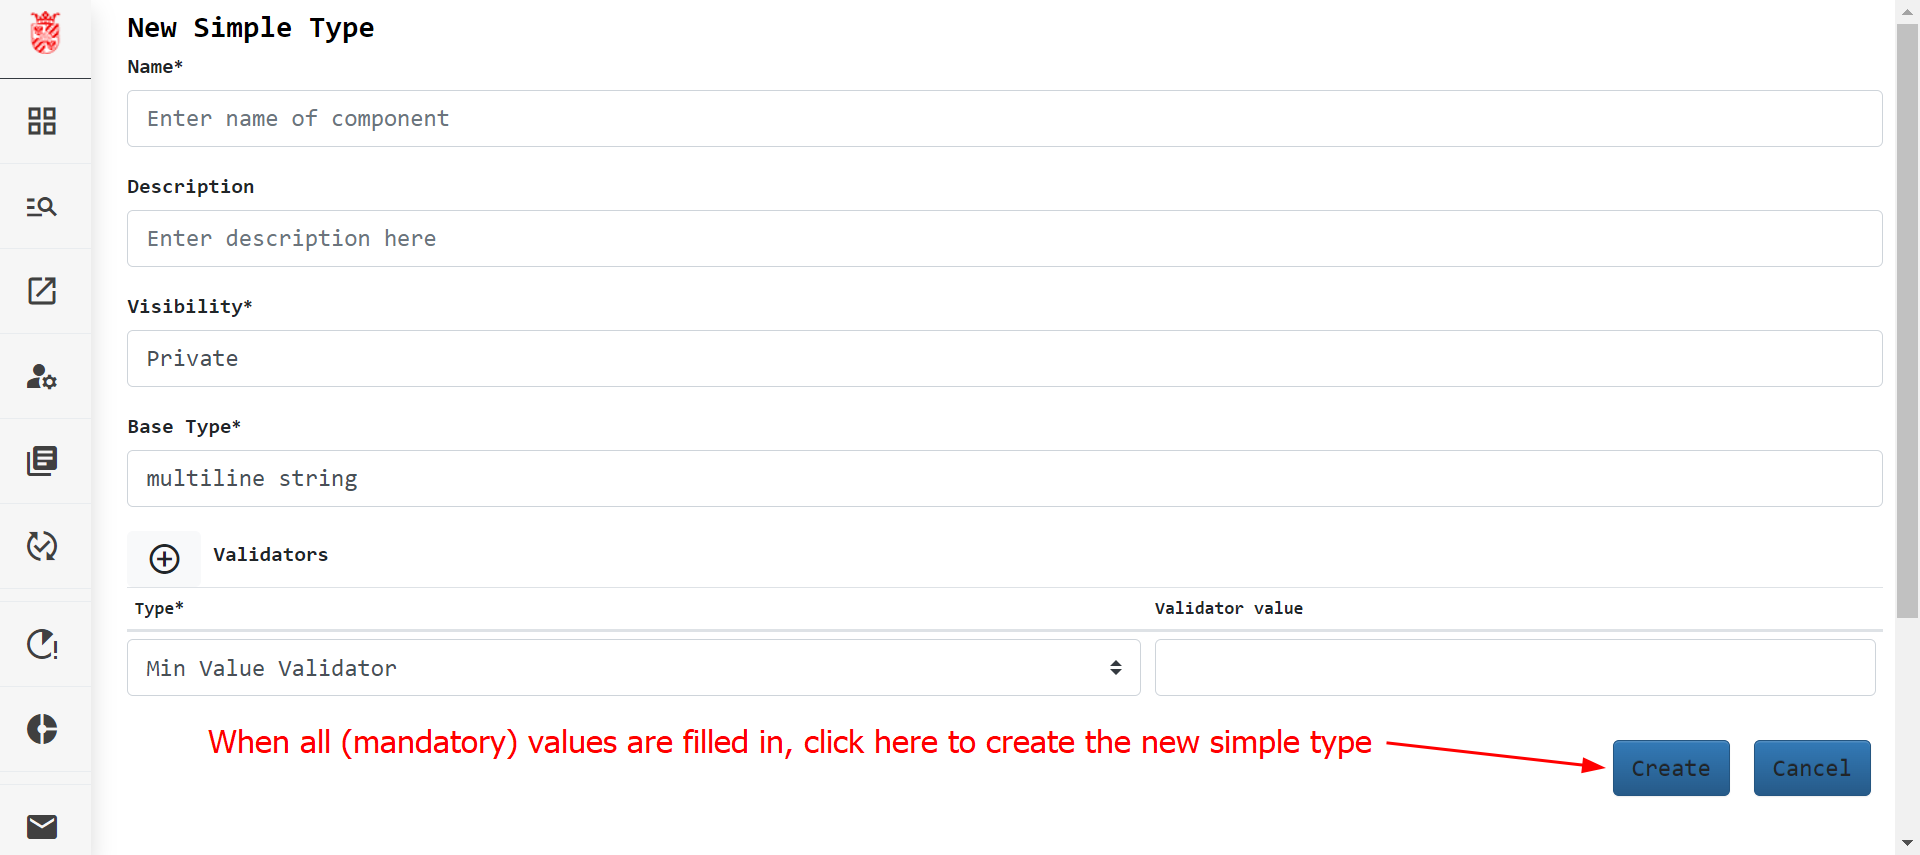
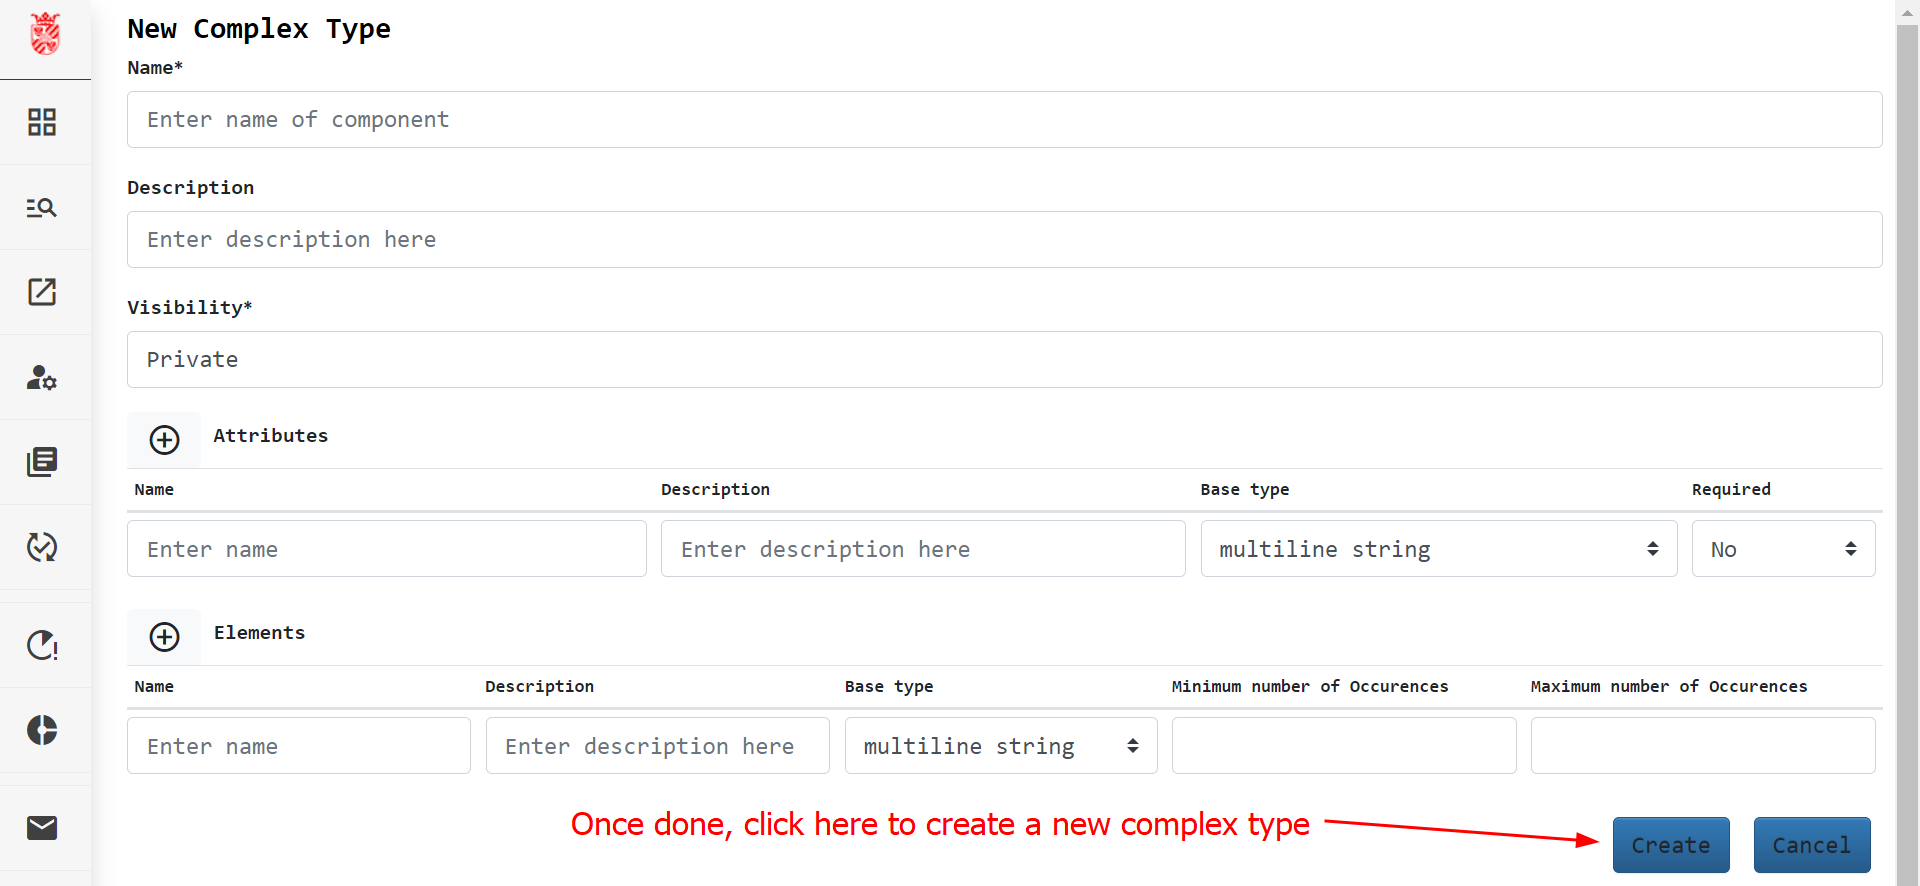
Should you need to create your own special entry, however, then you can use the Create Metadata Types functionality to do so. The RDMS web portal also allows you to create two different kinds of Metadata types as described below. These types merely define what function a metadata entry can have and if restrictions apply to it.
The user-created metadata types are as follows:
How to Create Metadata Templates
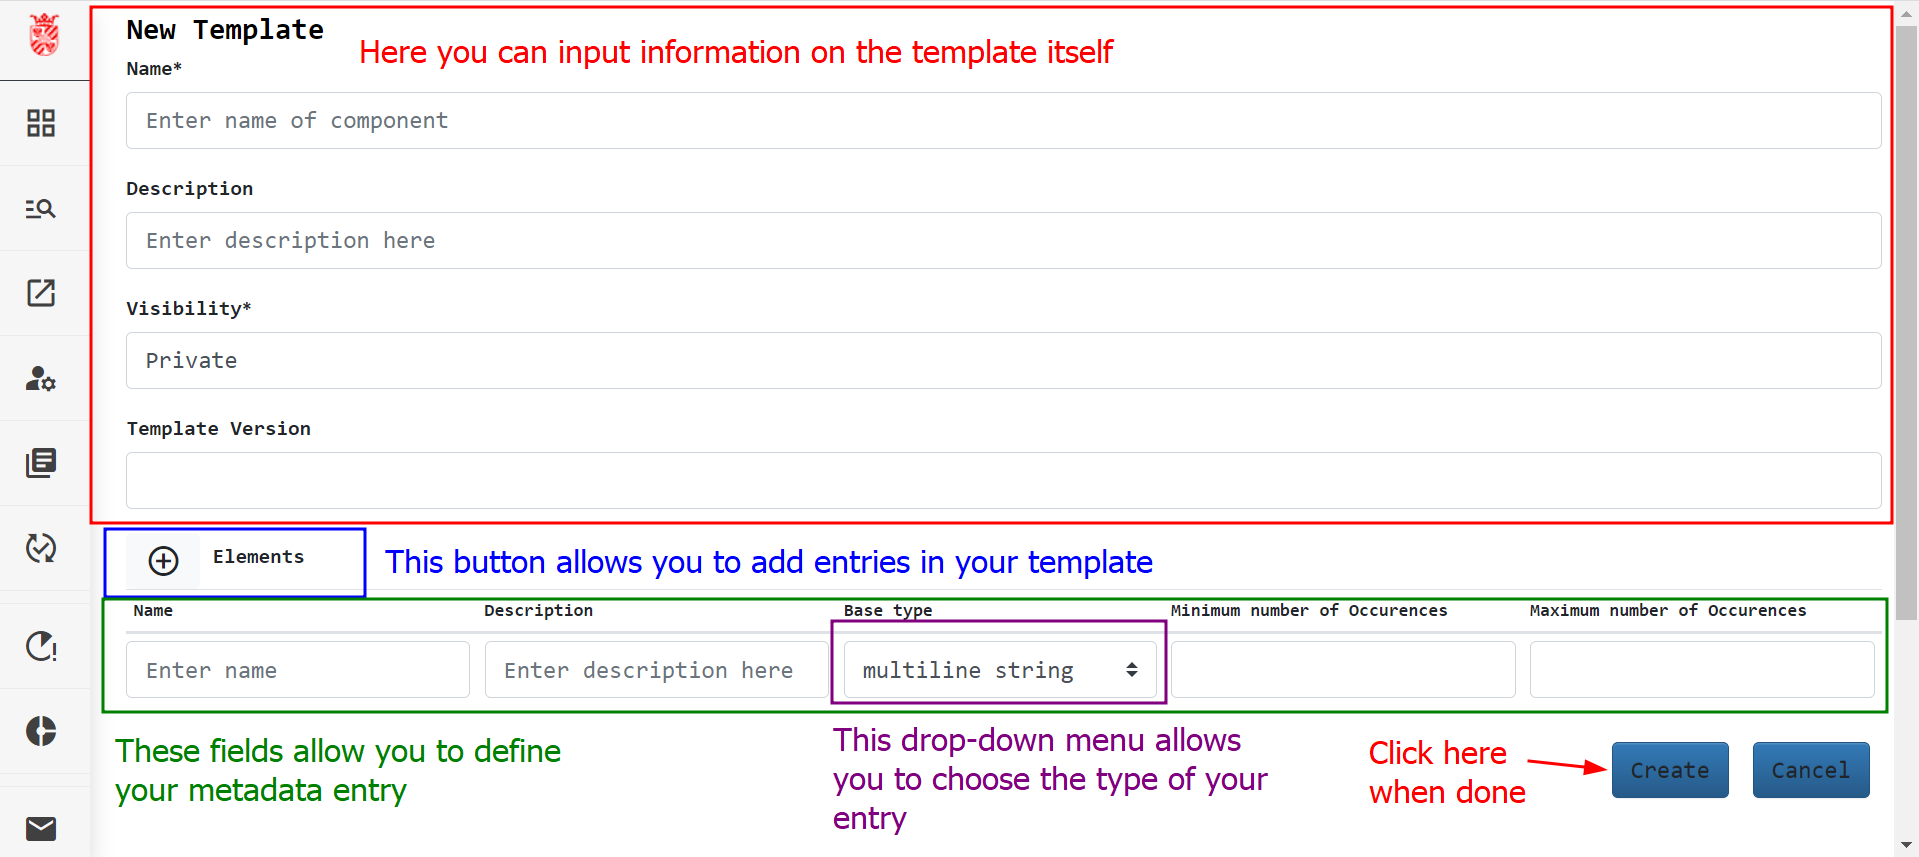
If metadata types are clear to you, you can open the metadata template creation screen by clicking the ![]() icon on the top right. You can build a template from scratch from the menu that will appear. Select
icon on the top right. You can build a template from scratch from the menu that will appear. Select Add Metadata Template and fill in the name and description you would like in your template. The fields with asterisks * are mandatory. Figure 6 shows the window for the Metadata Template creation.
<html> <center></html> Figure 6 <html> </center></html>
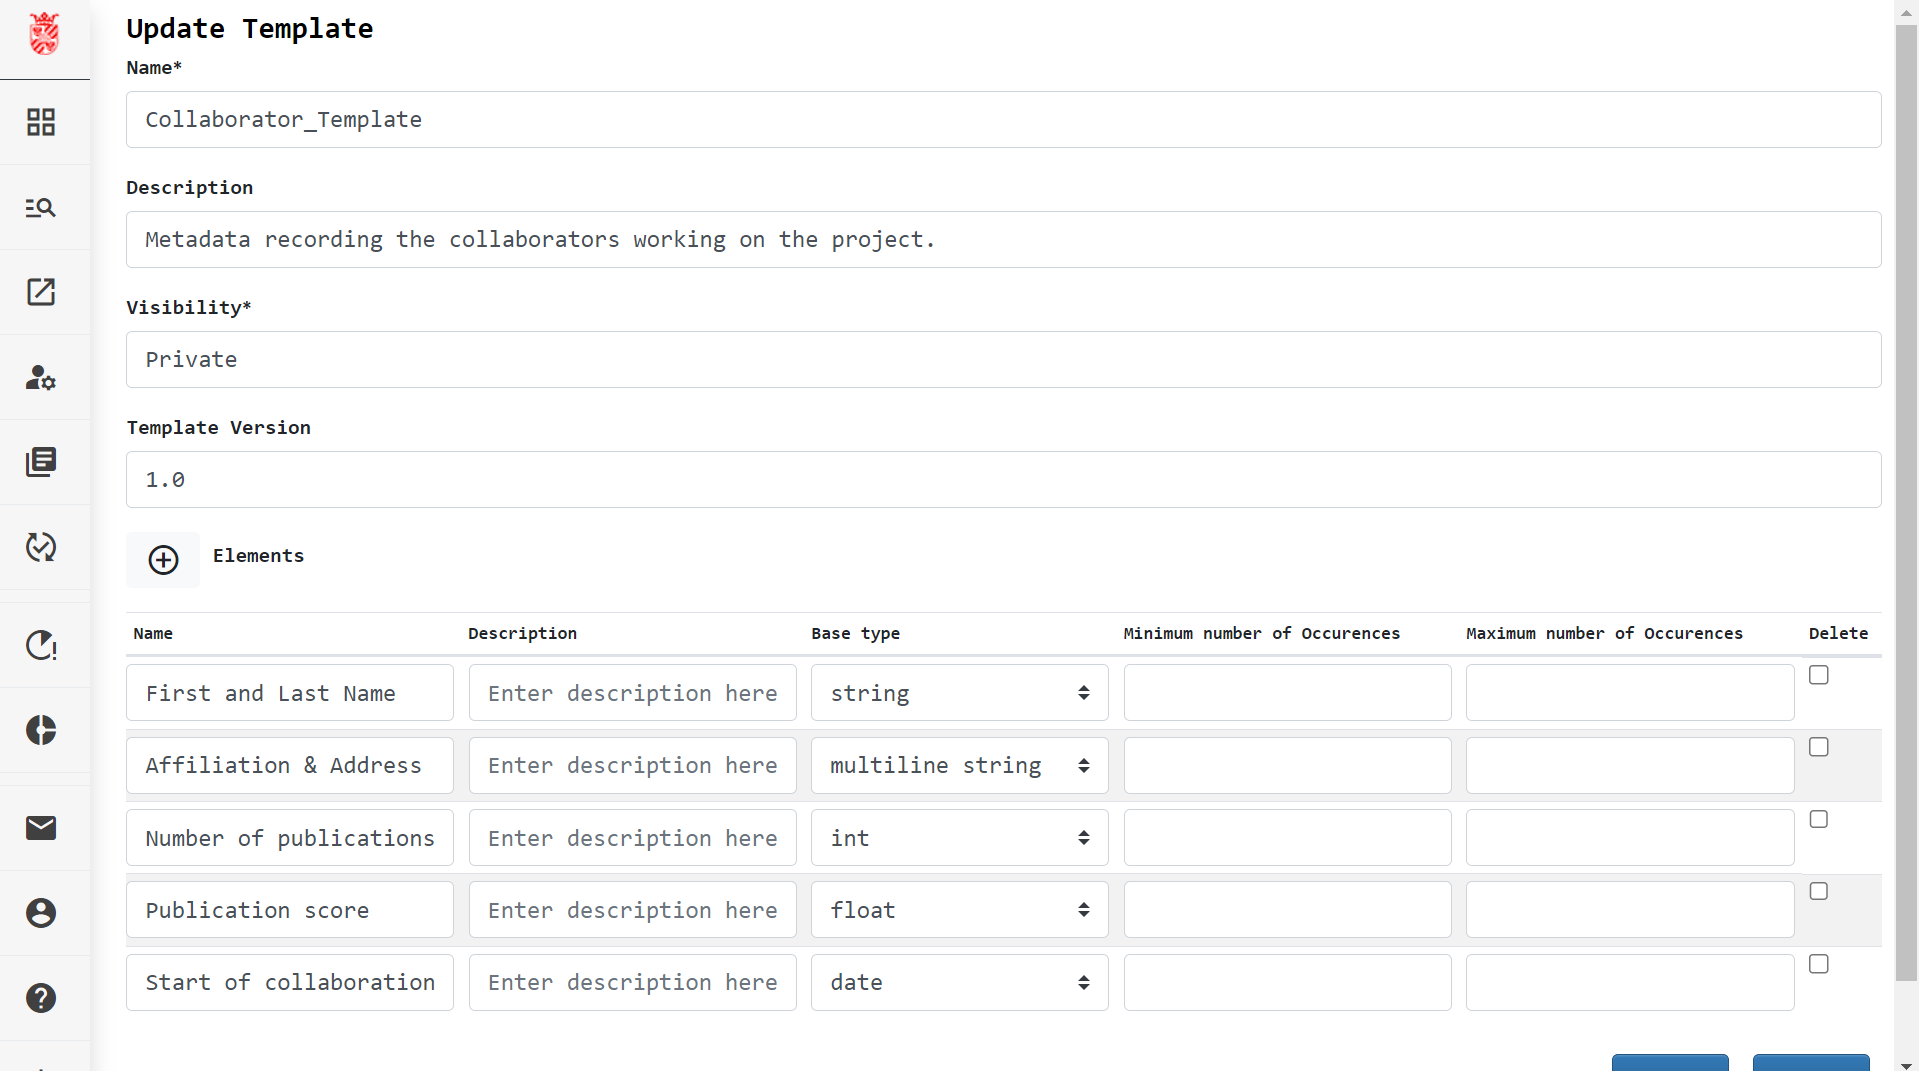
The fields in the red box describe the template itself. Here you can input the template name, add a brief description, set the visibility of the template, and record its version. As for the Metadata Types, there are four possible values of Visibility:
Public: can be used by all RDMS usersPrivate: can only be seen and used by the owner and creator of the templateUnknown: legacy value, please do not use thisRestricted: not implemented yet, please do not use
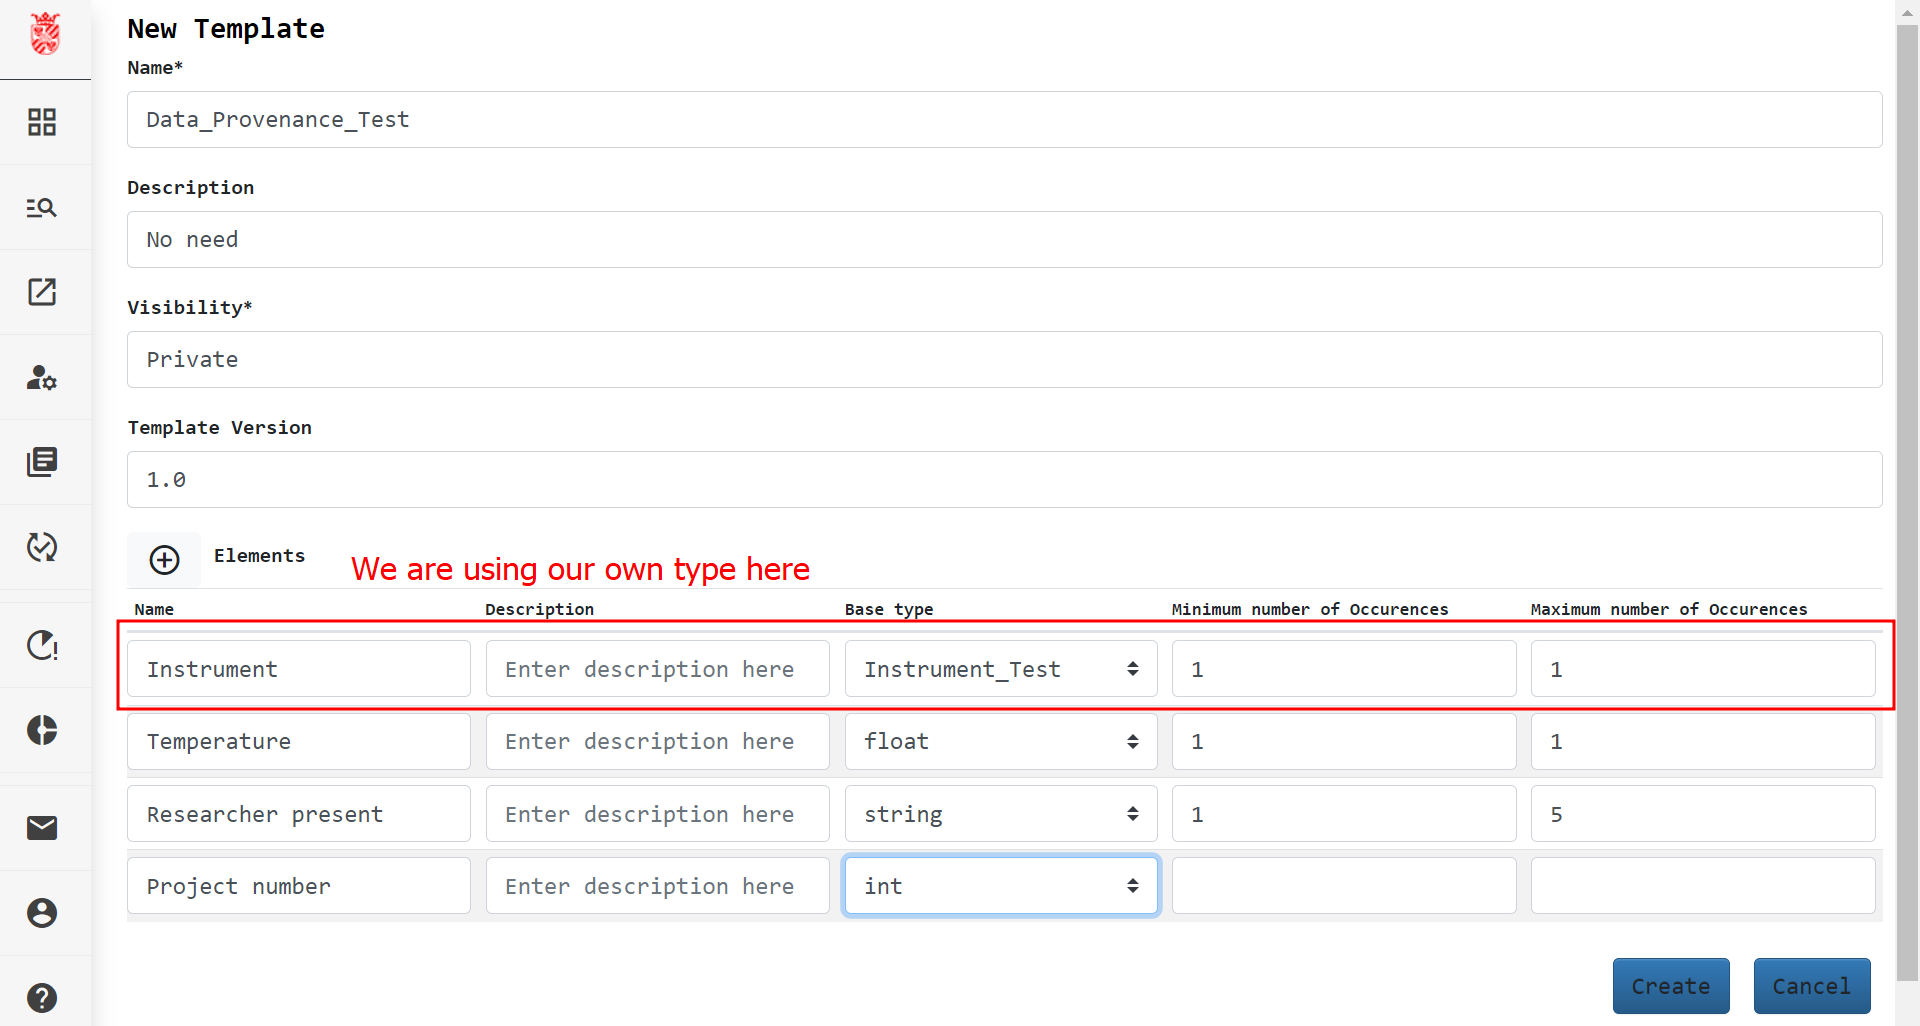
Clicking on Elements in the blue box will allow you to add entry fields in your Metadata Template. You can define the entry itself by compiling the fields in the green box, giving it a name, a description and limiting its minimum and maximum number of entries. You can also define the type of metadata entry in the drop-down menu in the purple box. If you don't need your own specific Metadata Type, then you can use the standard types described at the beginning of this page, otherwise refer to the above section to find out how to create your own type. Please keep in mind that your template can contain multiple Elements.
Once you are done with your template, click on the blue Create button at the bottom on the form to save your template.
Examples of Template Usage
Metadata templates can be used to record many different things about your data and the way you use them is ultimately up to you. We give two brief examples of how to set up a template using both the standard and user-defined types.
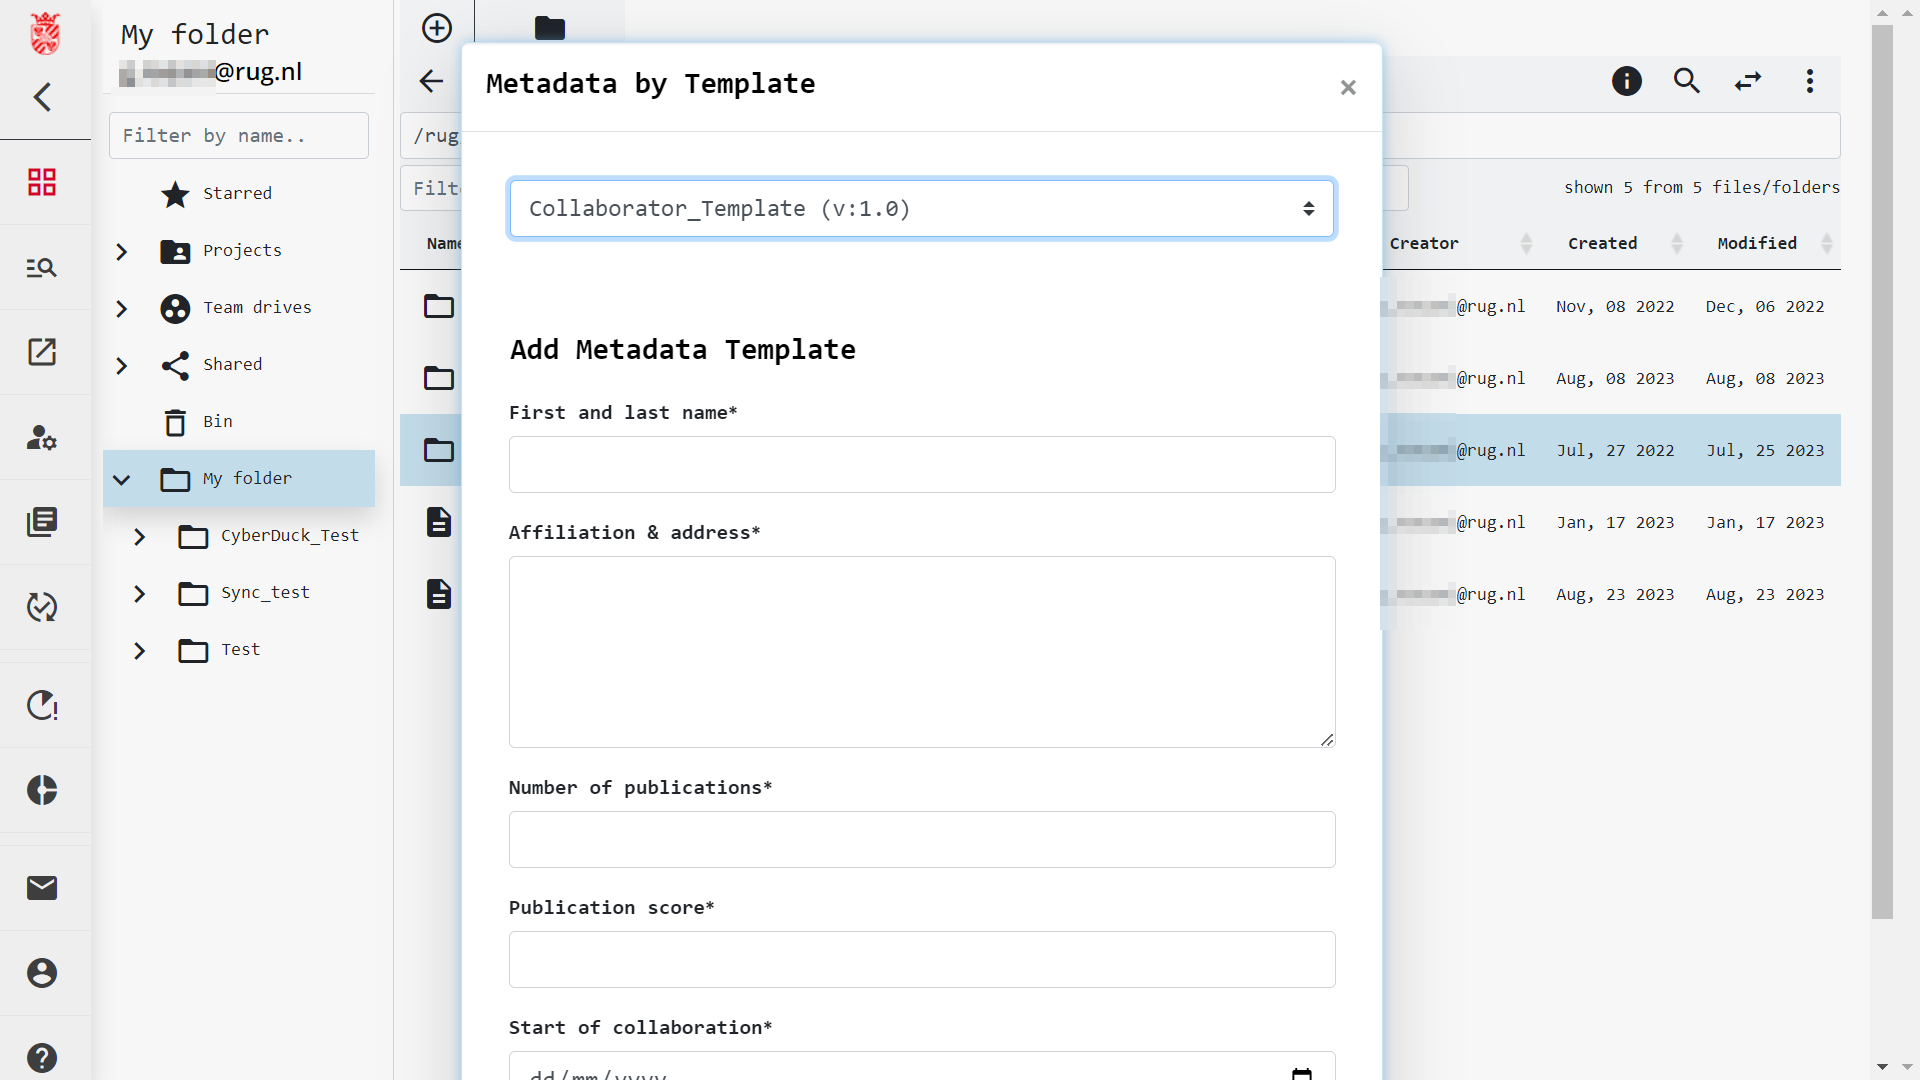
For the example using the standard types, we want to attach metadata to a collection in order to record all the collaborators that worked on that project. Remember, you can always do this by manually inputting all the metadata fields yourself, but a template makes this part of the data management so much easier.
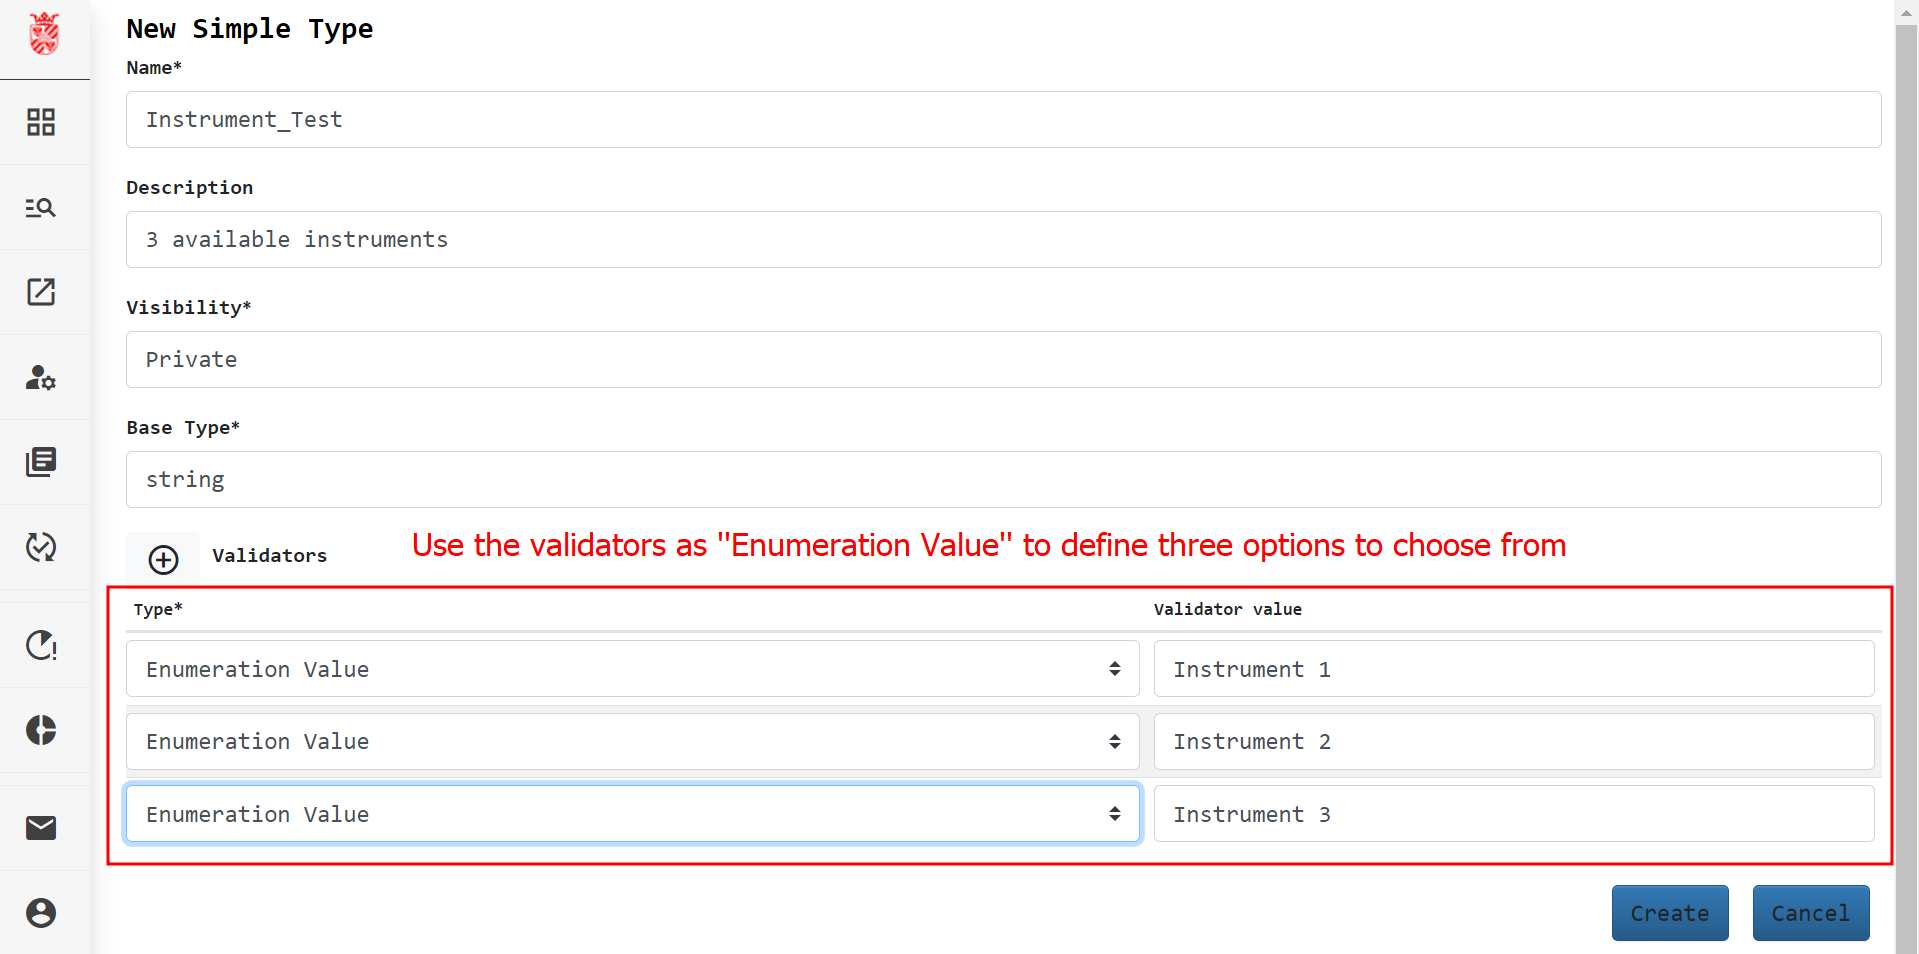
For the use of user-defined types in the creation of a template, we want to create a metadata entry that records what instrument was used to record a certain set of data. We also want to record the instrument settings and put restrictions on certain fields. We also want to make sure that certain metadata entries are always recorded when this specific template is used.