Data Management Tab
If you want to manage your RDMS Groups, Team Drives, or your Projects, you need to access the "Data Management" tab in the right sidebar menu (see screenshot below). If you do not see the data management icon (![]() ), then it means that you do not yet have the right permissions to manage RDMS Groups, Team Drives, or RDMS Projects. If that is the case, please contact rdms-support@rug.nl to request access to it.
), then it means that you do not yet have the right permissions to manage RDMS Groups, Team Drives, or RDMS Projects. If that is the case, please contact rdms-support@rug.nl to request access to it.
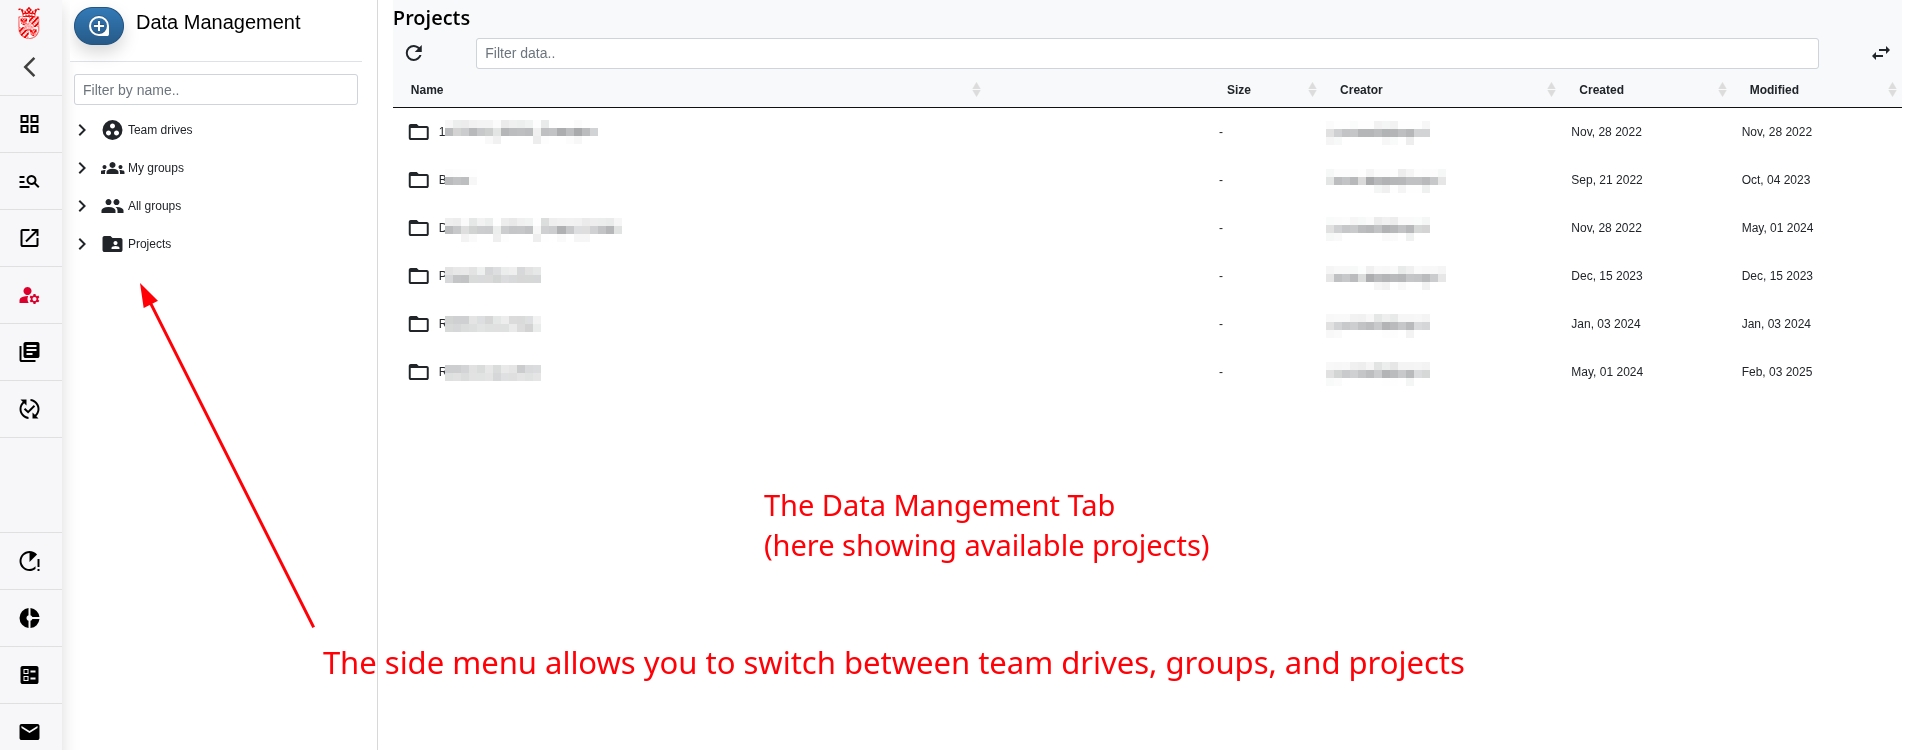
Clicking on the "Data Management" tab in the menu will open a browser window, as shown below. This window will allow you to select groups, team drives, or projects for which you have management permissions. If you want to display the data contained in Team Drives or Projects, you can do it from this page as well, but we suggest you use the Data Browser instead.
Team Drives Management
For further information about the management of RDMS Team Drives via the "Data Management" tab, please have a look at the Team Drive section of the wiki.
Project Management
For further information about the management of RDMS Team Drives via the "Data Management" tab, please have a look at the Projects and Archives section of the wiki.
Group Management
RDMS Groups serve to collect RDMS users into one single entity. They serve as a way to collectively manage and assign the same permissions to multiple users in the RDMS. For example, you can grant multiple users access to a folder by using a group, or you can share files with a group instead of individual users. Please see the Sharing Files and Folders section of the wiki for more info on how to share files and folders in the RDMS.
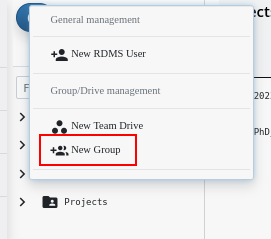
With this being said, to create a new group in the RDMS, first open the "Data Management" tab, then select the ![]() button, and choose "New Group" from the context menu that opens.
button, and choose "New Group" from the context menu that opens.
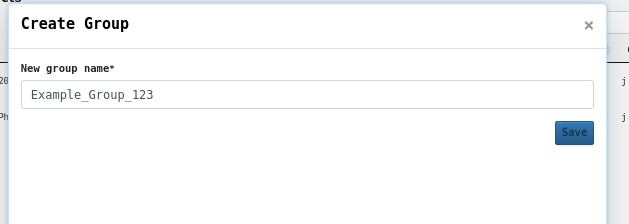
Specify a valid group name in the next window and confirm via "Save" to create your new group. At this point, the new group should contain a single user: yourself.
The web portal will automatically open the user overview for your group. Here you can verify that the group is not empty. If you see an empty group, then it means that something failed during the creation process. Please contact rdms-support@rug.nl in such a case. You can also verify that the group has been successfully created by checking if you can see the newly created group listed on the left side of the "Data Management" tab under "My groups".
Once you start adding group members, this page also gives you an overview of all current RDMS users who are members of the selected group.
Adding and Removing Group Members
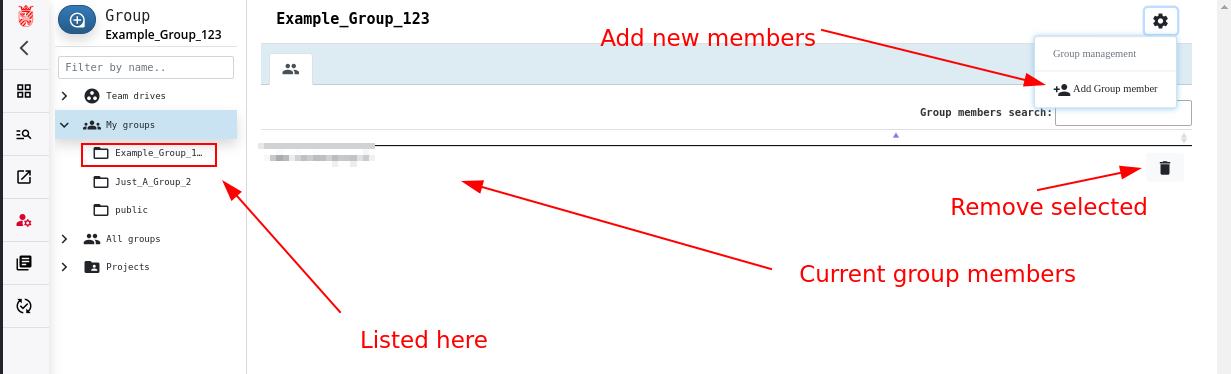
Once you have selected a group in the "Data Management" tab, you can use the ![]() button on the right side of the screen and then select "Add Group member" to add a new user to your group. If you wish to remove a user from the group, instead, then you can use the
button on the right side of the screen and then select "Add Group member" to add a new user to your group. If you wish to remove a user from the group, instead, then you can use the ![]() button next to a user's name to remove this user from the current group.
button next to a user's name to remove this user from the current group.