This is an old revision of the document!
With Mac
For Mac users, we currently offer the following connection options:
- Usage of the RDMS web portal.
- Using Finder with WebDAV.
- Using Cyberduck with WebDAV.
While the usage of the web portal is convenient for permission management, working with metadata, management of RDMS Team Drives and Projects as well as the related archiving workflows, it is very limited on its up-/download capabilities (max. ~32MB per file).
Hence, we recommend to use either Finder with WebDAV or alternatively Cyberduck with WebDAV if you are using MacOS. In this section, both options will be explained.
Using Finder and WebDAV
Finder is the default file manager under Mac. It's functionality allows to not only access the local file system, but also to access remote files using different protocols. For this section, we will configure Finder using the WebDAV interface of the RDMS which allows for the data transfer in Mac without using additional third-party software.
In order for Finder to access the RDMS, you need to provide our WebDAV address: https://webdav.data.rug.nl.
The more detailed configuration of Finder and RDMS WebDAV is listed below:
- Click on your Desktop to get Finder's attention.
- Press Command-Key + K to open the 'Go to Server' dialog (see note below for an alternative way to access this dialog).
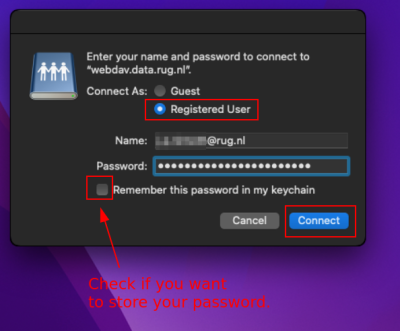
- A new window will open. Select 'Registered User' and specify your RDMS user name (UG mail address) and password. Additionally also select the option to save your RDMS password for later re-use. Then again, click the
Connectbutton
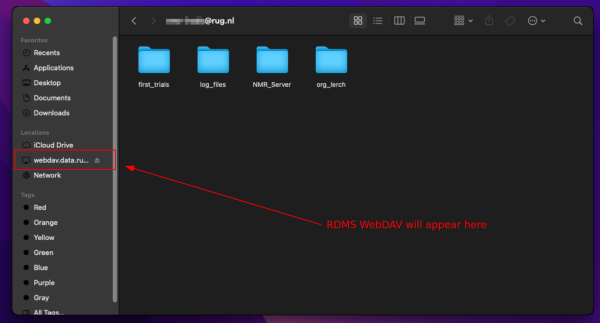
- The RDMS WebDAV access will appear in Finder and data transfer is now possible (for example via drag & drop of files/folders).


Notes:
- The 'Go to Server' dialog can be also accessed by right-clicking on the Finder logo in the Mac Dock.

- If you experience connection problems be sure that the specified address and username/password are correct. Also check that you are in the UG network and use the UG VPN if trying to access the RDMS remotely!

Using Cyberduck and WebDAV
Cyberduck is a free multi-protocol file transfer client that is available for Mac and Windows. On Mac, you can also configure Cyberduck for the RDMS WebDAV protocol instead of using Finder.
Setup of Cyberduck and WebDAV on Mac
To configure Cyberduck on Mac, the following steps have to be performed:
- Download Cyberduck for Mac from the official website and install it.
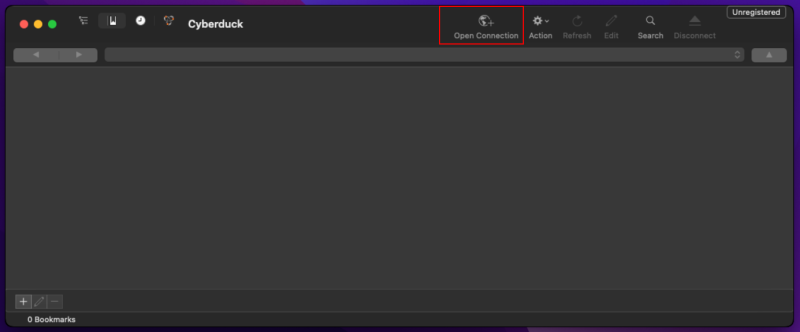
- Start Cyberduck and select 'Open Connection' to open the connection configuration window.
- In the connection configuration menu, select 'WebDAV (HTTPS)' from the drop-down menu of available protocols, then specify the server address as
webdav.data.rug.nl.
Also specify your username and password and select the additional 'Add to Keychain' option if you want to save the credentials for later re-use. Finally, confirm by pressing theConnectbutton.

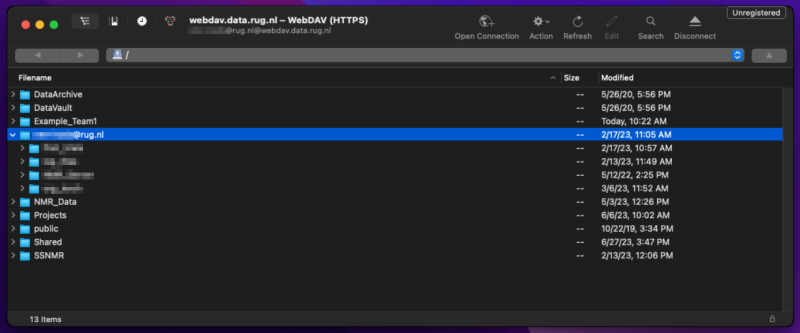
- The Cyberduck connection will be established and you will see the your available folders upon success.


Set Connection Bookmark for Cyberduck
The above description explain how to initially setup a WebDAV connection to the RDMS using Cyberduck on Mac. After the connection is setup, the connection settings can be saved as a bookmark in Cyberduck for later re-use. Saving a connection as a bookmark also gives some more configuration options that will be discussed below.
To add a bookmark for your current connection, you first have to navigate to the Action menu at the top of the Cyberduck interface and then select New Bookmark.

A new Window will open which should already have all needed information from your current running connection in Cyberduck filled in.

The following additional features can be configured for the bookmark if desired (click 'More Option' in the configuration window if you do not see all options):
- Nickname: The name with which the bookmark will appear in Cyberduck's bookmark overview.
- Labels: Additional labels to described the bookmark (more important if there are a lot of similar named bookmarks).
- Path: This value specifies the RDMS path which Cyberduck shows after connecting. This can be used to for example setup different bookmarks for a specific locations. For example if a bookmark to a Team Drive is desired, you can enter the location of the Team Drive here (e.g.,
/rug/home/<Team_Name>) - Download Folder: Here you can specify the standard folder that Cyberduck will use to save downloads.
- Transfer Files: Allows to select the connection type used for transfer. We currently recommend to leave it at Default or Open Single Connection.
After you made the desired adjustment to your bookmark, you can close the bookmark configuration window.
Afterwards, your new bookmark is available from the bookmark tab in Cyberduck. You can start the connection by double-click on the bookmark.
