This is an old revision of the document!
Archiving Workflow

The Archiving workflow in the RDMS allows the owner of an RDMS Project to archive the data contained in the project folder by following a step-by-step process in the web interface.
An archive in the RDMS is a bundled dataset, called a data package, that contains both the data and its related metadata, and has been frozen by making it read-only in the system. Each archive is automatically labelled with a creation date to indicate when the data was frozen.
Once archived, the dataset (data package) can be pushed to the Publication workflow (currently still in development), which will enable the metadata to be published externally in line with the Open Science framework.
During the archiving process, there are three distinct roles, each of which becomes active at different stages.
Owner/Admin: This role is responsible for assigning the data manager and metadata manager roles as well as starting the archiving process. By default, the creator of the RDMS project is its admin, but the role can also be assigned to other users (see below for info about assigning roles). Best practice is to assign this role to the project supervisor.
Data Manager: This role is responsible for verifying that the data sent to the archive is complete and uncorrupted, and giving the final approval of the archive. Best practice is to assign this role to the person(s) who are most familiar with the data.
Metadata Manager: This role is responsible for verifying and completing the metadata information related to the archive. Best practice is to assign this role to the person(s) who know the origin and scope of the data.
A single user can have any number of these roles assigned to them, and/or multiple users can have the same or different roles and work at different stages of the archiving process. The important part is that each role is assigned to at least one user; otherwise, the workflow cannot be completed.
Steps of the Archiving Workflow
This section explains the Archiving workflow starting from an existing RDMS example project and walks you through the requirements to start the workflow, the different steps, and the roles active at each step. It will also elaborate more on the content of the created data package.
Prerequisites
Existing Project
To start an Archiving workflow, the first prerequisite is that the RDMS Project you want to archive must already exist. In addition, the project must contain data. Attempting to archive an empty project will result in an error after the first step of the workflow.
Using the Web Interface
The archiving workflow requires using the RDMS web interface. It is not possible to execute the workflow via CLI, e.g., iCommands.
Correct User Privileges
If you want to start an archiving workflow as a project admin, you must have the appropriate elevated permissions to initiate the workflow and assign user roles(Data Manager and Metadata Manager). If you lack these permissions, please contact rdms-support@rug.nl. The easiest way to check if you have the correct permissions is to check if you can assign roles to users in the project management tab.
For the other roles involved in the workflow, Metadata and Data Manager, no special permissions are required. However, they must have at least read/write permission in the project. Without these permissions, the workflow will not allow them to modify or approve the data or its metadata.
Assigning Roles
If you have the required permissions, we recommend assigning the appropriate workflow roles for the RDMS Project before starting an Archiving workflow. As the project owner, you can assign these roles from the Project Management tab.
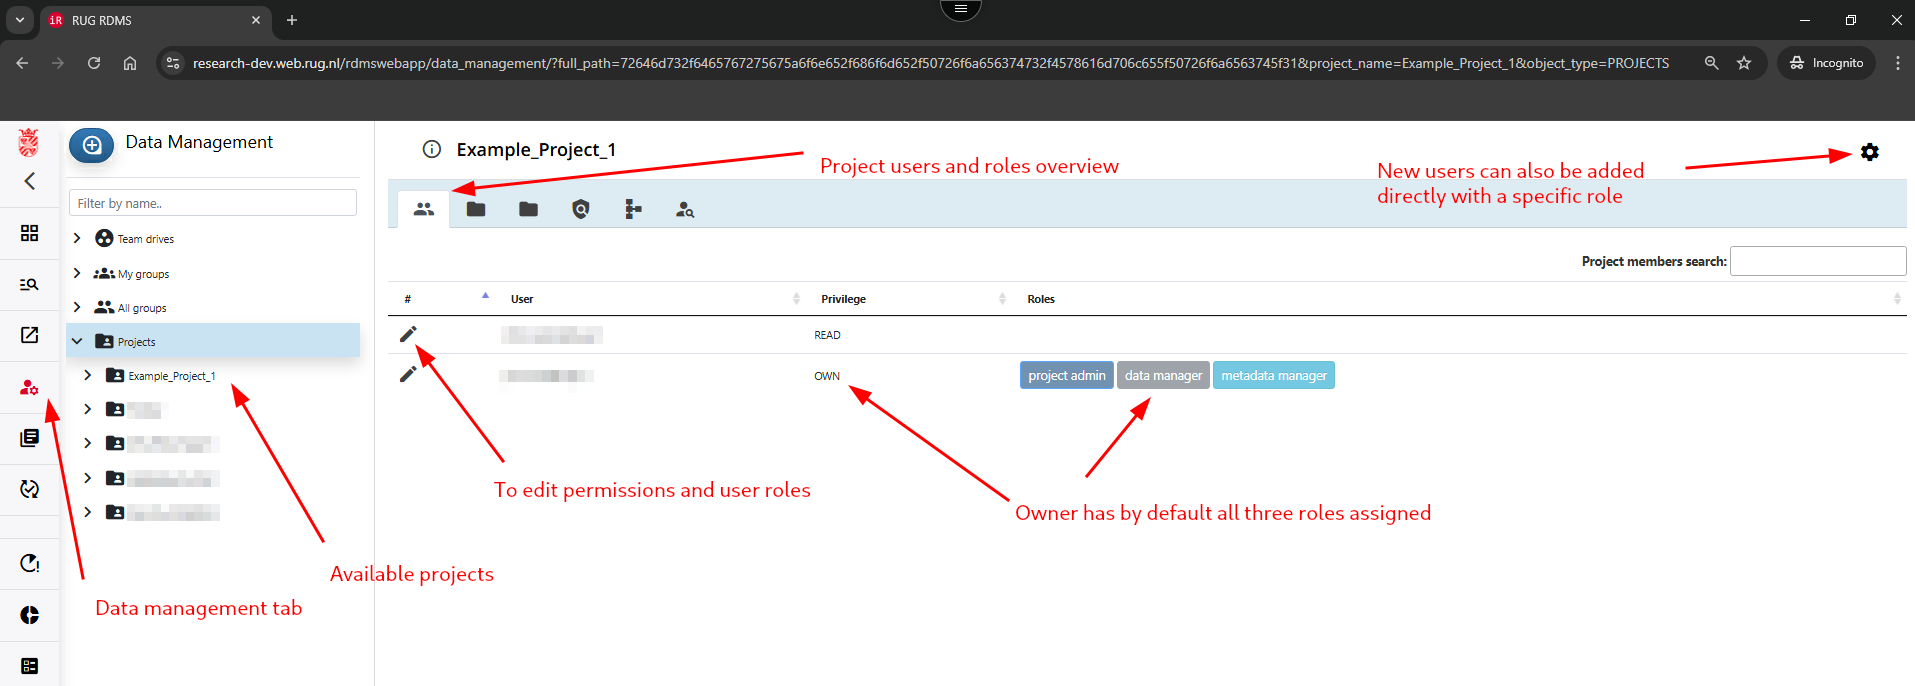
By clicking on the pencil symbol next to the name of an existing project member, their project permissions as well as project roles can be adjusted (see below for best practices).

After the roles are assigned, the archiving workflow can either start with the initialization of a new workflow by the project admin or continue from where it left off before the required roles were assigned.
Notes:
- To assign a user as Project Admin, select the own permission. Please note that the user needs elevated privileges; having own permission alone is not sufficient. If this is needed, please contact rdms-supprt@rug.nl.
- To assign a user role, the user needs to have at least 'read' permission in the project.
- The section about best practices provides useful guidance on how these roles could be assigned effectively.
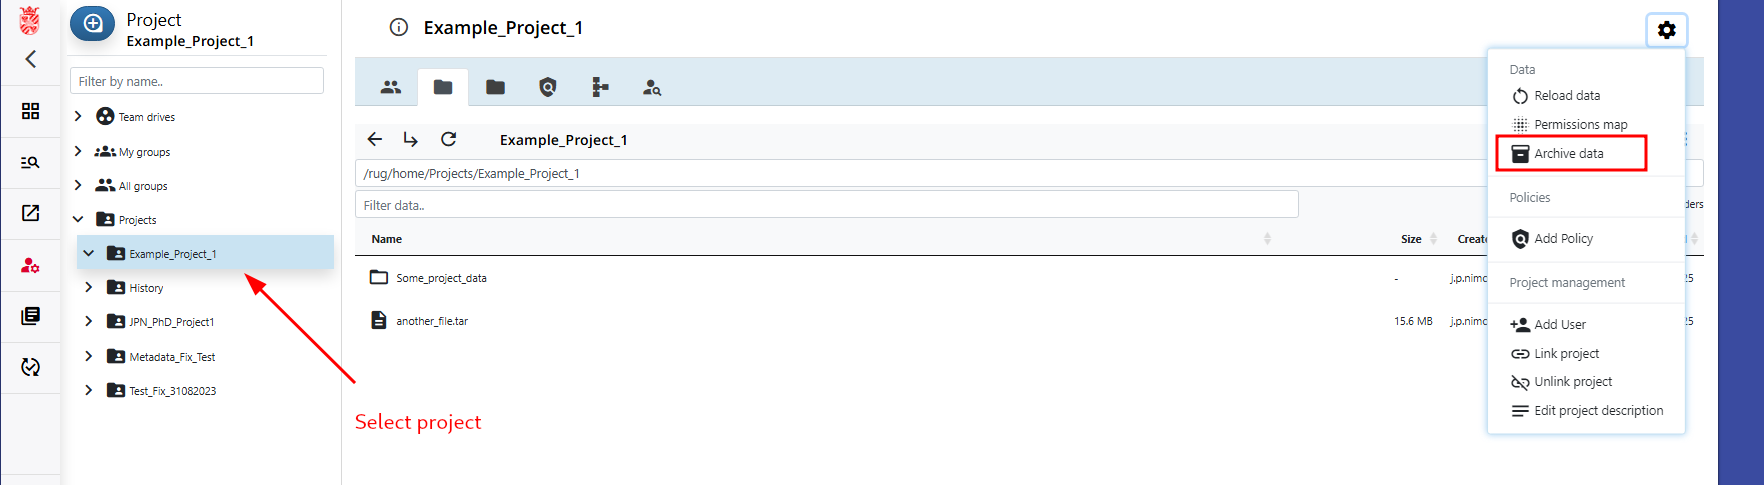
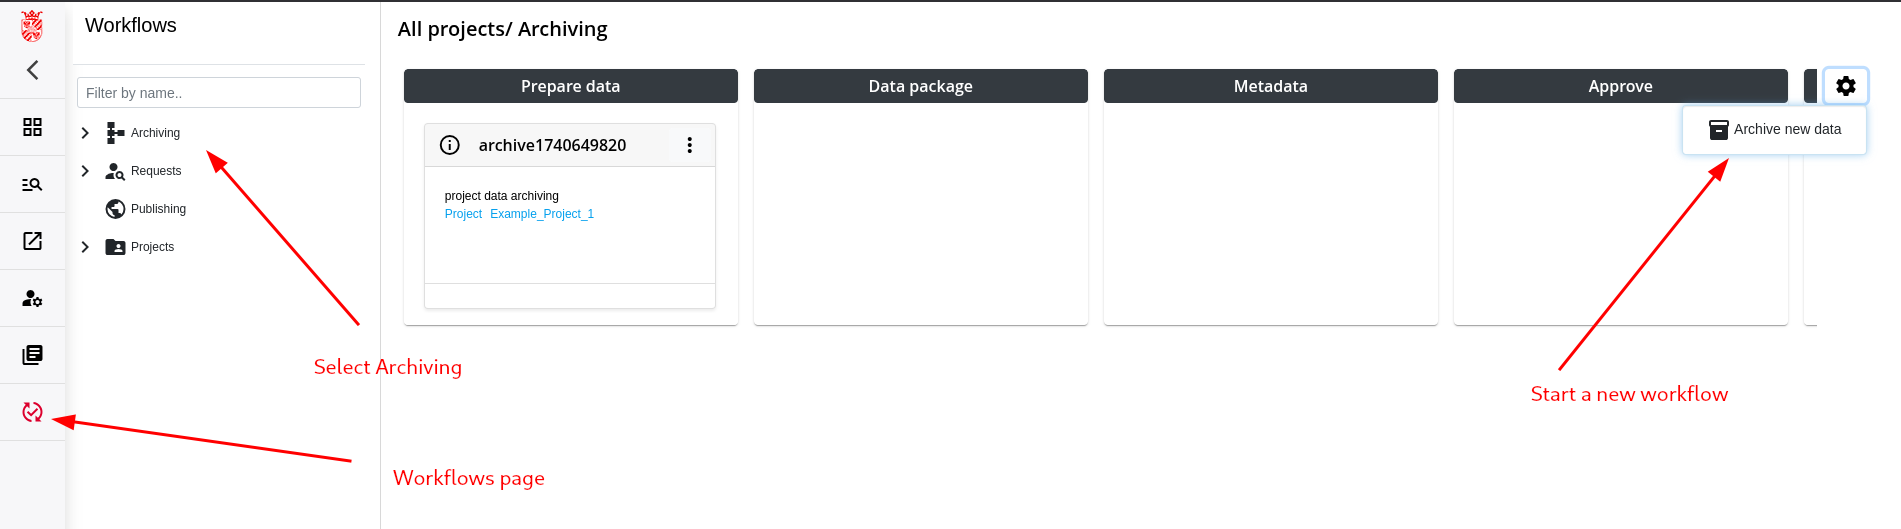
Step 1: Initialize a new Archiving Workflow
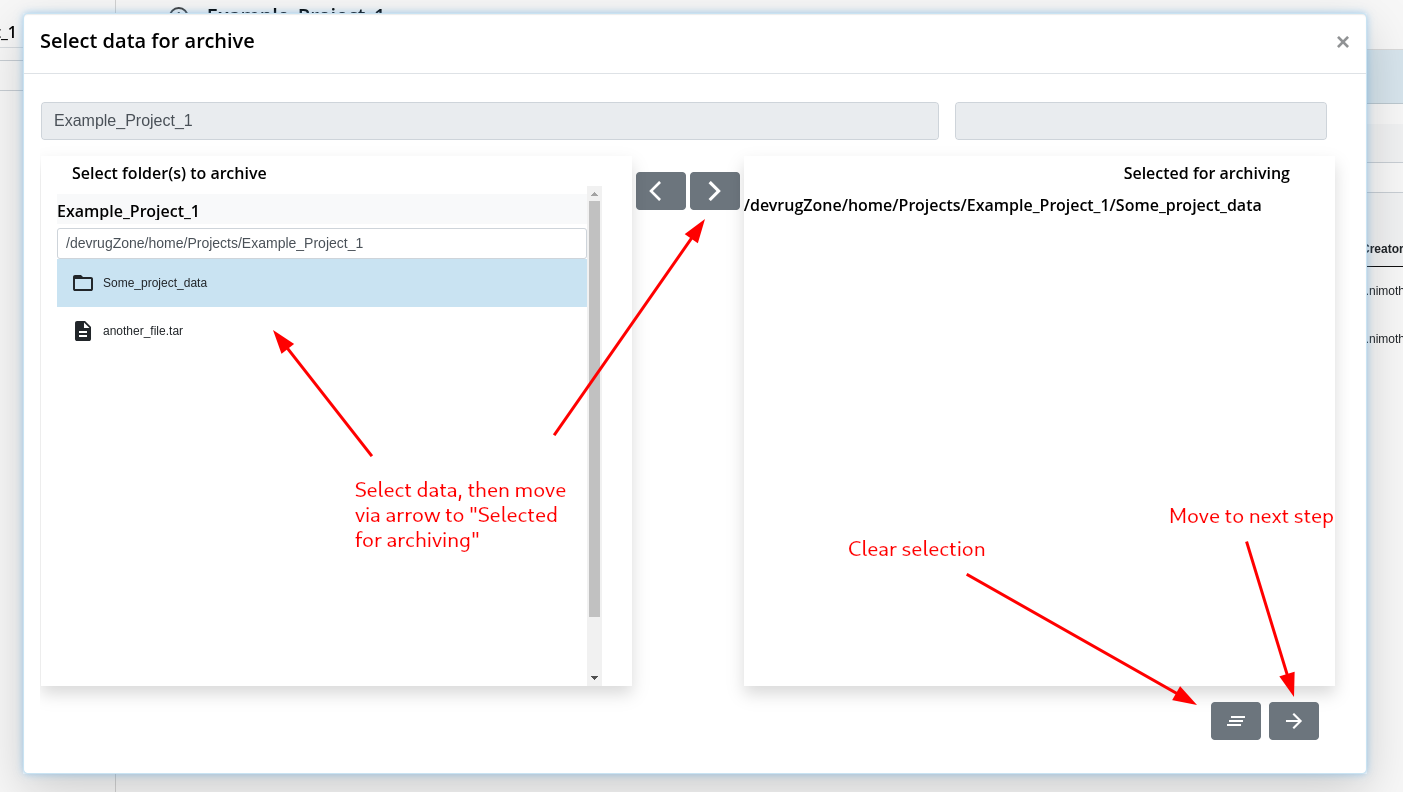
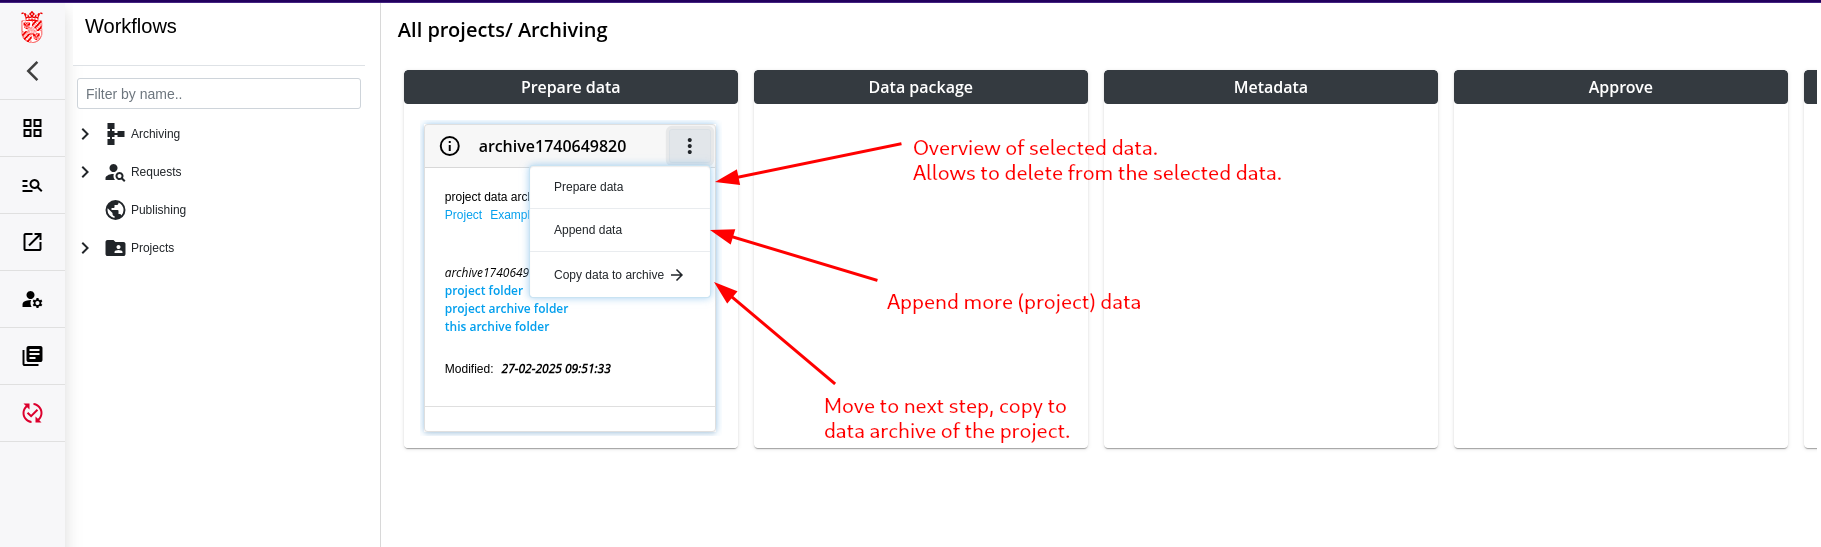
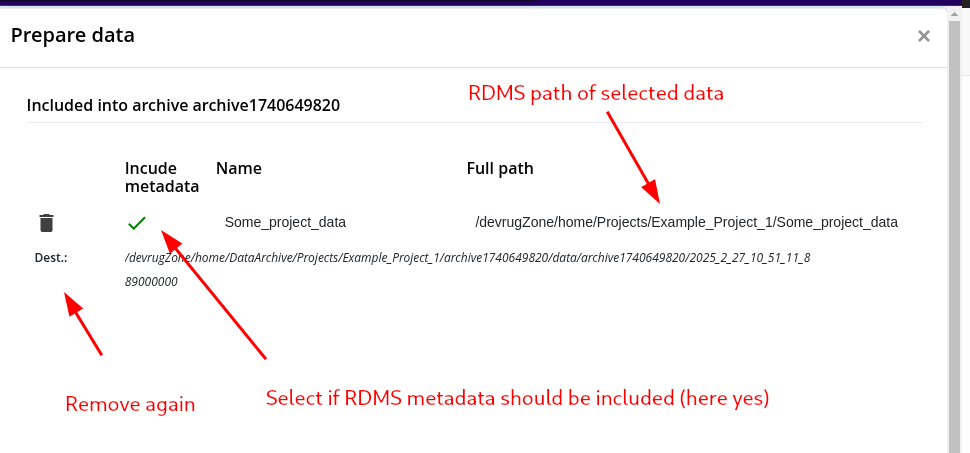
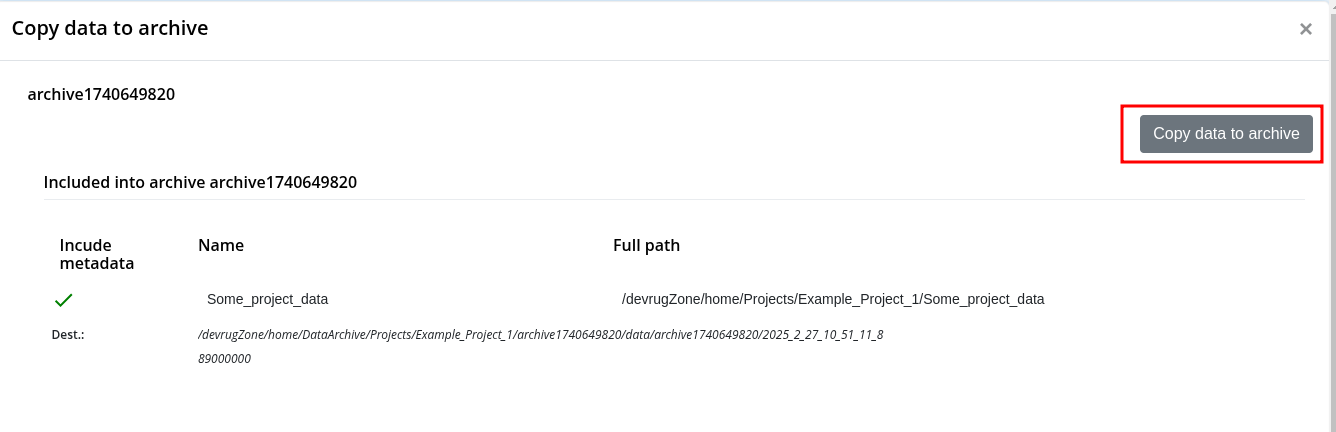
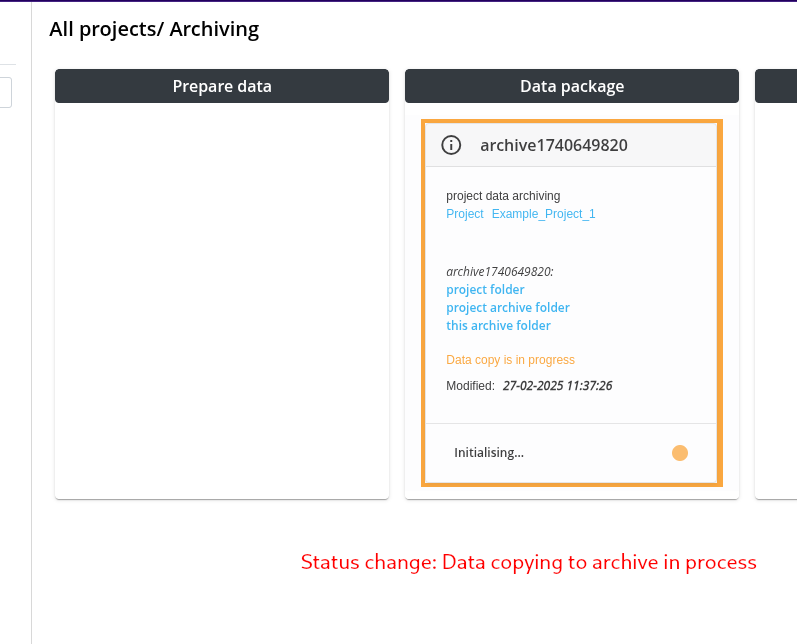
Step 2: Check Data and copy to Project Archive
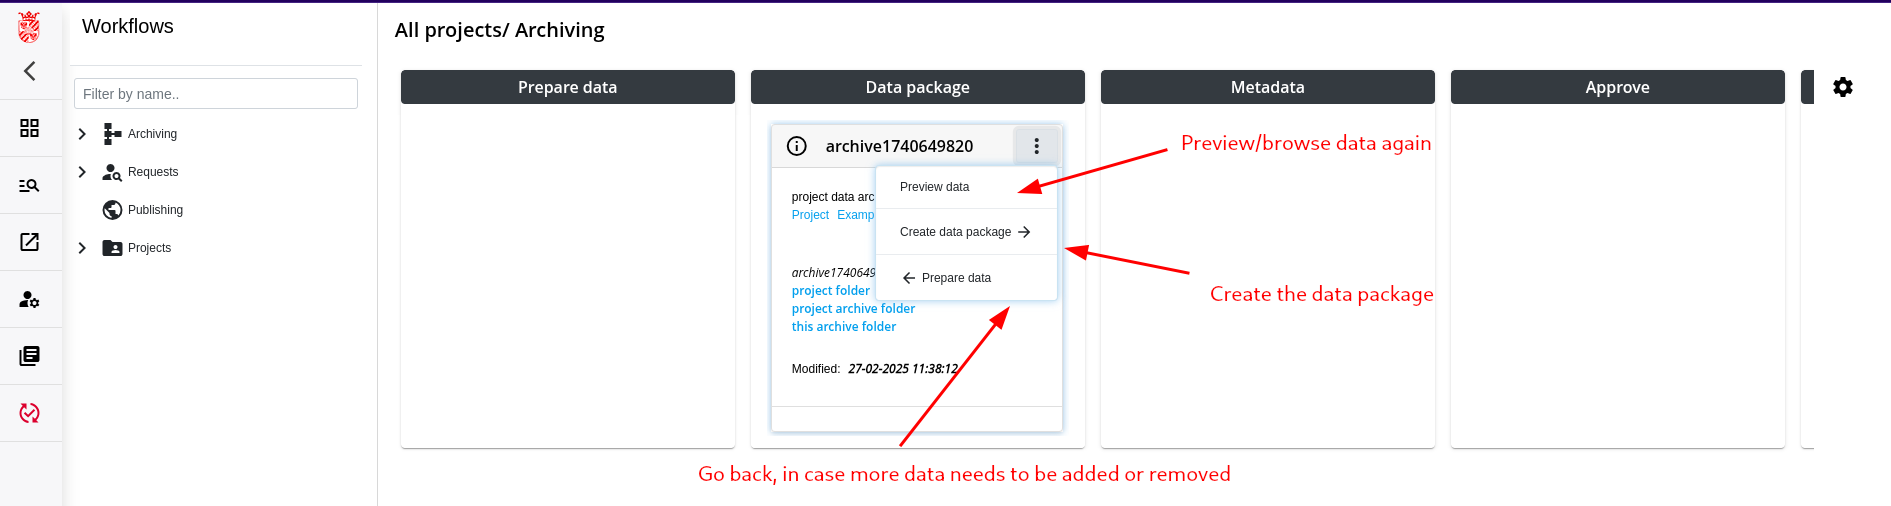
Step 3: Creation of the Data Package

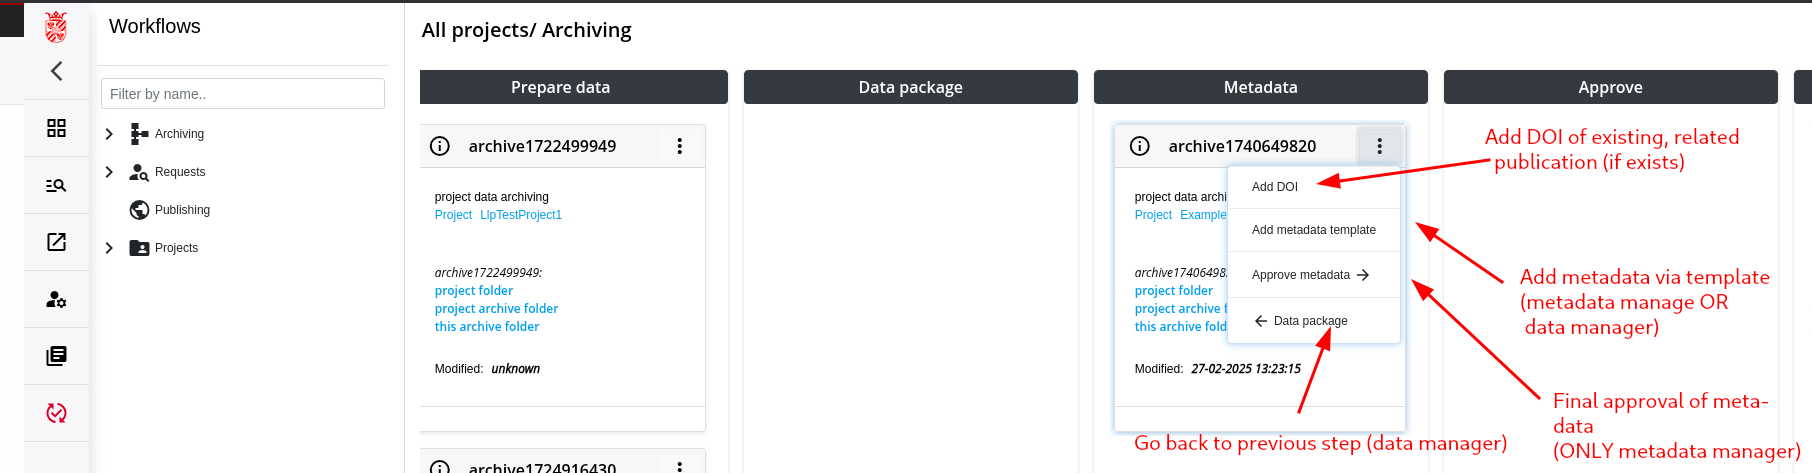
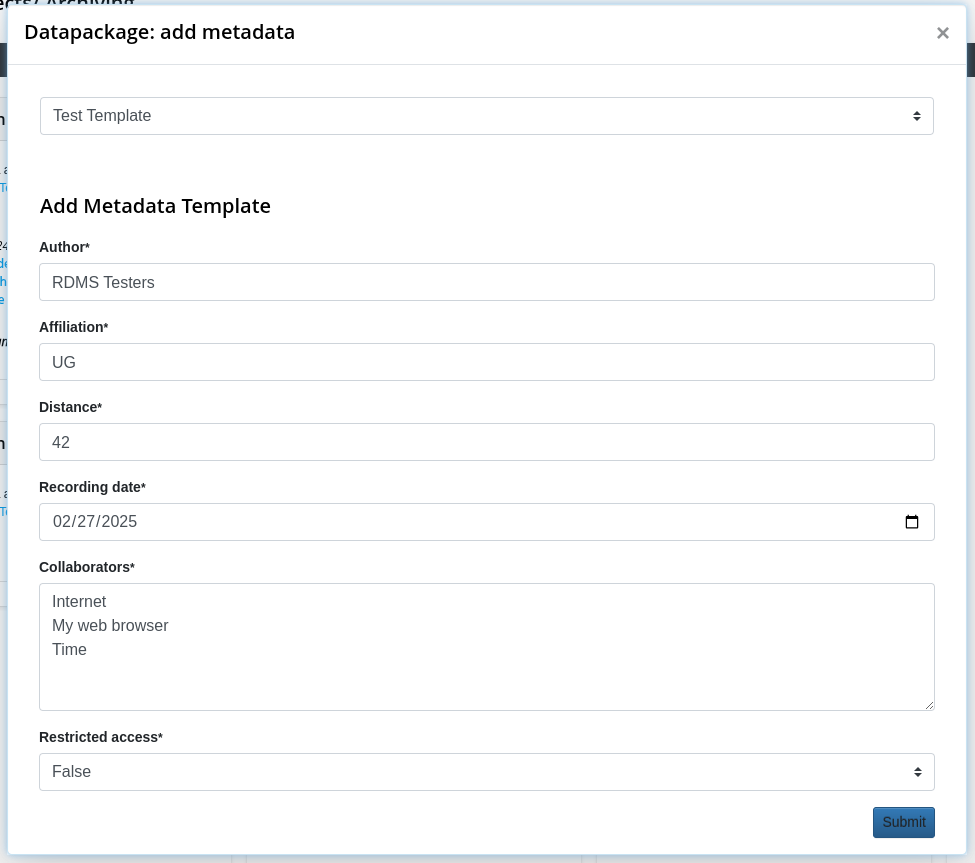
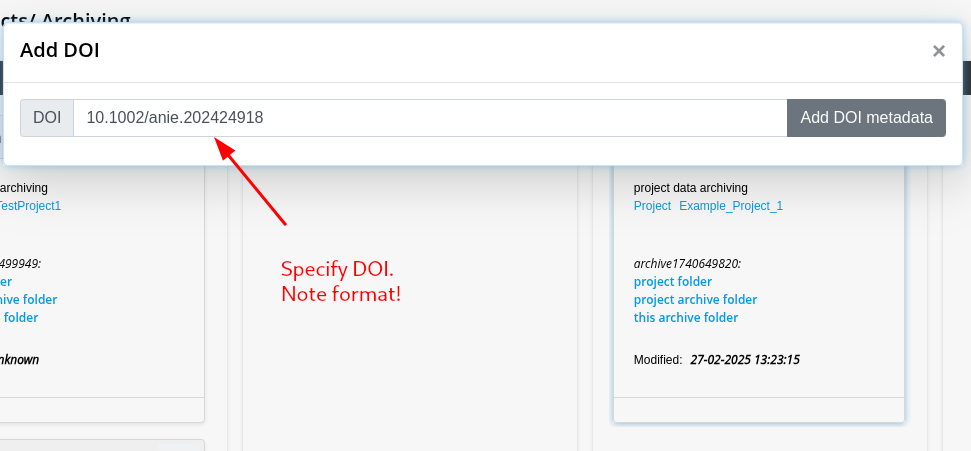
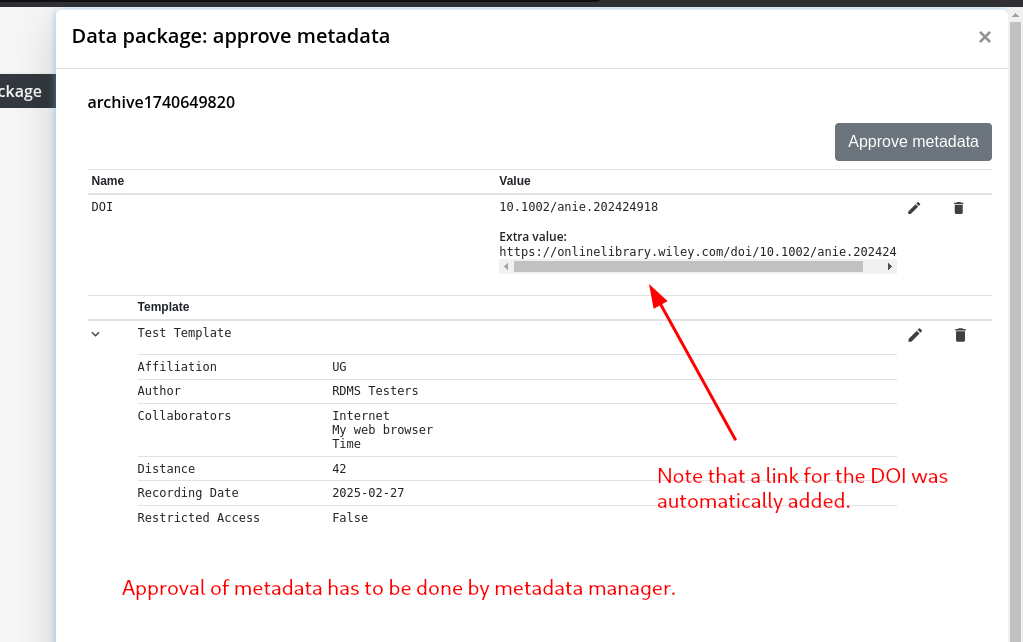
Step 4: Add/Approve Metadata
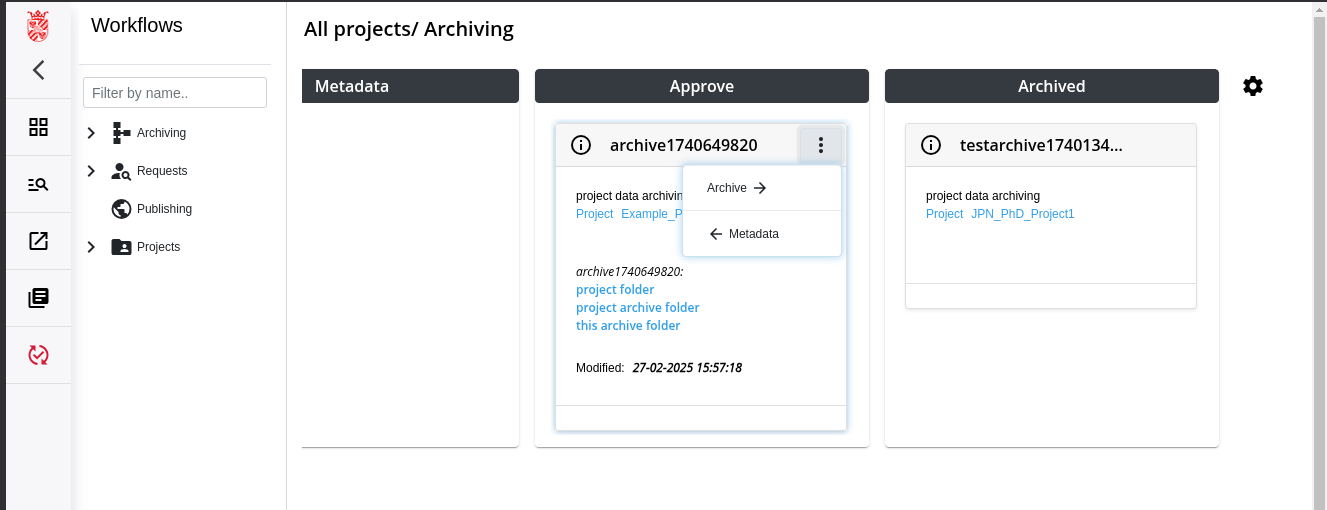
Step 5: Move Data Package to Archive
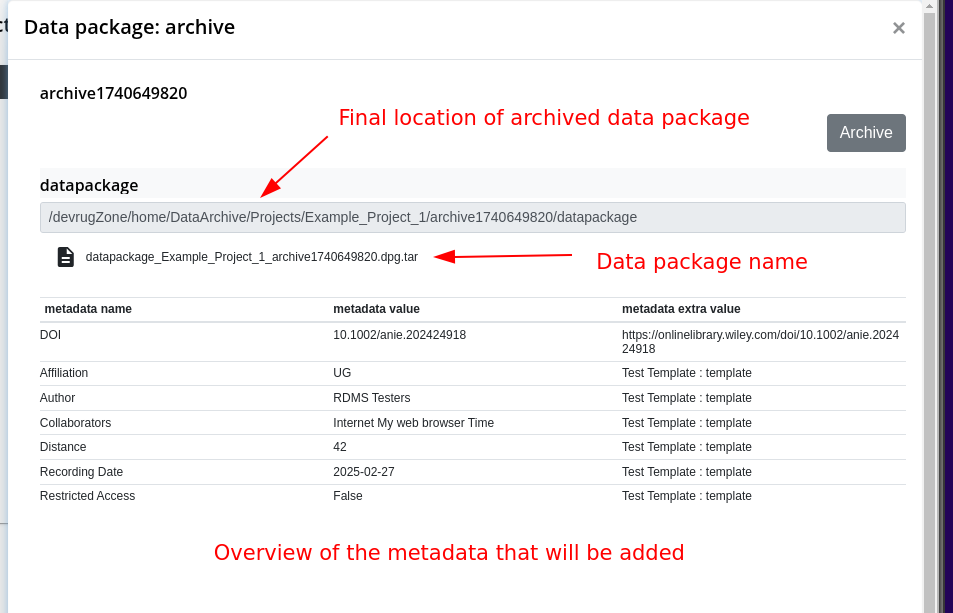
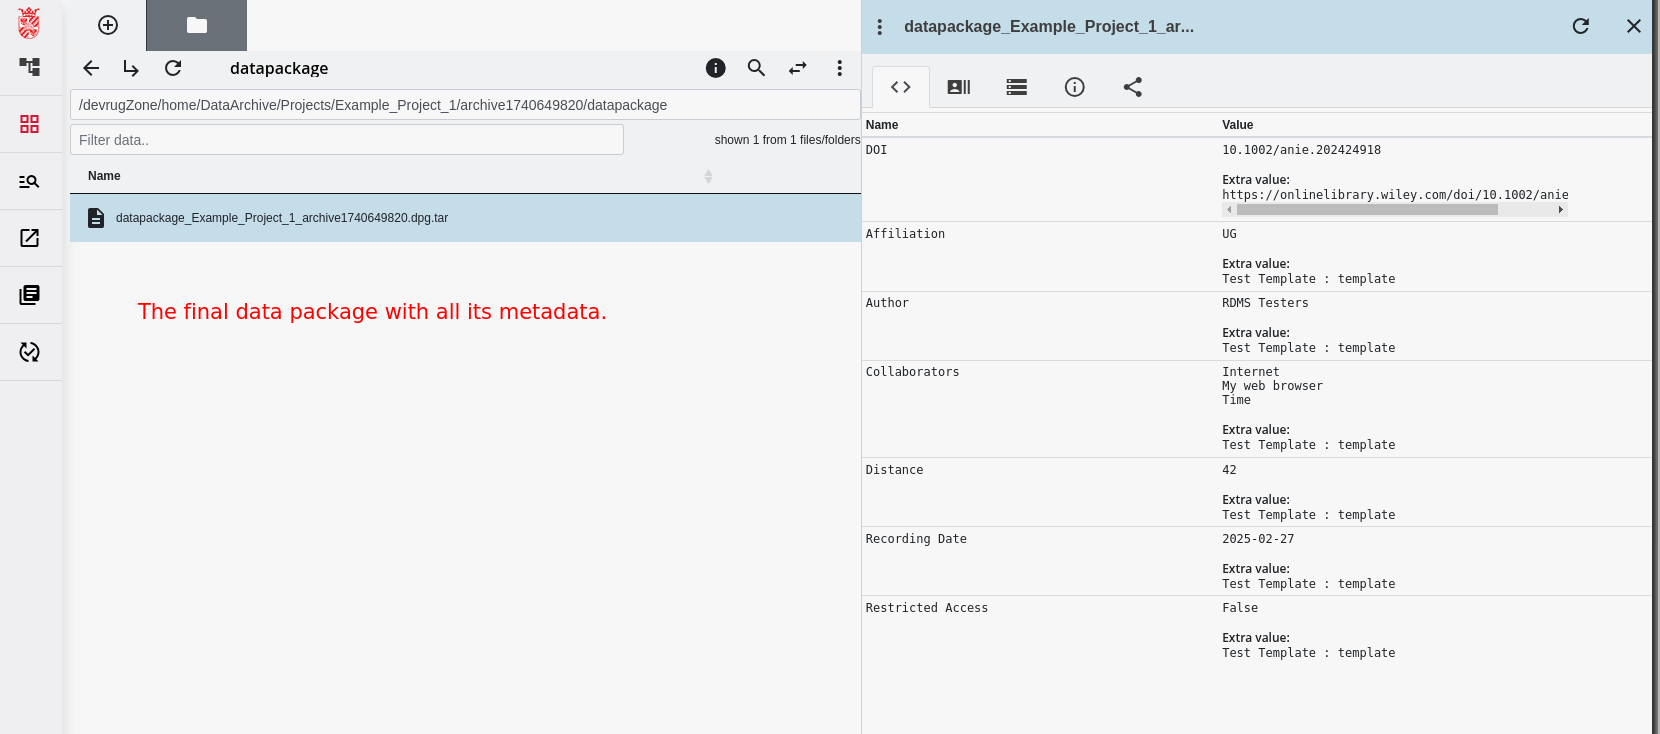
The Data Package and its Content
At the end of the archiving workflow, you will have created a data package. In the RDMS, we use this term to identify a data set with a specific structure that resulted from the archiving workflow. In this section, we will have a more detailed look at the data package and explain its internal structure.
In general, the following applies:
- The created data package is always in a structured
*.tarformat, which is a standard format for bundling data that can be opened with different tools. - Inside the tar, there are different subfolders for the selected and archived data, as well as the information about the metadata on files and folders included in the archive, saved in
*.jsonformat. This second folder with the metadata info is only created if you selected to include metadata during step 2 of the archiving workflow. Otherwise, you will only see the folder containing the data.
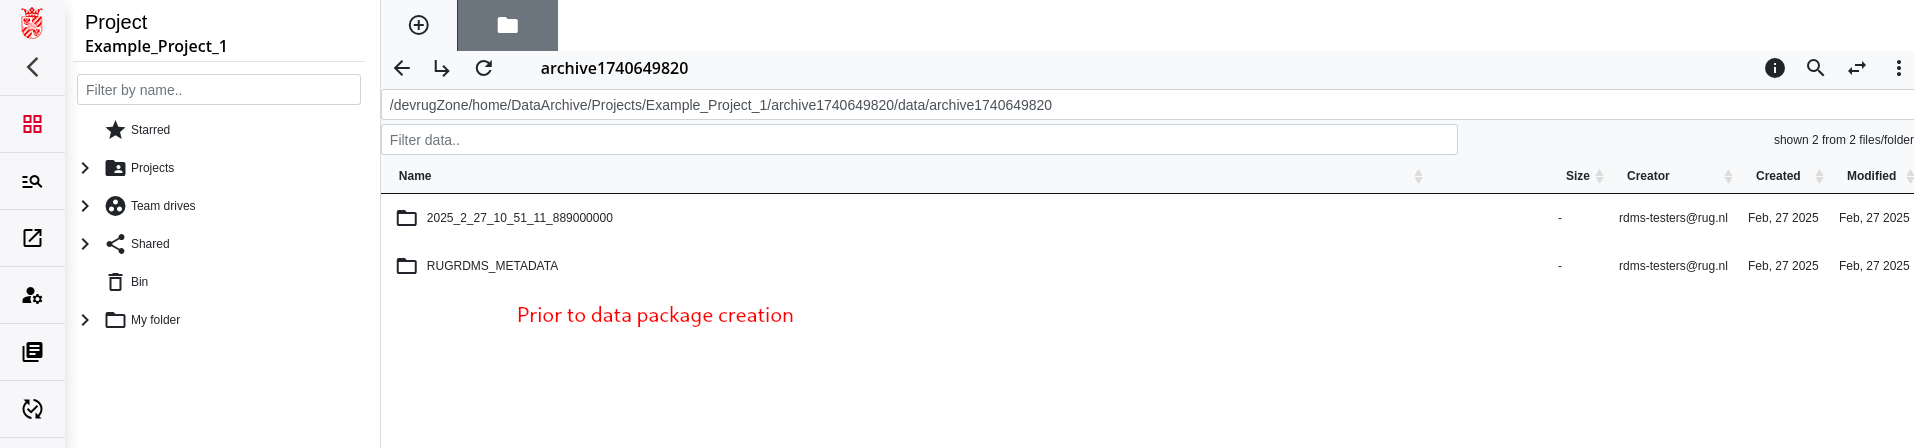
In our example case, we selected metadata to be included and one folder containing the data. Thus, our archive has the following structure in the end:
# This is the general structure of the created data package after being extracted.
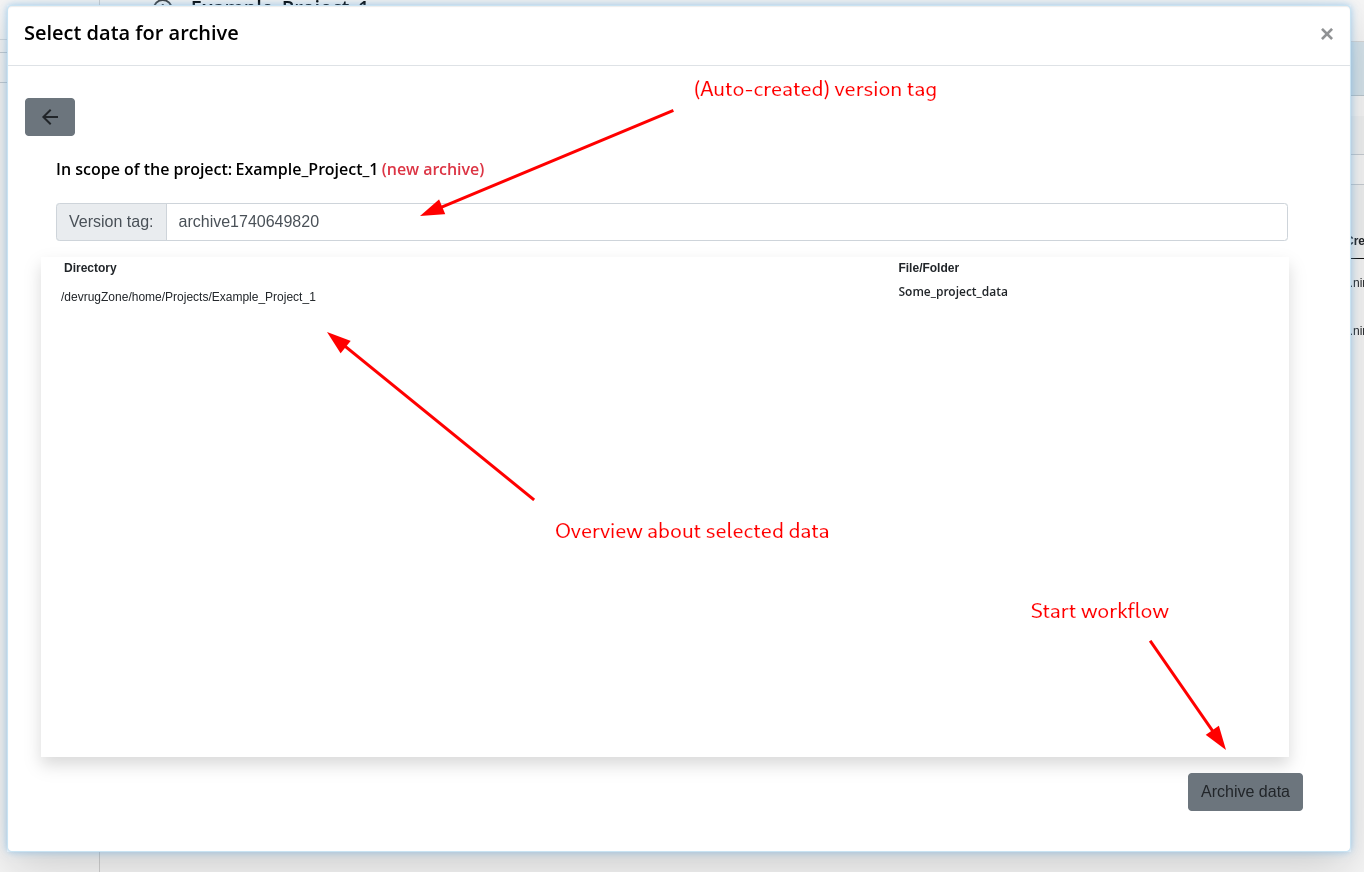
archive1740649820/ # This is the name (version tag) of the archive that we specified during the workflow
├── 2025_2_27_10_51_11_889000000 # Subfolder that contains the selected (meta)data
│ └── Some_project_data # This is the folder from which we started the workflow. Below is its content (not completely
│ └── LA-187-1 # shown)
└── RUGRDMS_METADATA # As we selected in the example to have metadata included, we get this folder as well
└── 1Some_project_data.metadata.json # This is the available metadata for the "Some_project_data" folder in .json format.
If we have a look at the JSON file with the metadata, we see that it contains info about the metadata related to the selected data, not the one related to the archive. The following is a snippet of that file that shows how this info is exported and included in the data package.
[
  {
    "l_header": "# DO NOT EDIT. Automatically generated for archiving.",
    "l_className": "rugirodsrest.RugIRODSRestArchiveMetaToStore",
    "l_toplevel_path": "/devrugZone/home/Projects/Example_Project_1/Some_project_data",
    "l_objectType": "NORMAL",
    "l_objectFullPath": "/devrugZone/home/Projects/Example_Project_1/Some_project_data",
    "l_symlink_destination": "",
    "l_metaDataList": [
      {
        "metadataDomain": "COLLECTION",
        "domainObjectId": "619037",
        "domainObjectUniqueName": "/devrugZone/home/Projects/Example_Project_1/Some_project_data",
        "avuId": 620497,
        "size": 0,
        "createdAt": "Feb 26, 2025 3:28:02 PM",
        "modifiedAt": "Feb 26, 2025 4:27:06 PM",
        "avuAttribute": "Origin",
        "avuValue": "RDMS",
        "avuUnit": "",
        "count": 1,
        "lastResult": true,
        "totalRecords": 0
      },
      {
        "metadataDomain": "COLLECTION",
        "domainObjectId": "619037",
        "domainObjectUniqueName": "/devrugZone/home/Projects/Example_Project_1/Some_project_data",
        "avuId": 290732,
        "size": 0,
        "createdAt": "Feb 26, 2025 3:28:02 PM",
        "modifiedAt": "Feb 26, 2025 4:27:06 PM",
        "avuAttribute": "Type",
        "avuValue": "Testing",
        "avuUnit": "",
        "count": 2,
        "lastResult": true,
        "totalRecords": 0
      }
    ]
  },
[...]
Best Practices
This section provides recommendations on how to assign roles within a project in order to distribute the tasks of the Archiving workflow efficiently among project participants. It also highlights best practices specific to the project archiving process.
In general, roles can be assigned as follows:
- Project Admin: This role should be assigned to the project lead. The Project Admin manages the project (permissions, roles, etc.) and is also the only one who can start the workflow. Other than that, this role does not need to take additional steps in the workflow.
- Data Manager: The Data Manager verifies that all relevant data has been included in the archive. This role is best assigned to the person most familiar with the project’s data.
- In a simple research project, this might be the main researcher who generated the data.
- In projects where multiple people are familiar with different parts of the data, we recommend assigning the Data Manager role to each of them, so they can verify the integrity of their respective parts.
- Since multiple Data Managers can be assigned, we also recommend agreeing in advance who has the final say in case of disagreements, as only one approval is required to move to the next step.
- The Data Manager may also add metadata in the next stage of the workflow, but cannot approve it.
- Metadata Manager: The Metadata Manager is responsible for verifying that the metadata associated with the archive is accurate and complete.
- Ideally, this role should be assigned to someone with knowledge of the data who was not directly involved in earlier steps of the workflow.
- If such a person is not available, a Data Manager may also serve as Metadata Manager.
- If there were multiple Data Managers in the earlier steps, we suggest assigning the Metadata Manager role to one who did not have final authority over the dataset.
- If your project or research group has dedicated data management staff, they are well-suited for this role.
As noted above, multiple roles can be assigned to the same user. If a user is both a data and metadata manager, then the whole workflow, except for the initialization, can be done by that single user. This is also a valid possibility, but we suggest you make use of the “checks and balances” that the archiving workflow introduces by assigning roles to different users, where possible.