This is an old revision of the document!
Data Browser
General
The "Data Browser" is the main area of the RDMS Web interface for navigating and managing your files and folders. It is displayed when you log in to the Web interface. You can access it at any time by selecting the  button in the navigation menu on the left.

In the Data Browser, use the  and
and  buttons in the navigation menu to hide or show the directory browser marked by the green box in the screenshot above. Select an icon in the directory browser to access the corresponding part of the RDMS:
- Starred (
 ): Contains the files and folders that you have marked with a star. Hover over or select a file or folder to display an empty star icon next to its name. Select the star to add the item to "Starred". Select the star again to remove the item. This feature provides quick access to frequently used files and folders.
 - Projects (
 ): Contains all the RDMS Projects that you can access. For more information, see RDMS Projects.
 - Team Drives (
 ): Contains all the RDMS Team Drives that you can access. For more information, see RDMS Team Drives.
 - Shared (
 ): Contains the RDMS locations that other users have shared with you. Use this overview to access shared locations quickly.
 - Bin (
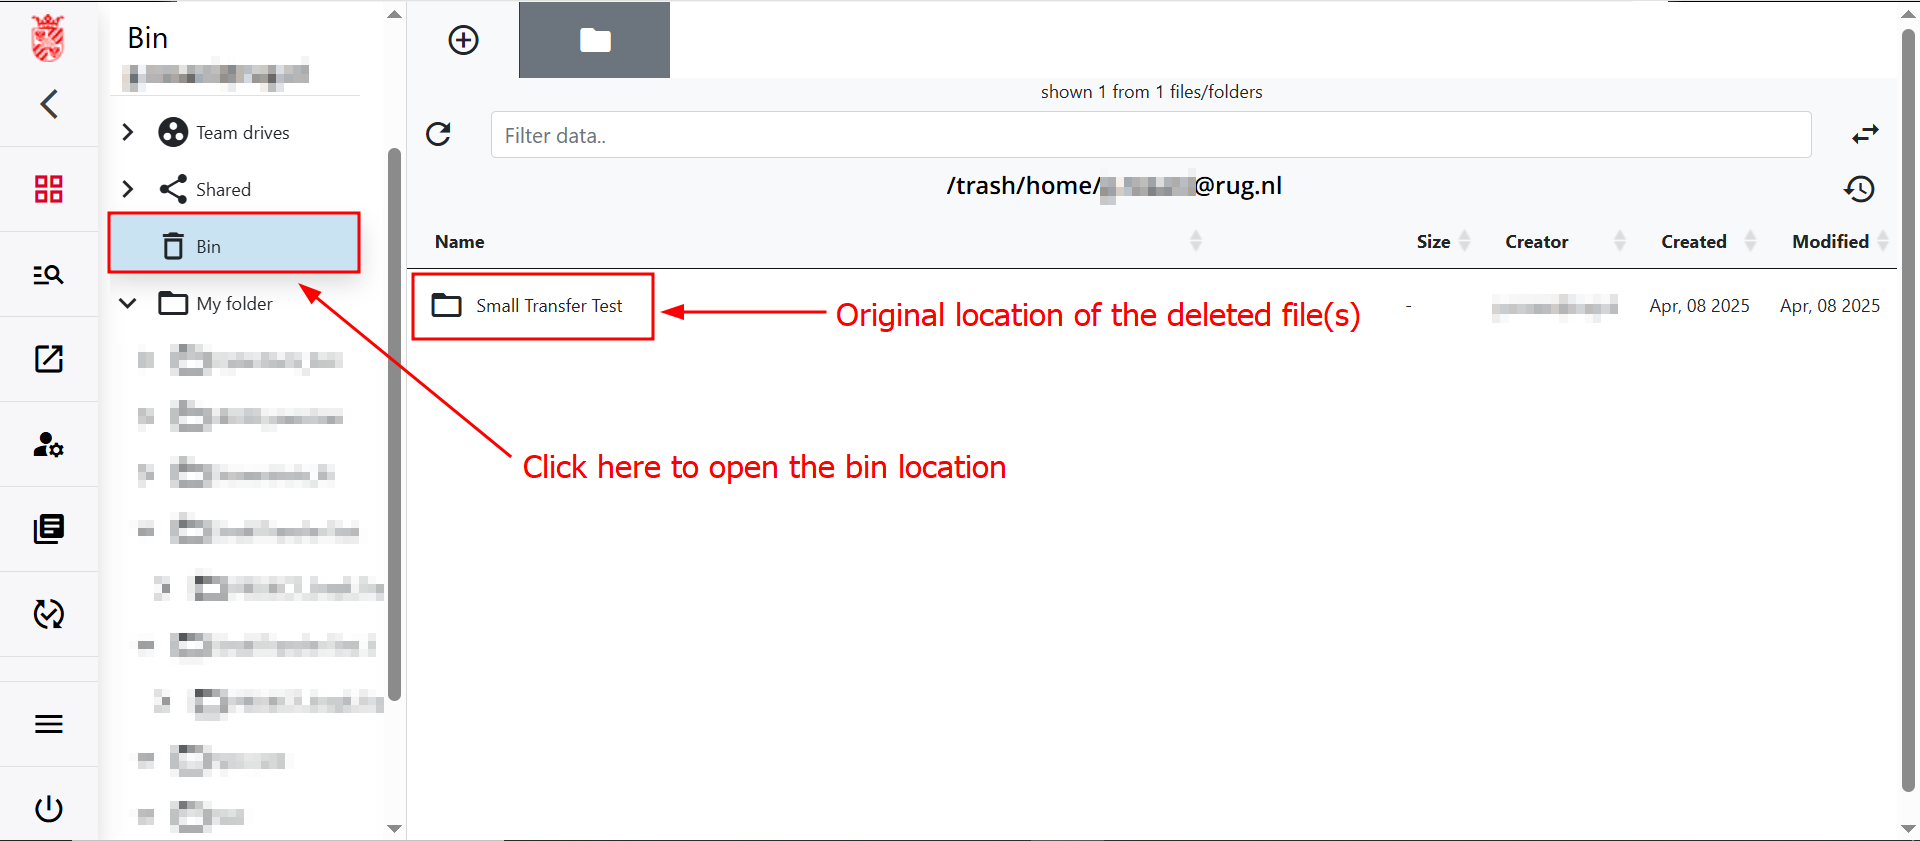
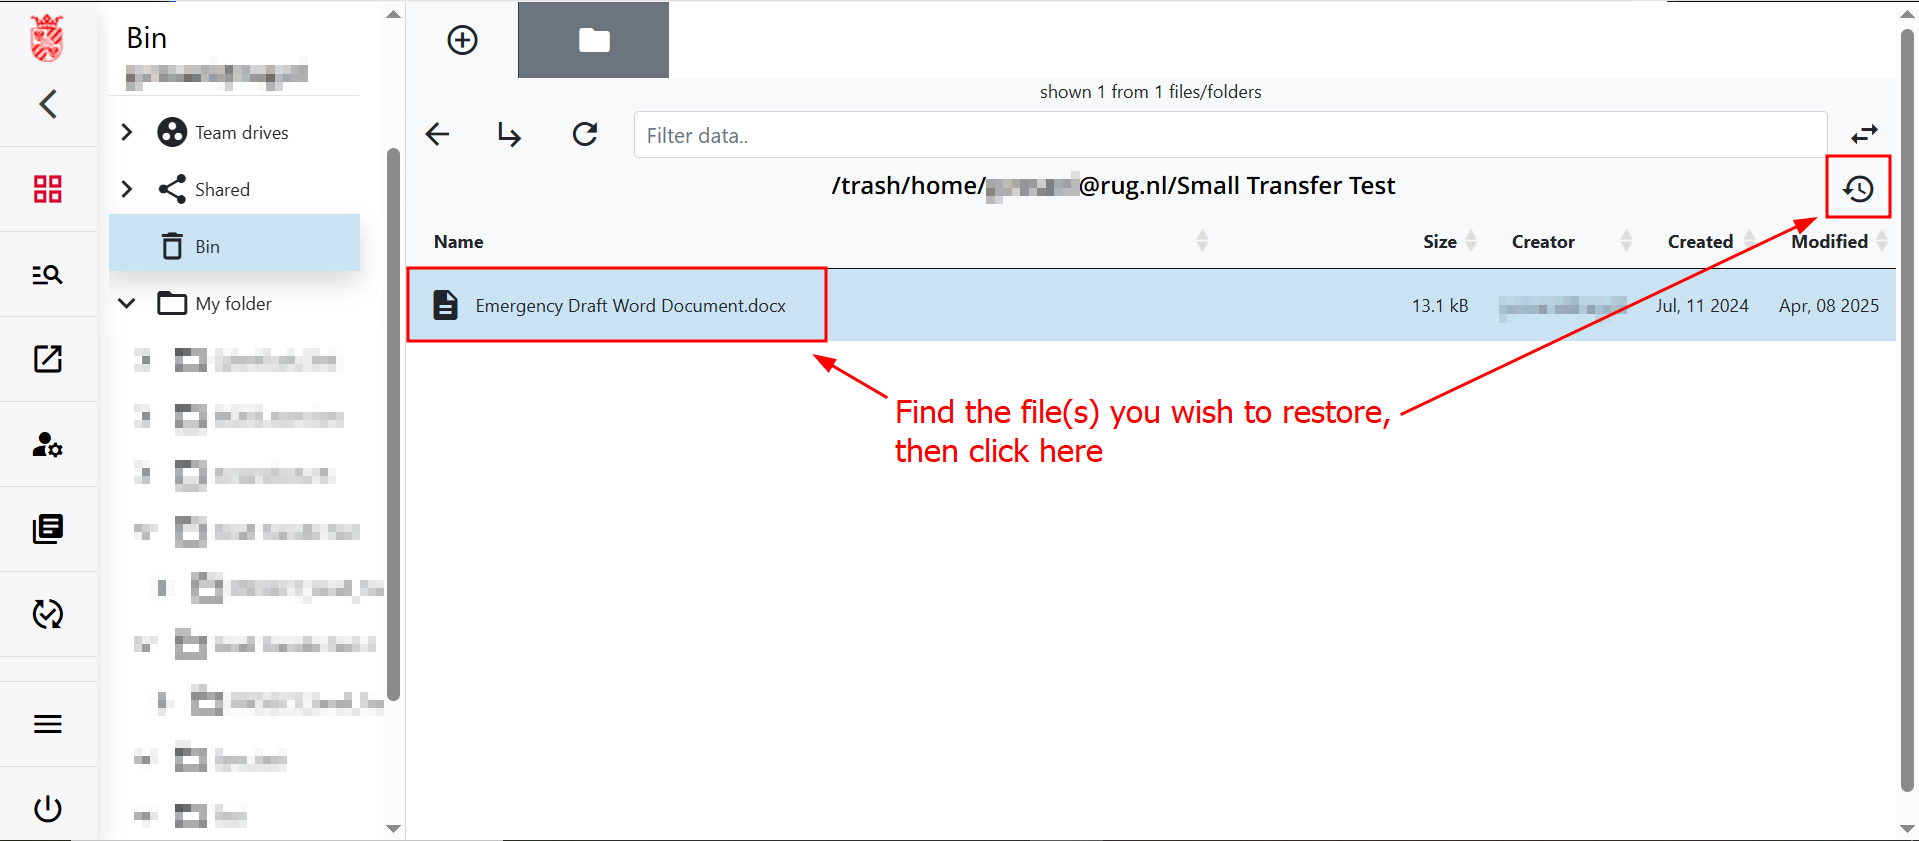
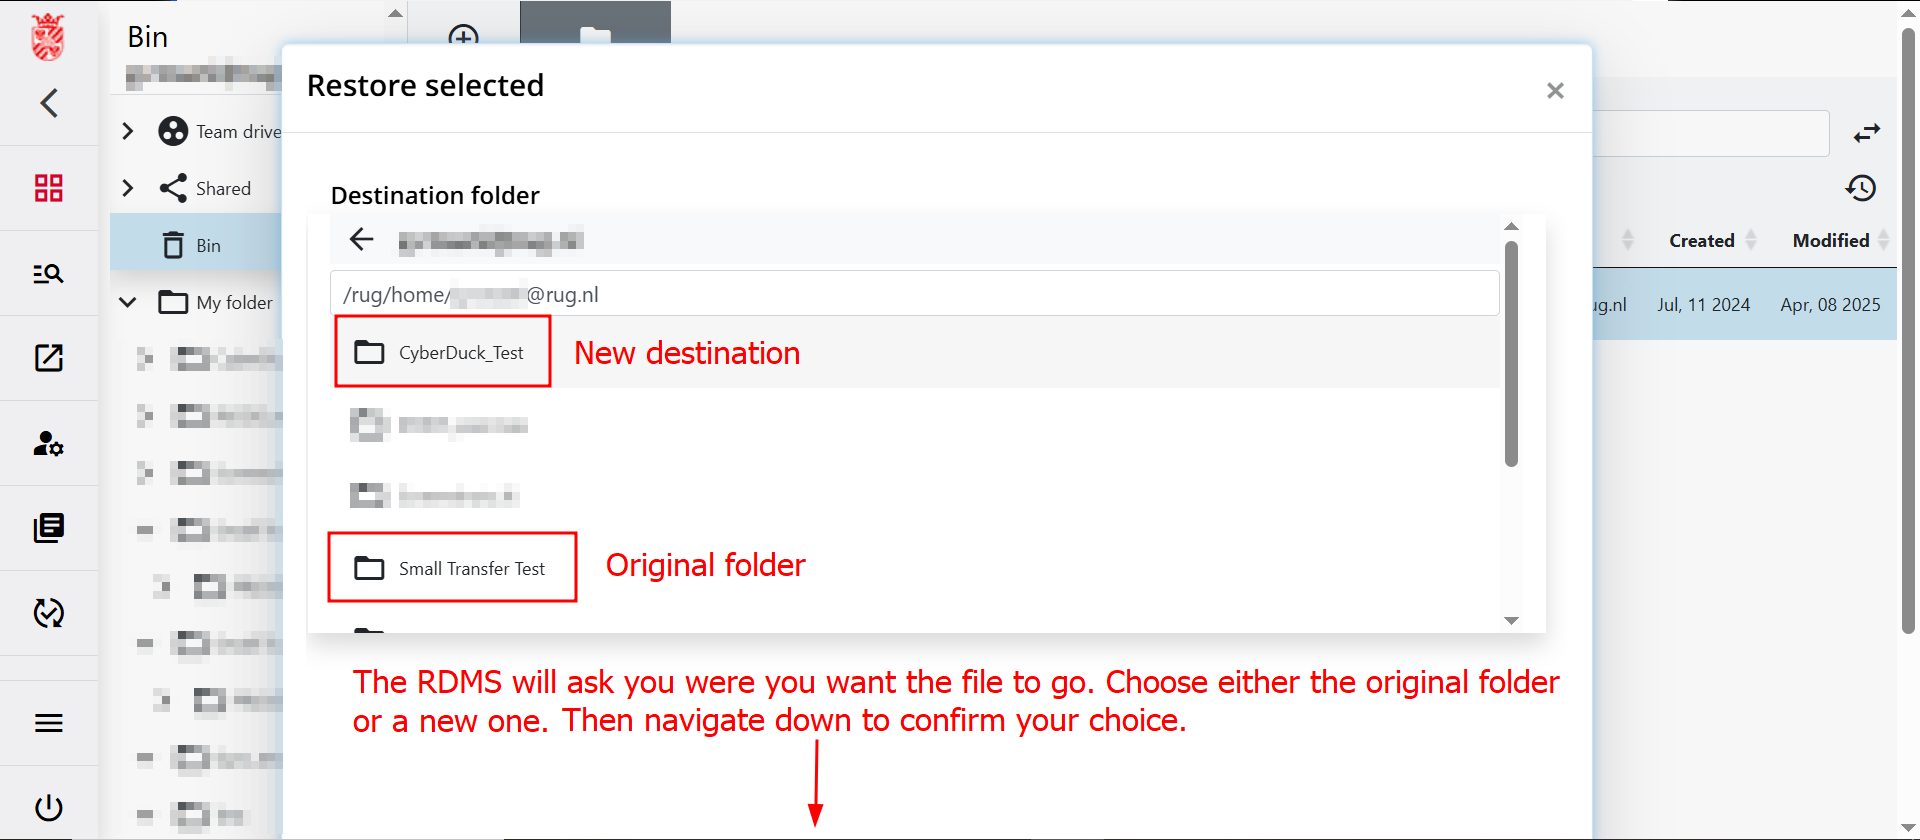
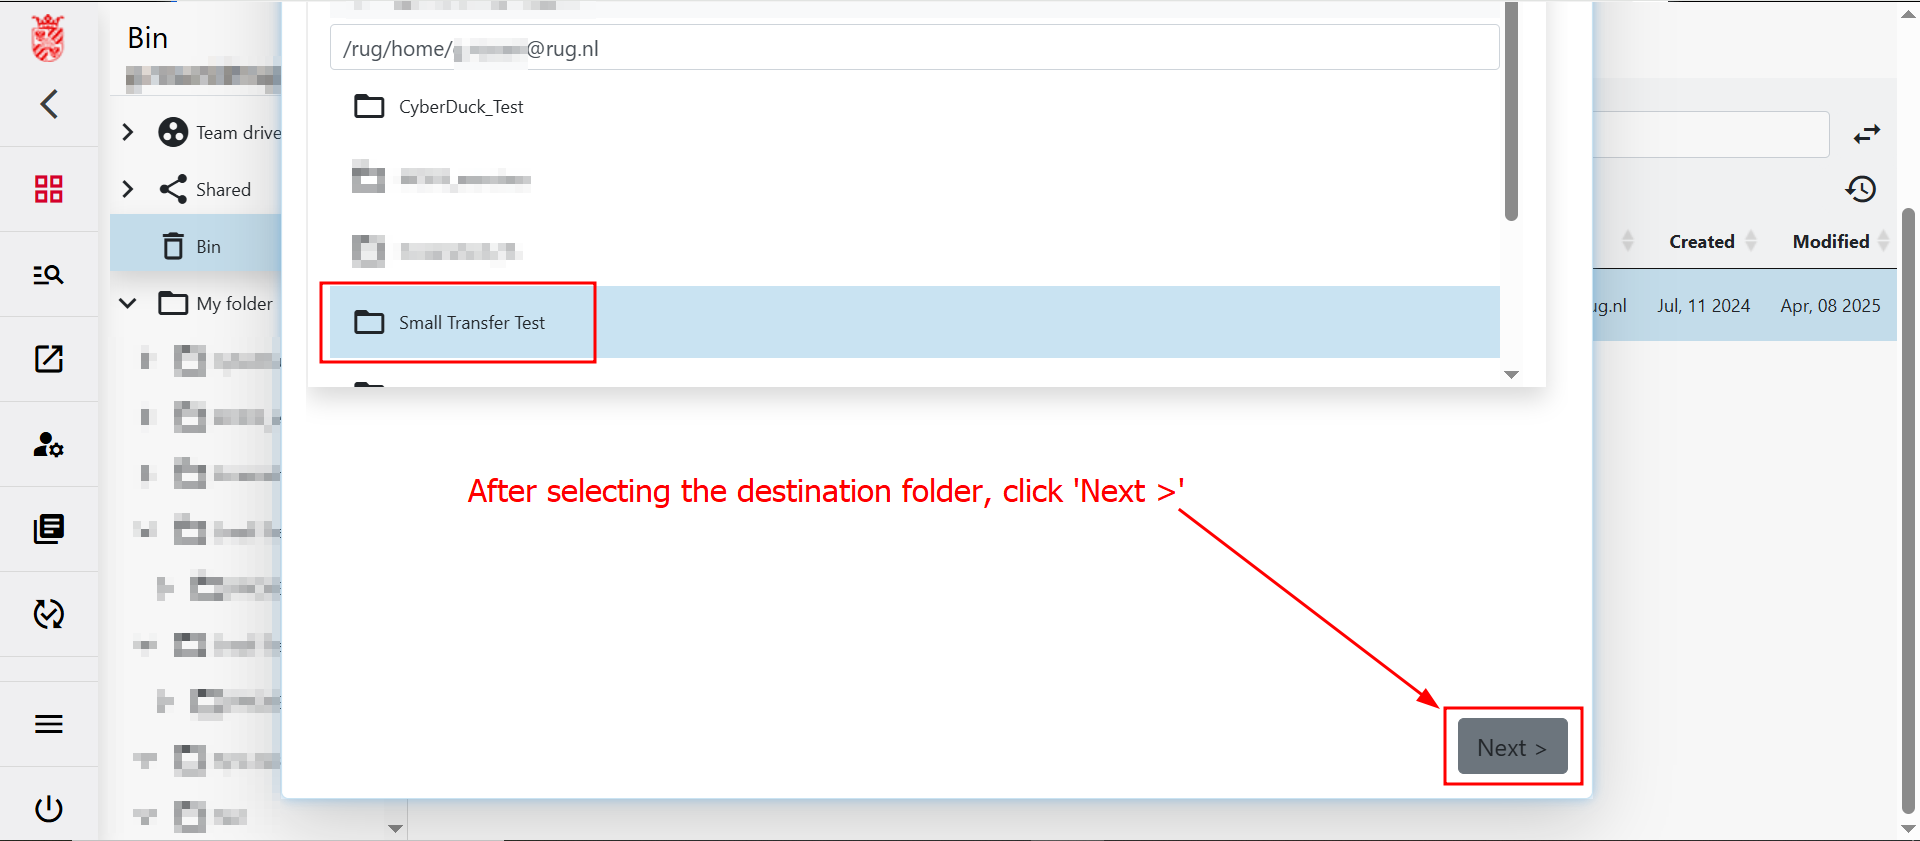
 ): Contains the files and folders that you have deleted. You can use the Web interface to restore these items. For instructions on restoring or permanently deleting files and folders, see How to Restore Deleted Files.
 - My folder (
 ): Opens your personal RDMS Home directory.


Data Browser Functions
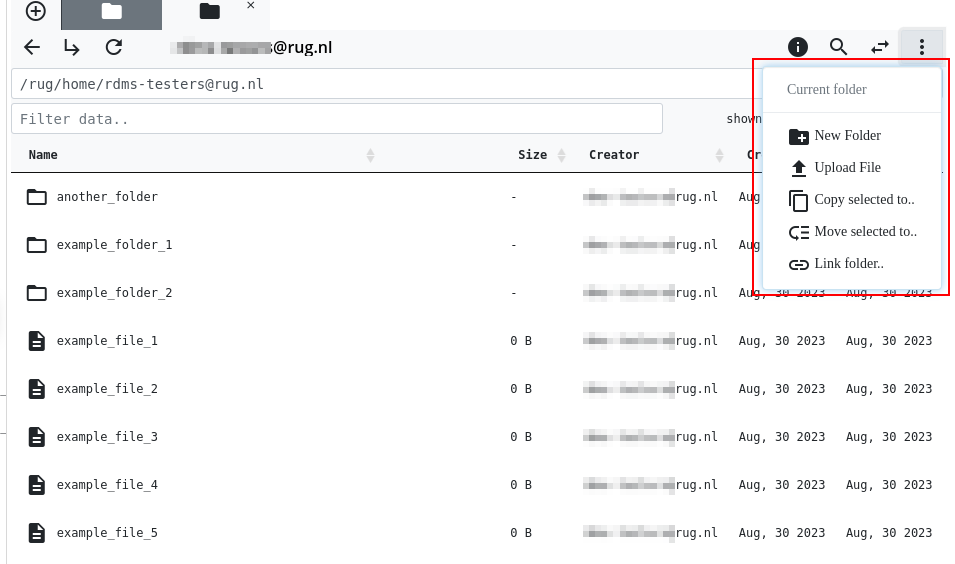
You can perform various file-management tasks directly from the Data Browser. Select the  button in the top-right corner to open a menu from which you can create folders, upload files, move files and folders, or link folders:
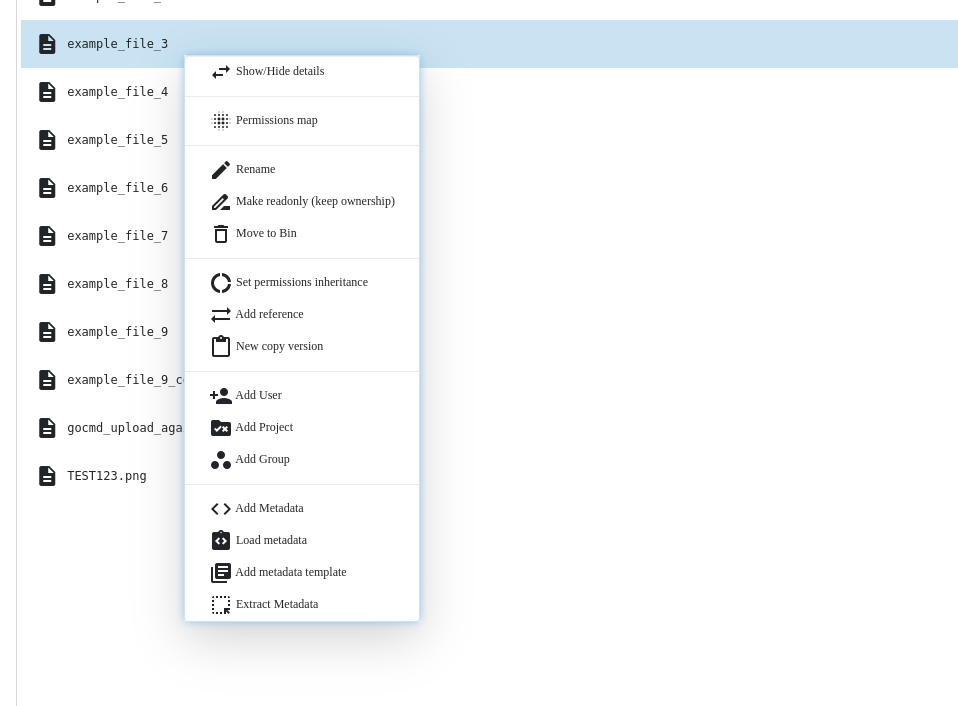
You can also right-click a file or folder to open a context menu with additional actions, such as assigning permissions to the selected item:
Preview Data
The context menu in the Data Browser allows you to preview the contents of certain files. The RDMS currently supports previews of the following file formats:
| File Type | File Extensions | Notes |
|---|---|---|
| Image | *.apng, *.bmp, *.gif, *.jpg, *.jpeg, *.png, *.svg | Displays a preview of the image. |
| PDF document | *.pdf | Opens the PDF in the browser. You can print or download it from there. |
| Text-based file | *.csv, *.html, *.json, *.txt, *.xml | Displays the contents of the text file. You can also copy the contents. |
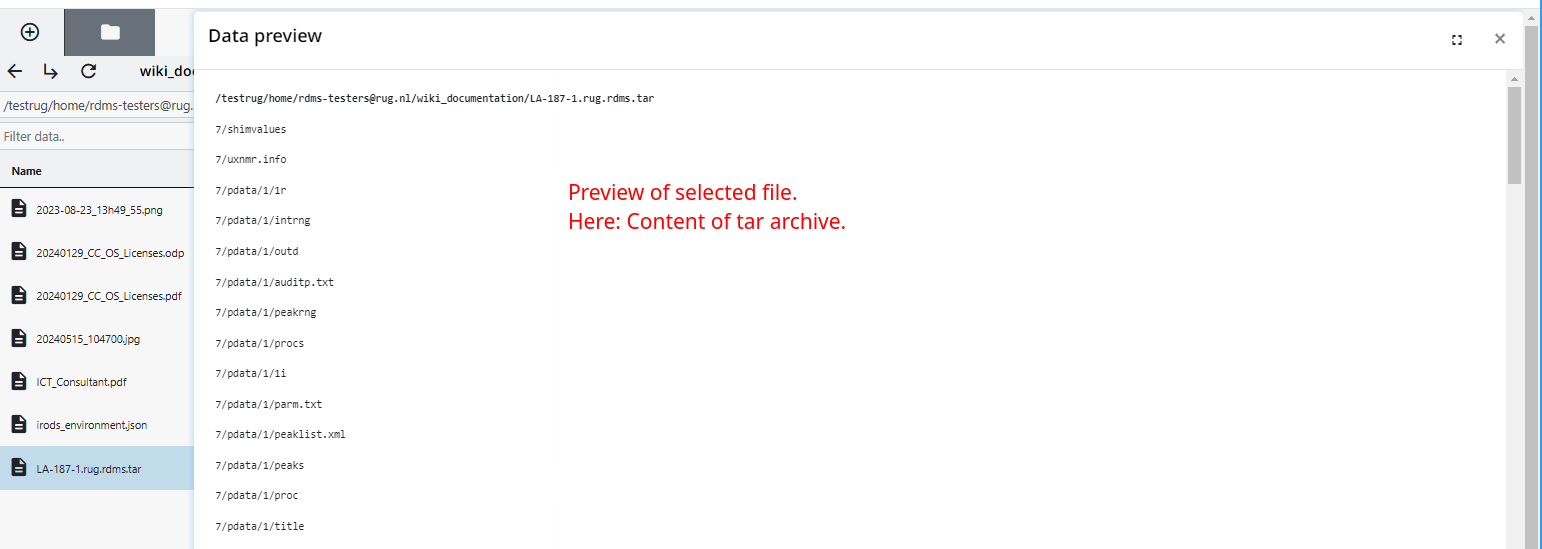
| Archive | *.tar | Displays the contents of the tar archive. |
To preview a file, right-click it and select "Open In…" from the context menu. You can preview the file on the right side of the current Data Browser or in a new browser tab.
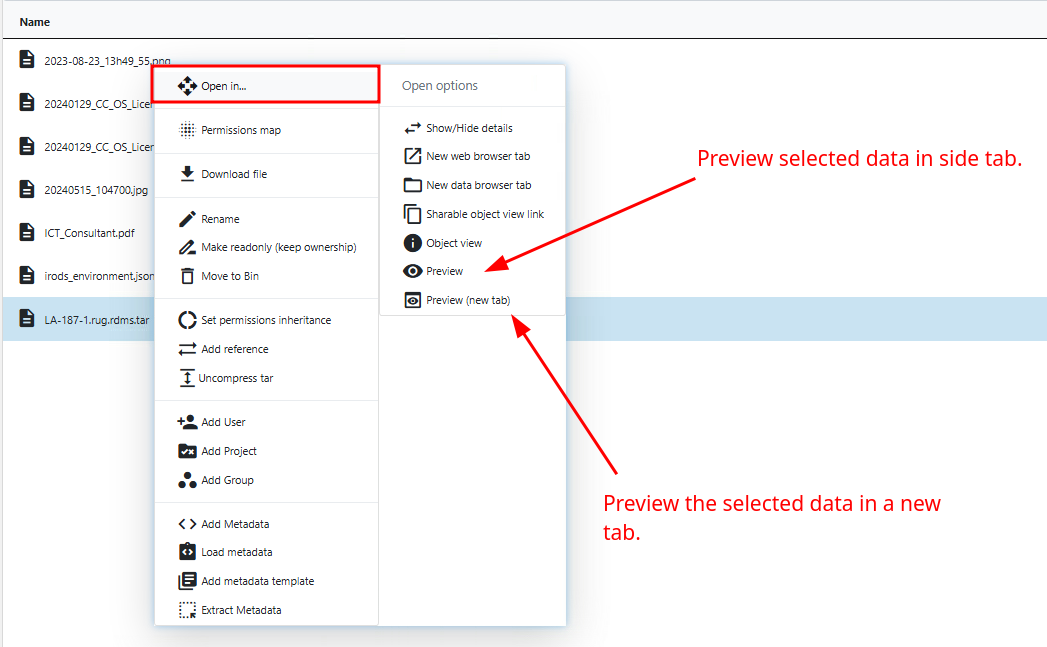
The following example previews a tar archive. The contents of the archive appear on the right side of the Data Browser:
Notes:
- The preview function is limited to files with a maximum size of 500 MB.
- In the future, we will add more data formats that can be previewed. If you need a certain preview function, please contact rdms-support@rug.nl with your request.
Using Hotkeys
Within the Data Browser, different hotkeys are implemented that you can use to execute common data operations in a convenient way.
The hotkeys in the Data Browser are designed to be as close as possible to hotkeys used on other operating systems. As such, the basic hotkey combinations shift + up, shift + down, and shift + click are available to select multiple files or folders. The ctrl + click combination also works like expected from your operating system.
Additional hotkey functions that are currently implemented can be accessed by typing the strings below on your keyboard while in the Data Browser:
dbn: Create a new collection (folder)dbu: Upload a new data object (file)dbm: Move the selected objects or collectionsdbl: Link a collectionctrl + h: Display the help window
Notes:
- The listed hotkeys are only available in the Data Browser, with the exception of the
ctrl + hhotkey combination, which is available in the entire web interface. - For Mac users, the
ctrlkey is replaced by thecommandkey. The hotkeys then function in the same way as described above.
How to Restore Deleted Files
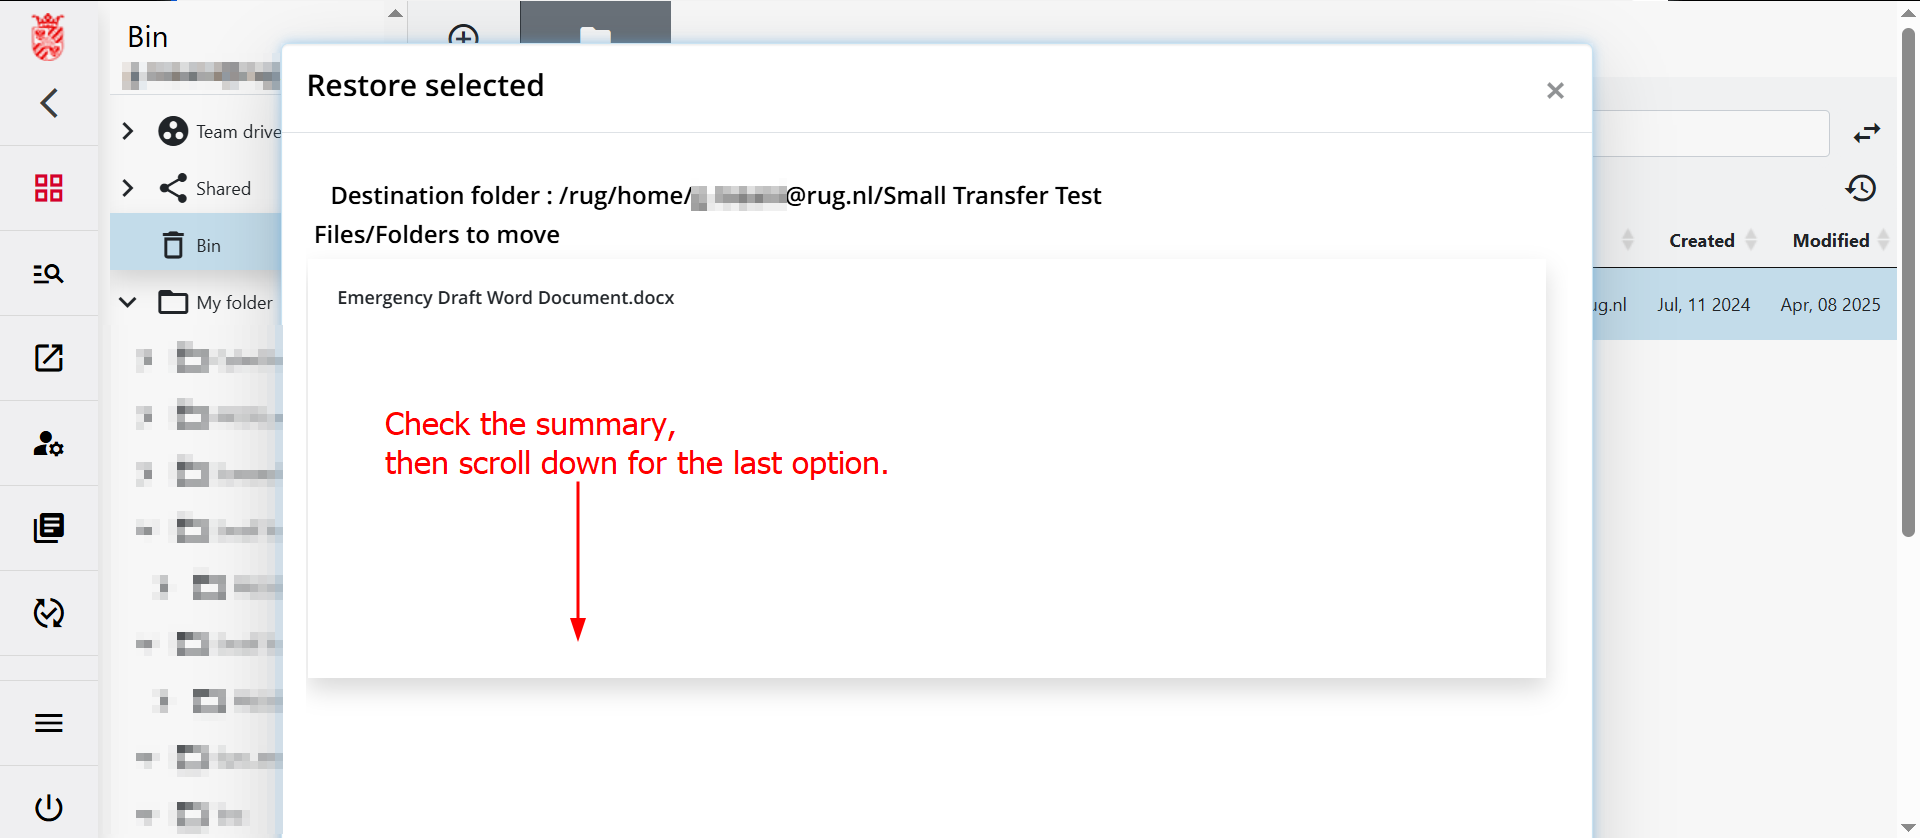
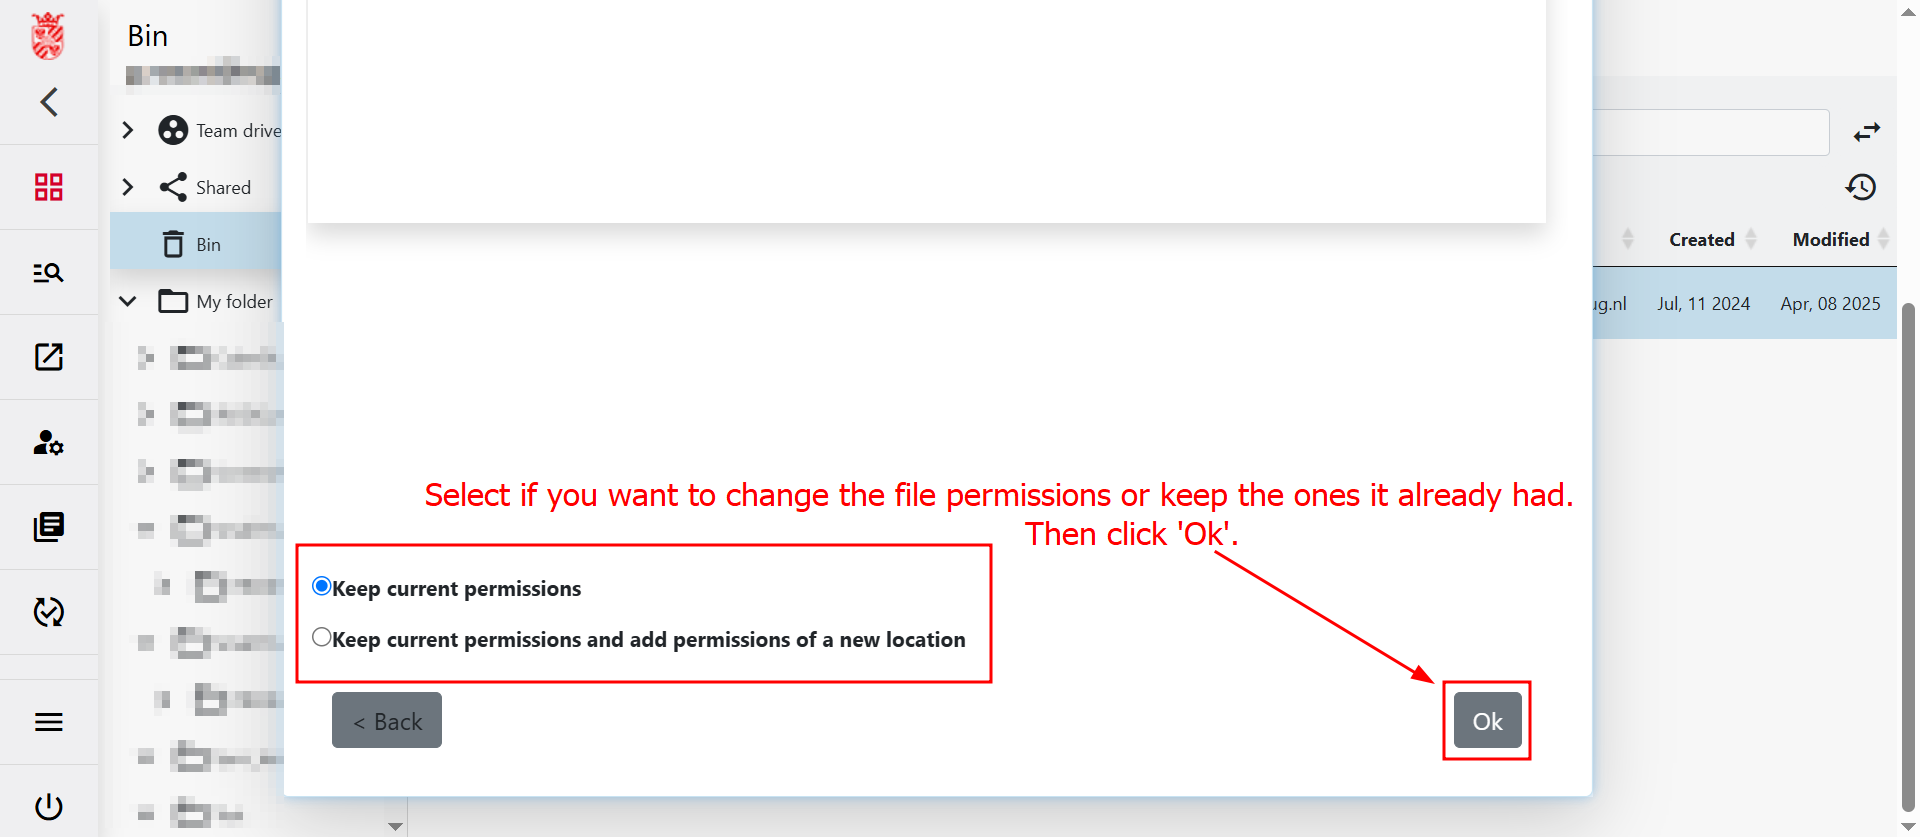
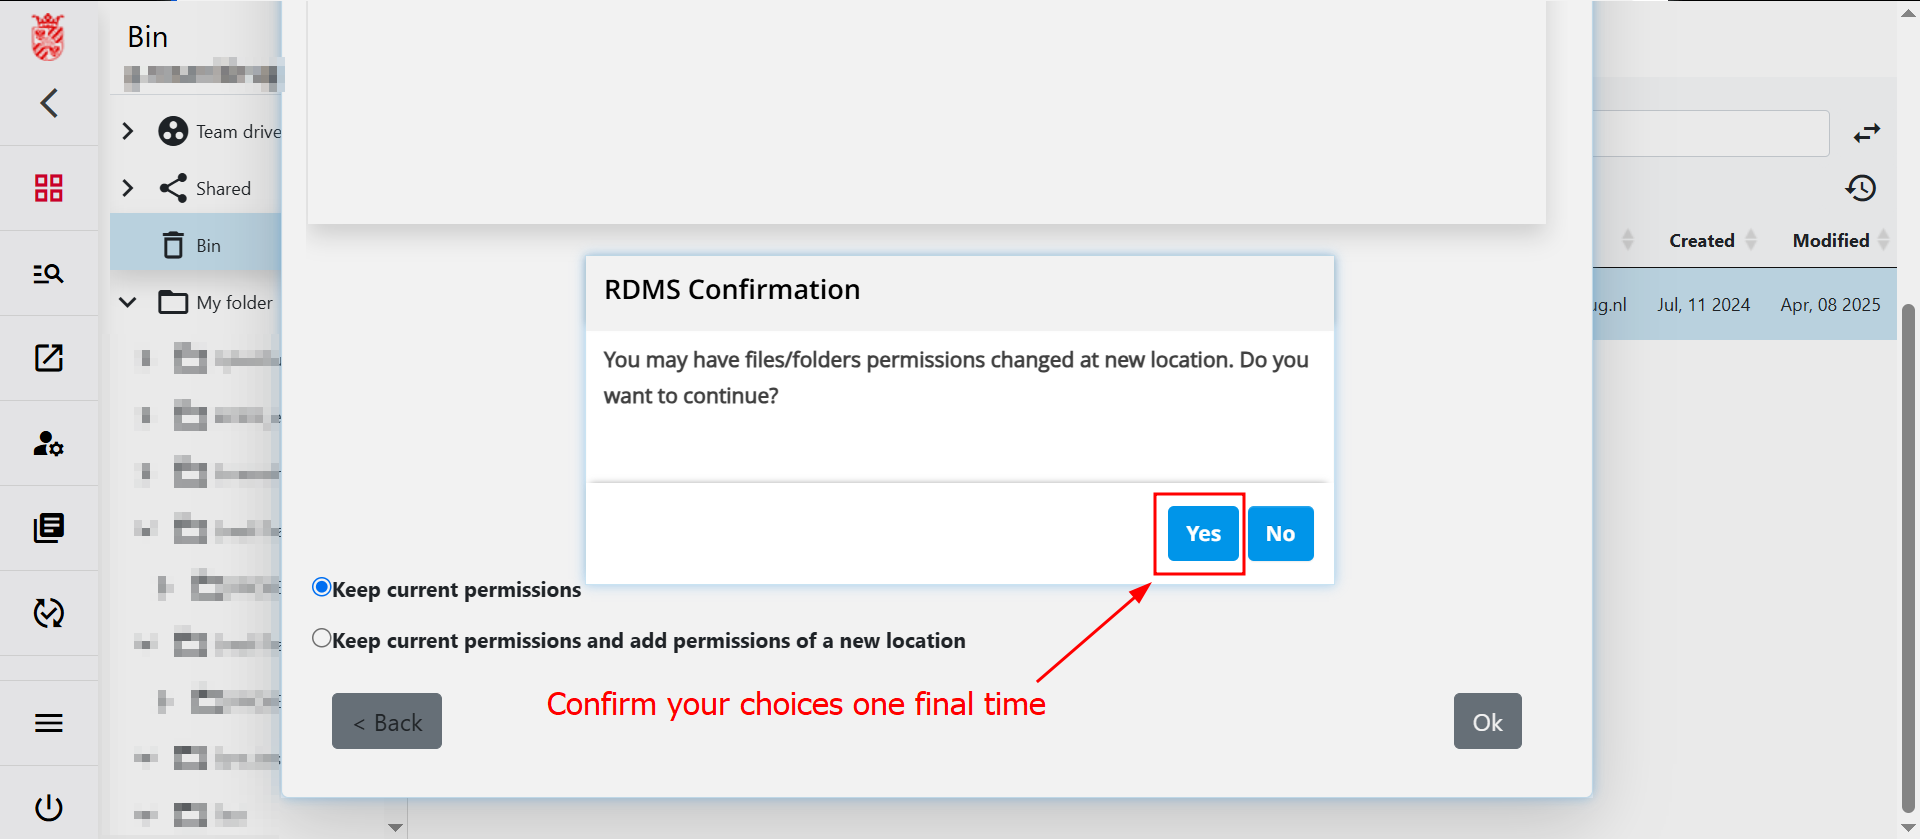
Files in your bin can be restored via the web interface. Click below to reveal the guide showing you how to do so. If you would like to use iCommands to restore files, please navigate to the corresponding command in the How to manage files in the RDMS trash folder section of the wiki.
Note: Please keep in mind that if you wish to permanently delete files stored in your bin, the only way to do so is by using the Command Line Interface (CLI). Look to the section explaining how to use irmtrash on the iCommands page.