This is an old revision of the document!
Initial Setup
Setting up on HPC using the portal
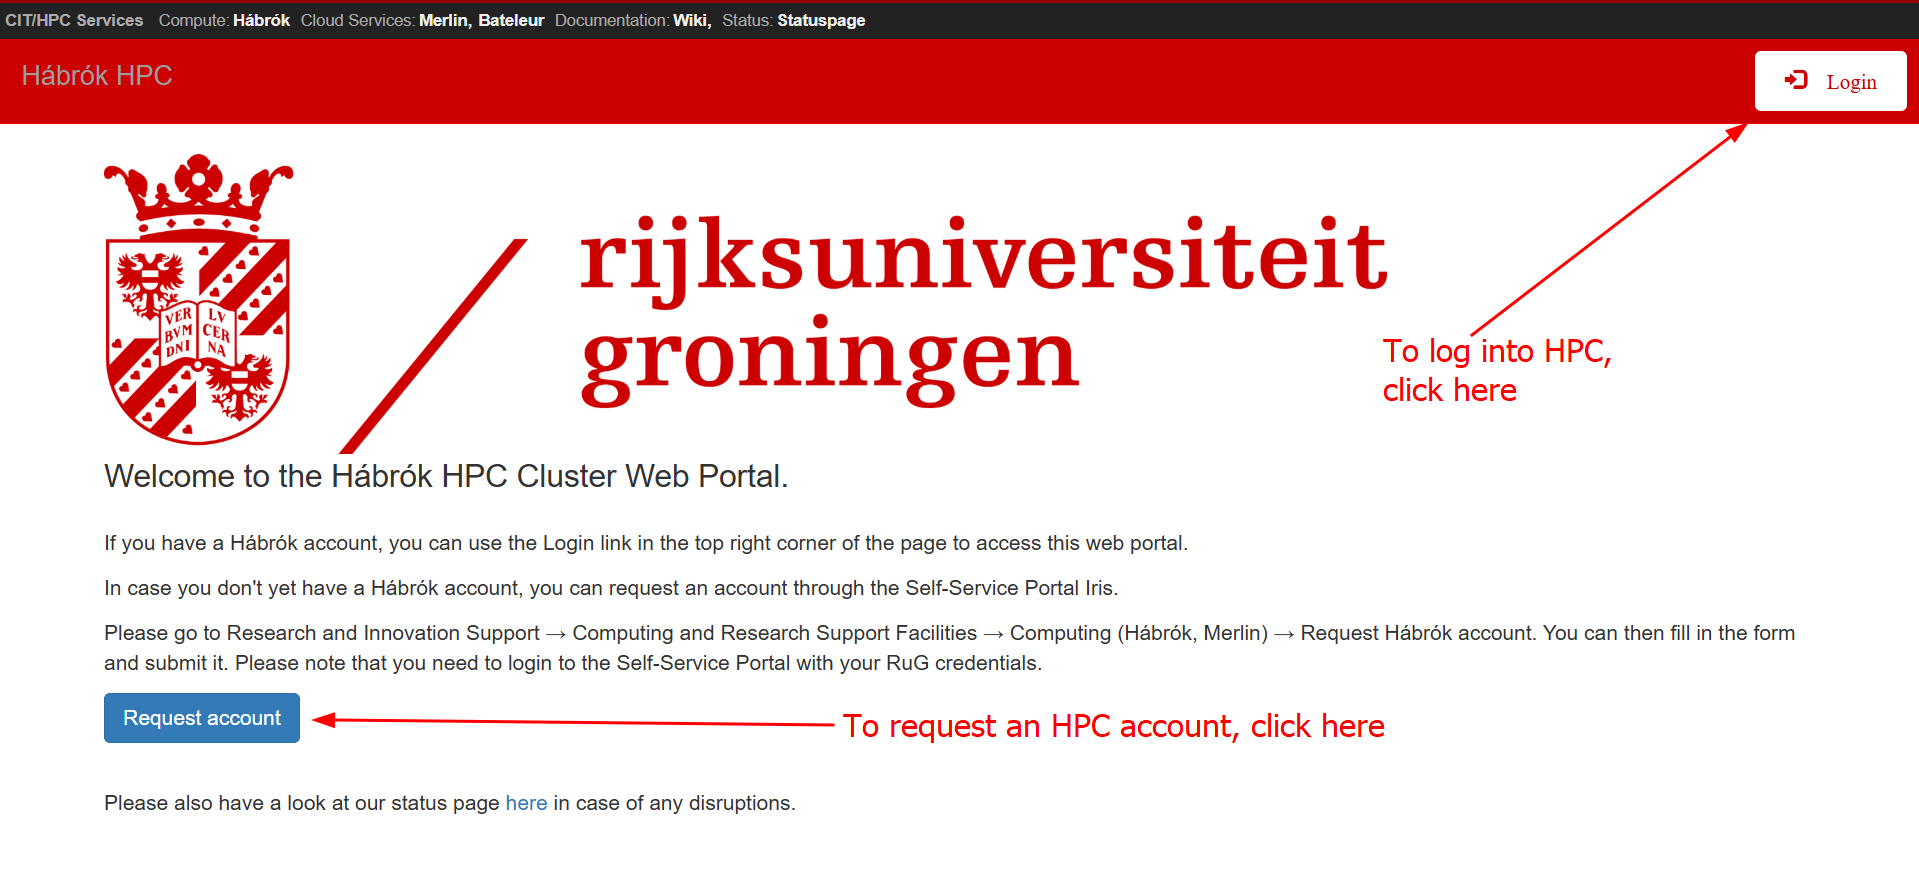
The guide below will take you through some basic steps to start running automatic transcription jobs on the High Performance Computing (HPC) cluster from a Windows computer. Before you can get started with setting Whisper up, you need to first Request a Hábrók (HPC) account or log into the HPC portal
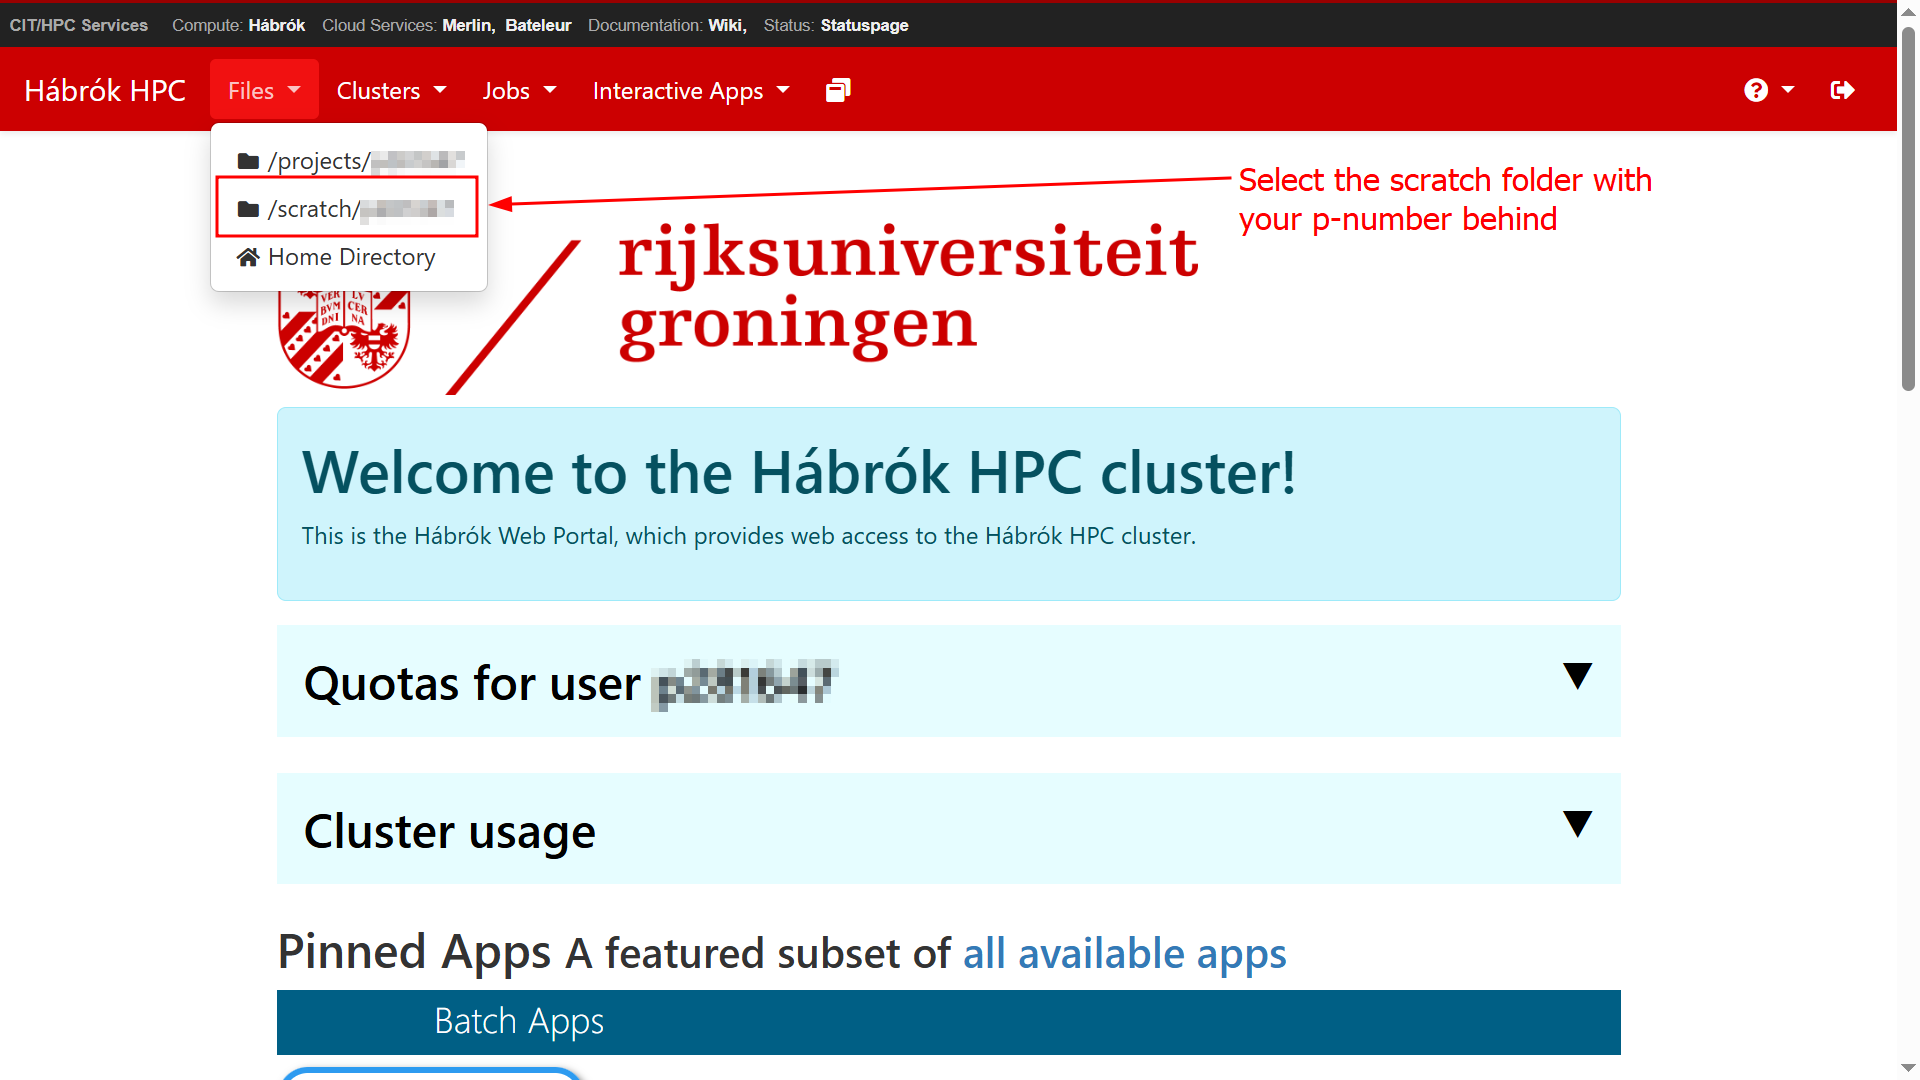
Once you have an HPC account, you can navigate to the Files tab in the top menu bar and select /scratch/p-number. Before we can run the script for the transcription, we need to make sure that folders are set up correctly in your HPC environment.
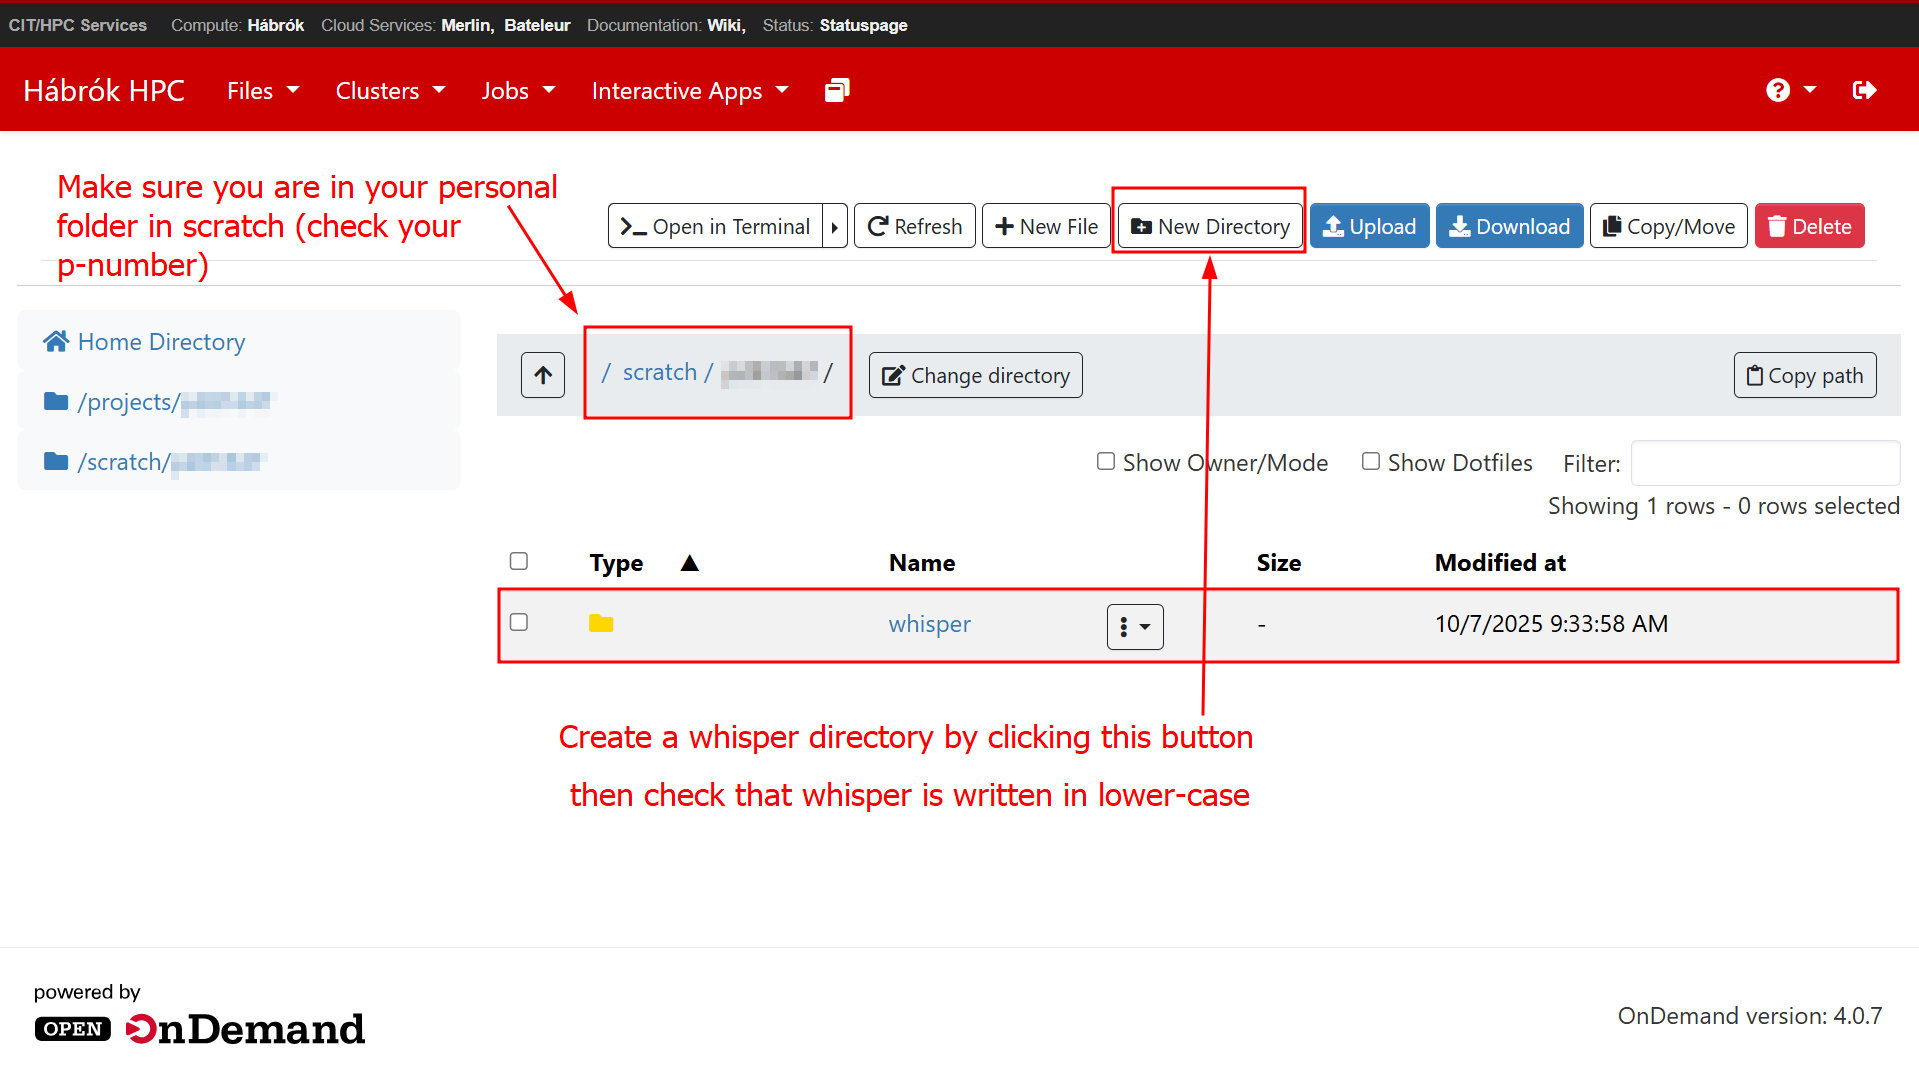
In this window, you will be able to manage your files and folders in HPC. To begin with, make sure that you are in the folder with your p-number in the /scratch/ partition of Hábrók. In the next steps, you will need to create a main folder for Whisper, then two subfolders for the input and output data. To create the main folder, click on New Directory as shown below. Please make sure that you write “whisper” in lower case. When the folder appears in your window, click on its name to open the next window.
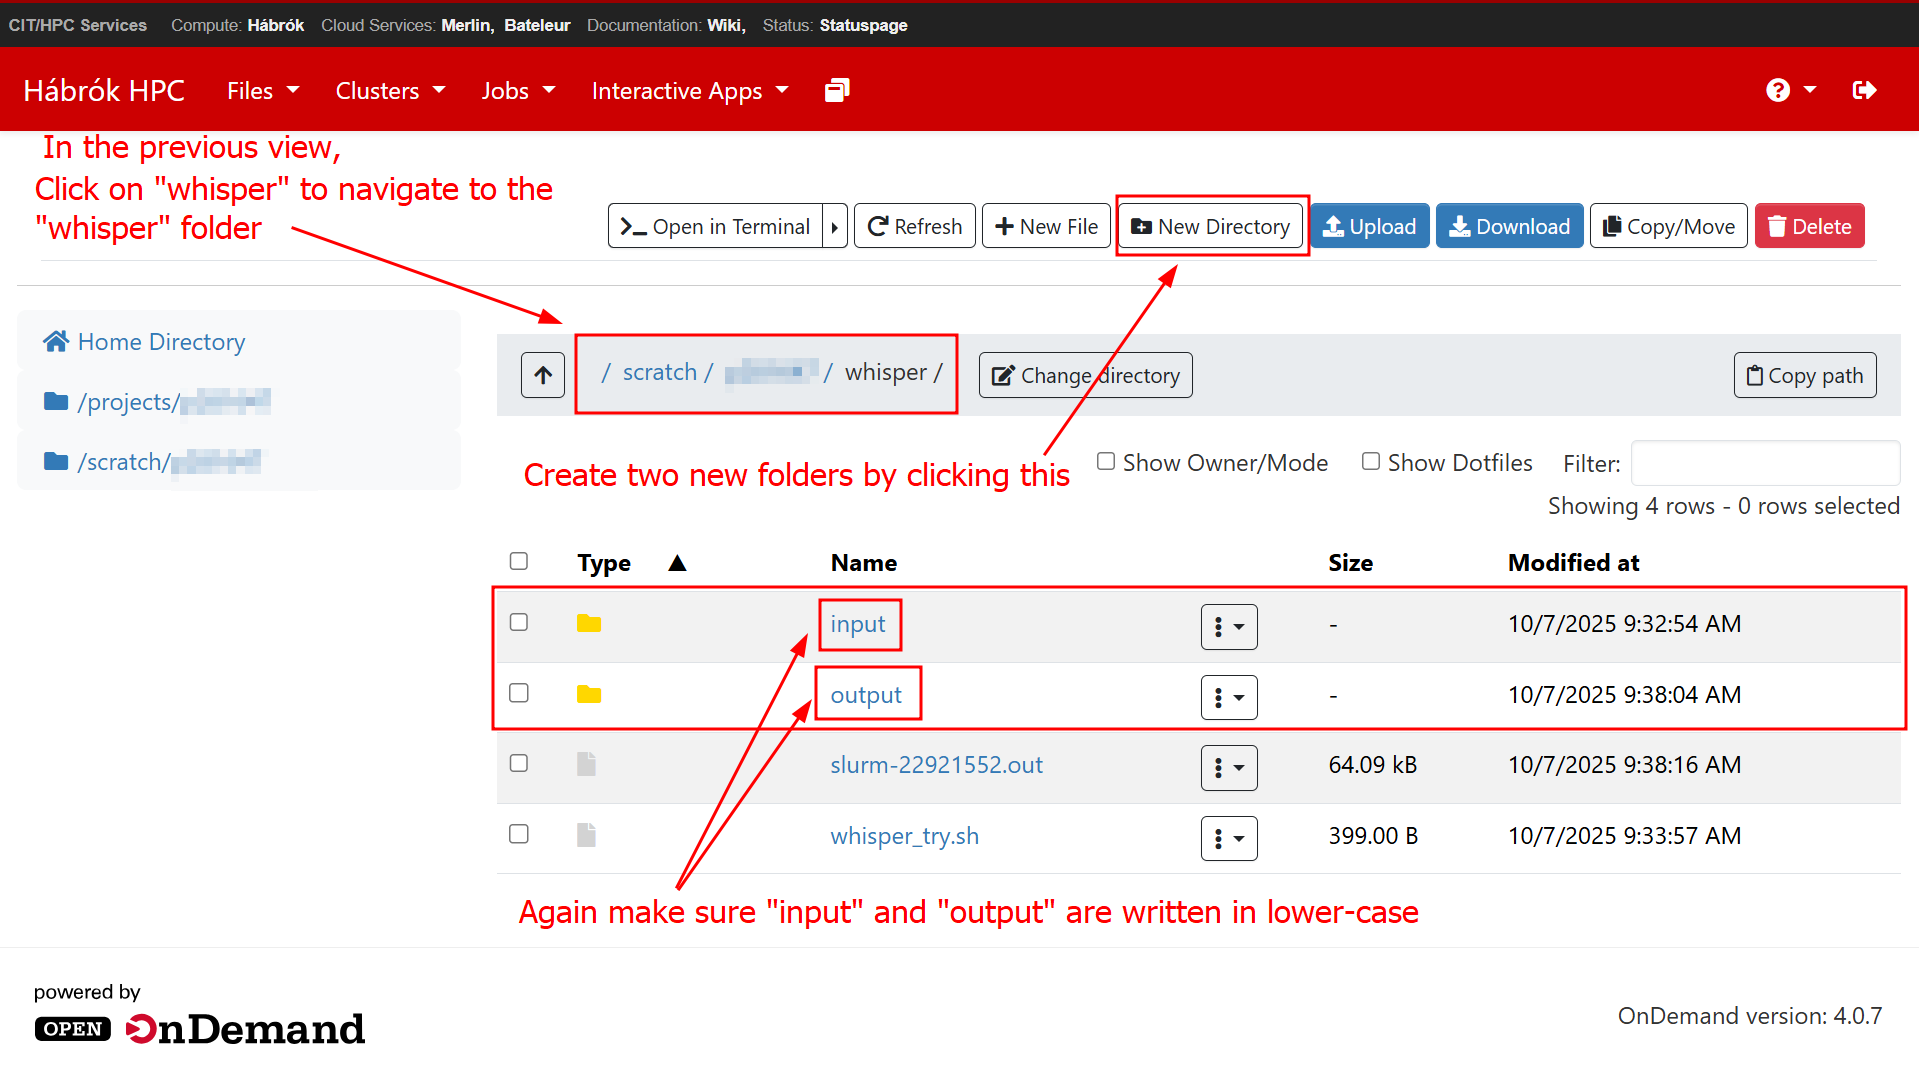
Once inside the Whisper main folder, you need to create two subfolders. Once again, use New Directory to create each new folder. Call them “input” and “output”, respectively, taking care to use lower case letters. Do not worry if your do not see any .sh file or slurm file in your file view. They will come later.
Building the virtual environment and installing Whisper
Note: This step is only needed the first time you set up Whisper. After you have installed the program for the first time, you can skip directly to the next part of the guide to run the program.
When logged into your session in the terminal, you will have a prompt where you can enter commands. In order to run Whisper, you will need to create the proper environment in your HPC session. To do so, copy the grey-highlighted lines below one by one into your terminal and run them separately by pressing enter.
Note: To copy text into the terminal, ctrl+V will not work. Use either the right mouse click, then select paste from the drop-down menu, or, if you have a mouse wheel, click on the terminal with the mouse wheel to paste the text directly after you copied it.
Steps to follow to install whisper:
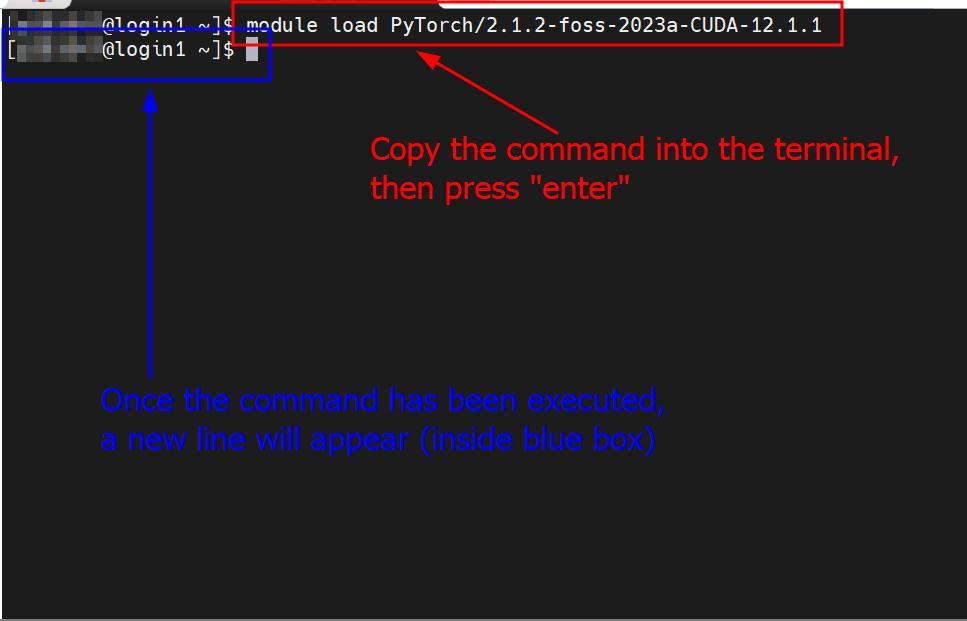
- First, you need to load a module that Whisper will need to run. To do so, copy-paste the line highlighted in grey below into the terminal, as shown in the figure.
module load PyTorch/2.1.2-foss-2023a-CUDA-12.1.1

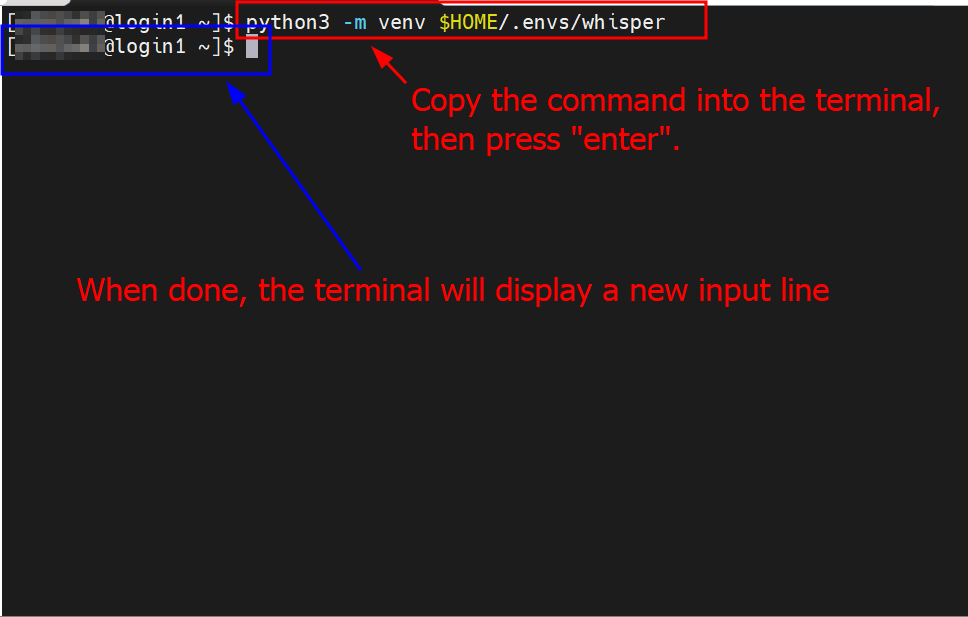
- Then you need to create the virtual environment where you will install whisper. Copy-paste the line below into the terminal.
python3 -m venv $HOME/.envs/whisper

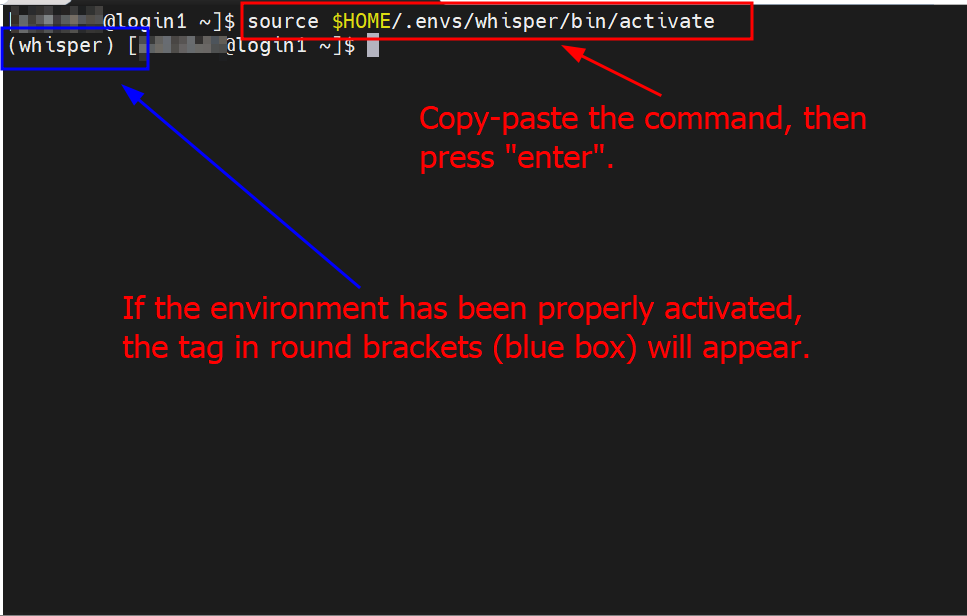
- Now, activate the newly created environment by copy-pasting the line below.
source $HOME/.envs/whisper/bin/activate

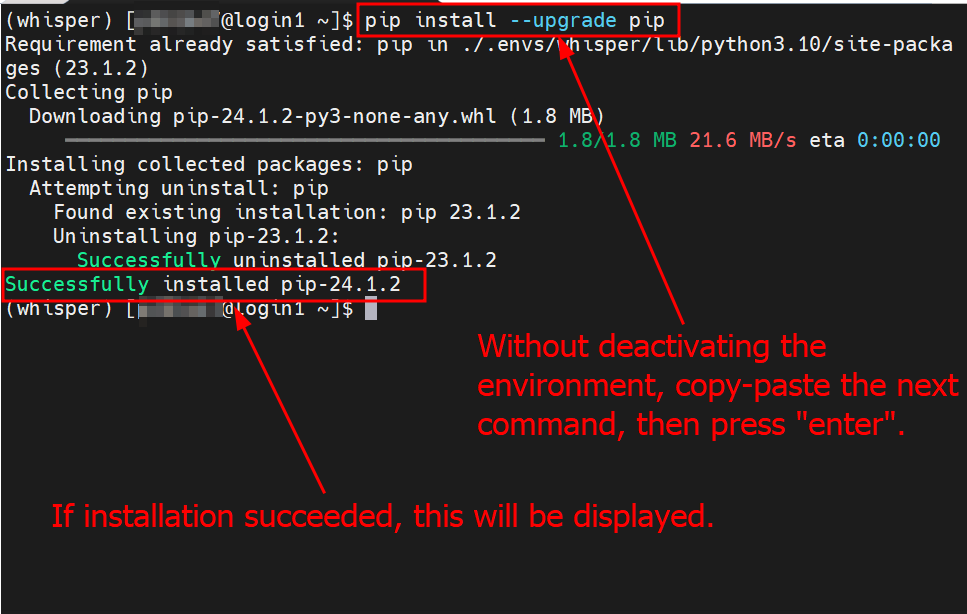
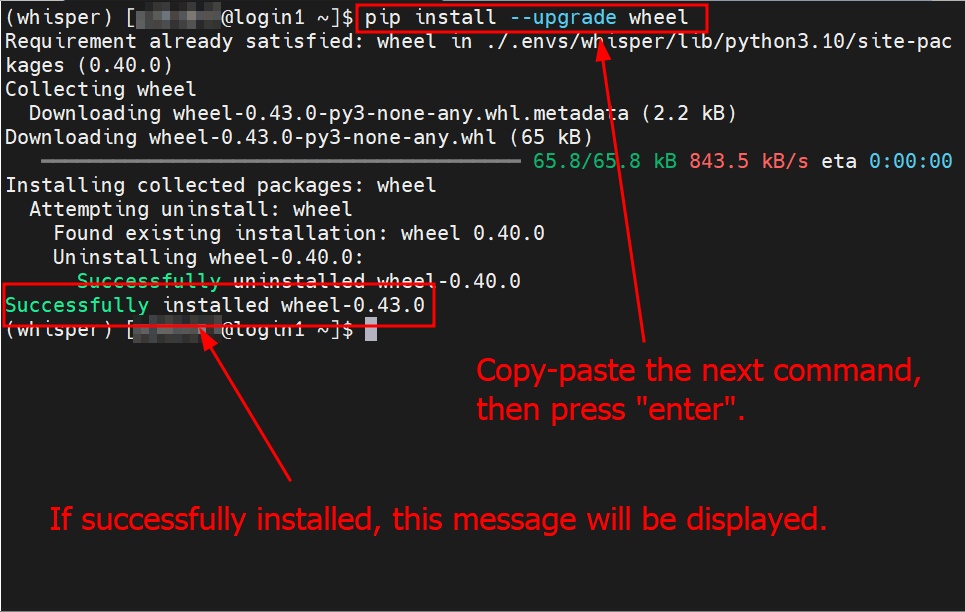
- Before you install Whisper, you need to make sure to have the latest version of some programs. Copy the two lines below separately into the terminal, as shown in the figures:
pip install --upgrade pip

pip install --upgrade wheel

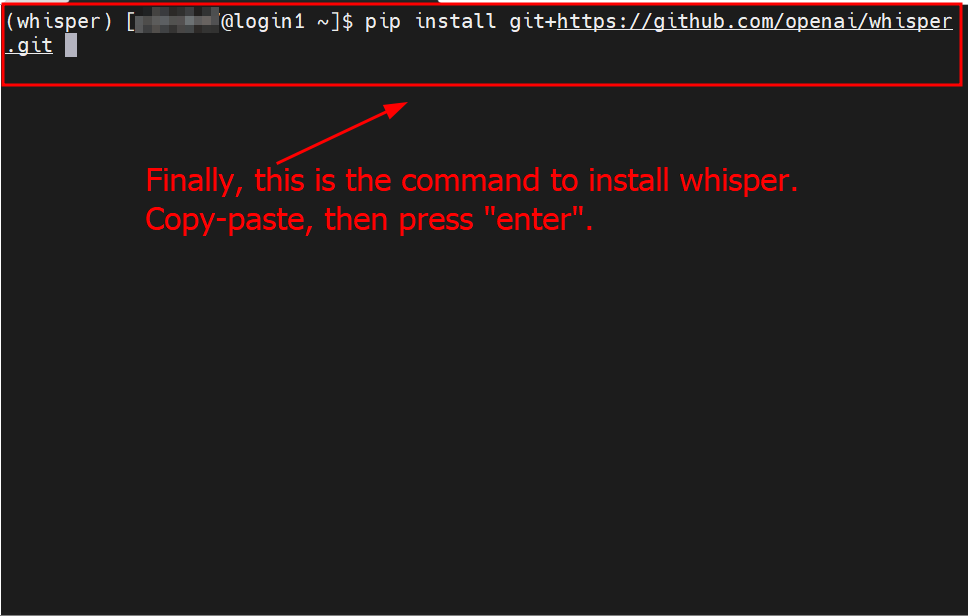
- Finally, you can install Whisper by running the command below:
pip install git+https://github.com/openai/whisper.git

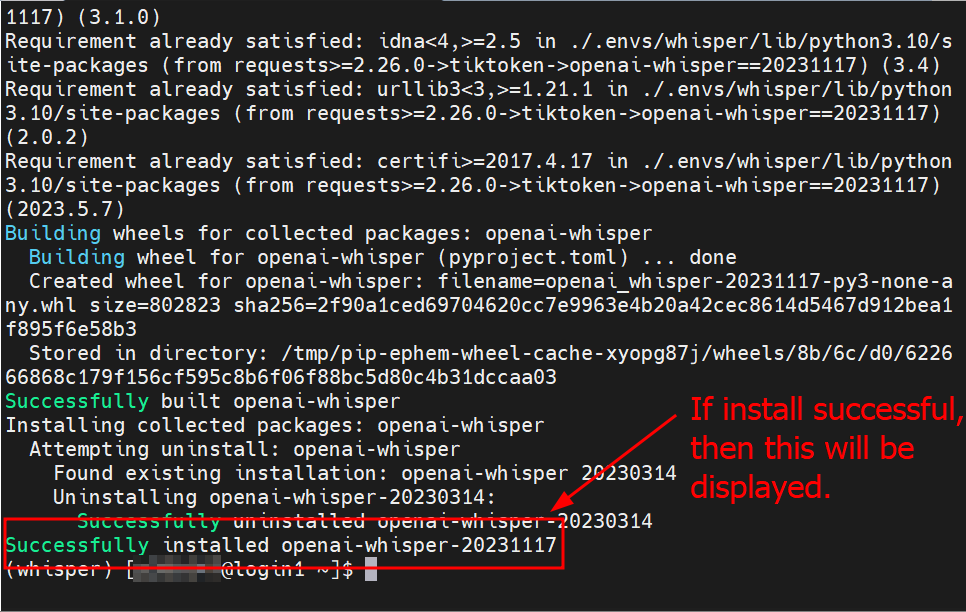
- If everything went well, you should see the following screen:

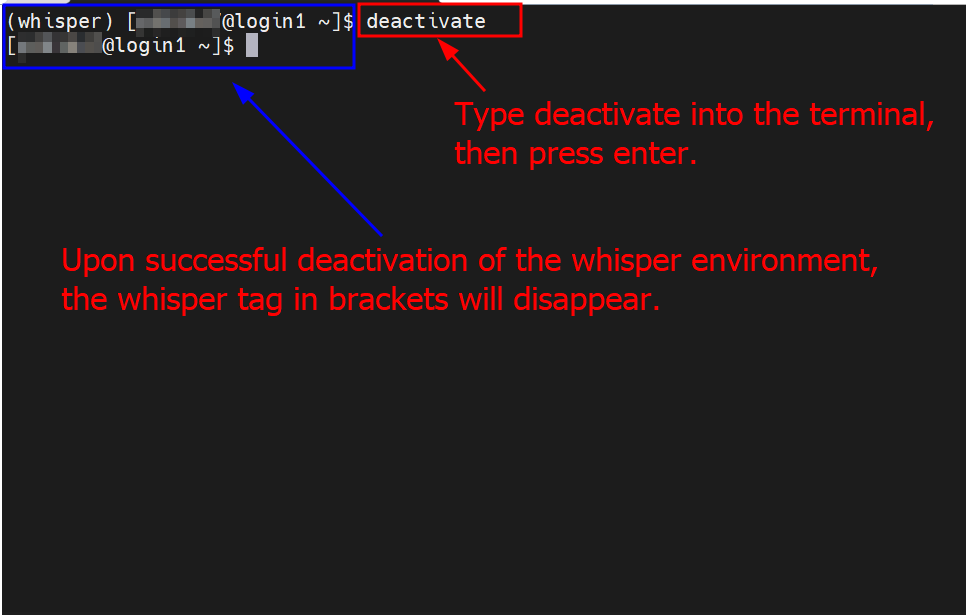
- As a final step, type
deactivate
into the terminal, then press “enter”. After this initial installation, you won't need to manually activate the whisper environment anymore.

- If you wish to fully close the environment and also close the HPC session directly, type
exit
instead of
deactivate
.
Note: The version numbers displayed in this guide for the programs you have installed and upgraded reflect the most recent versions at the time this guide was written. The numbers you will see displayed might have changed if newer versions have been released.