This is an old revision of the document!
Running Whisper
To run Whisper on HPC, you need to load an environment into your HPC session and build a script to specify what you want the software to do. The HPC Team has built an interface in their portal to make this task clear and easy for you. For this reason, we will describe how to use the interface in this part of the guide. Should you want to modify the script and the instructions to Whisper beyond what the interface allows you to do, then you are of course free to write your own script or contact dcc@rug.nl with your question.
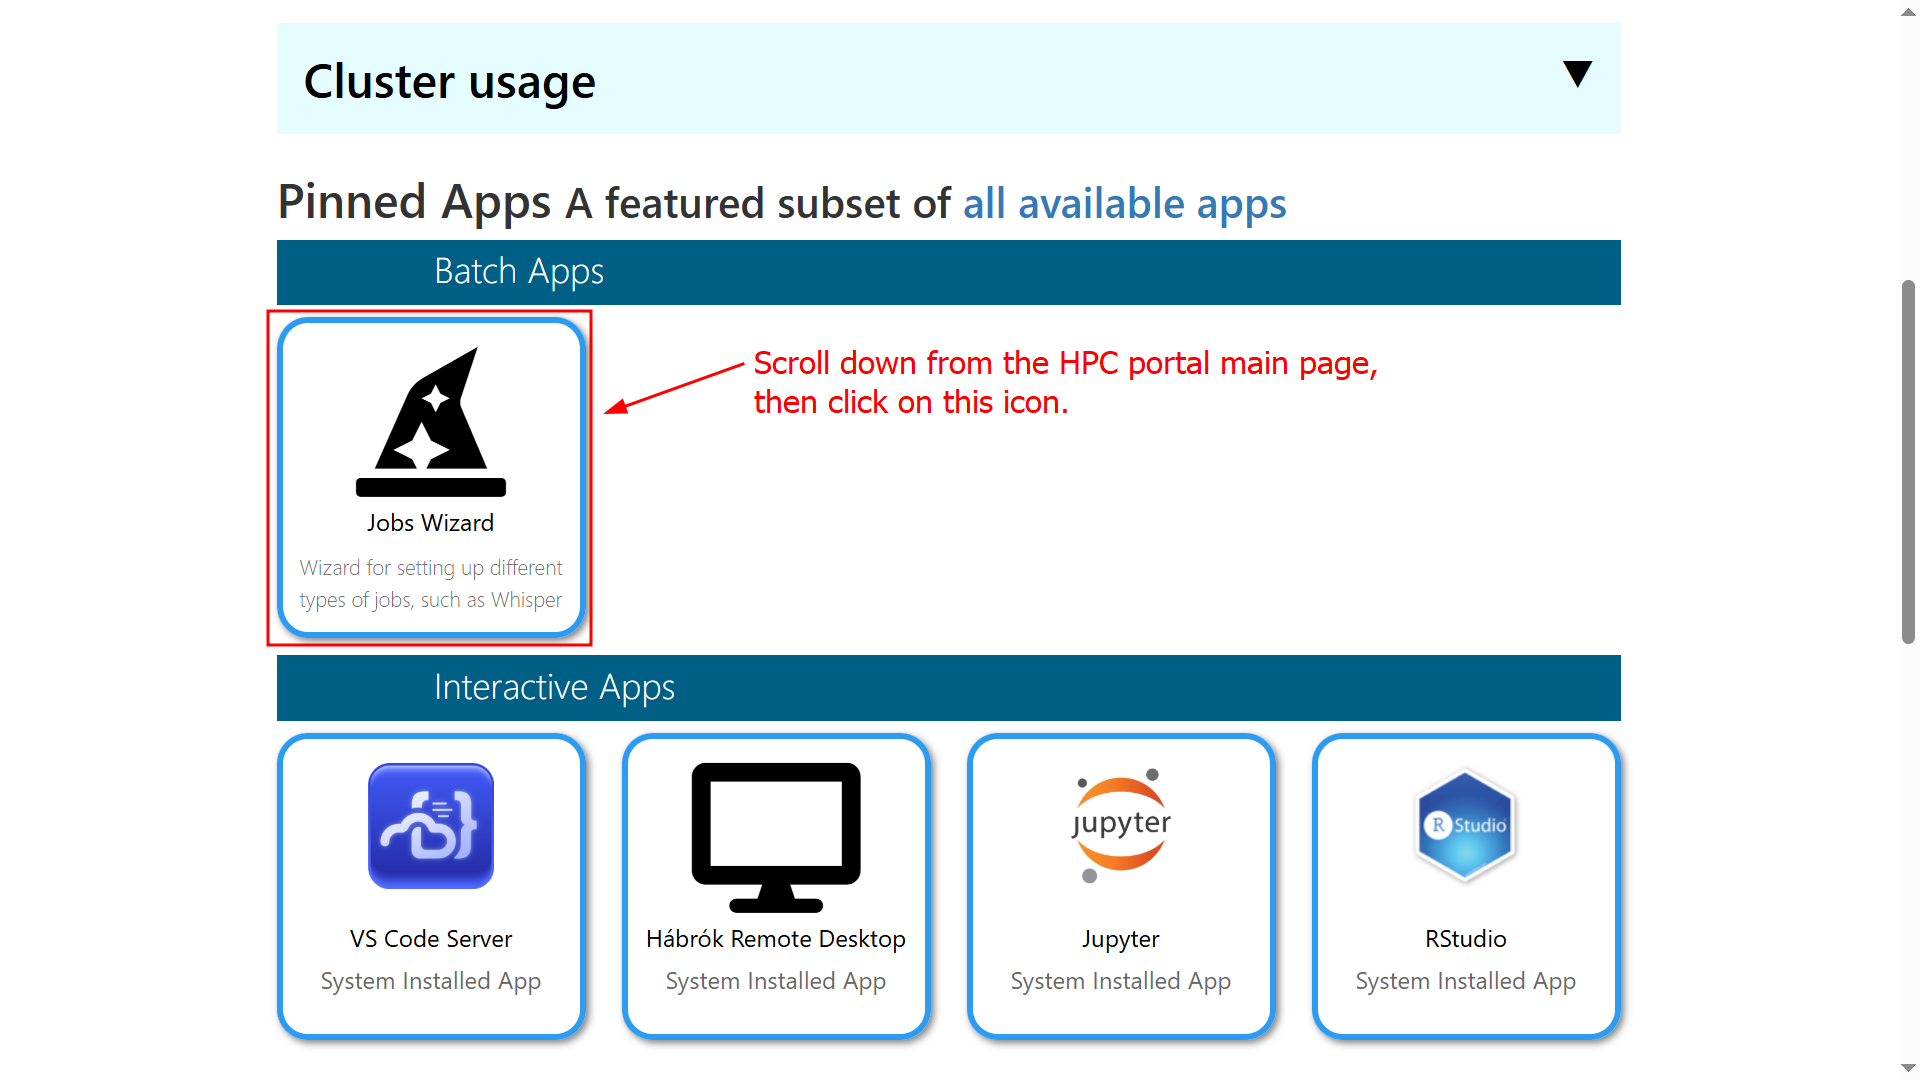
To access the interface, log into the HPC portal and scroll down until you see the Jobs Wizard button shown in the screenshot. Click it to open a new window.
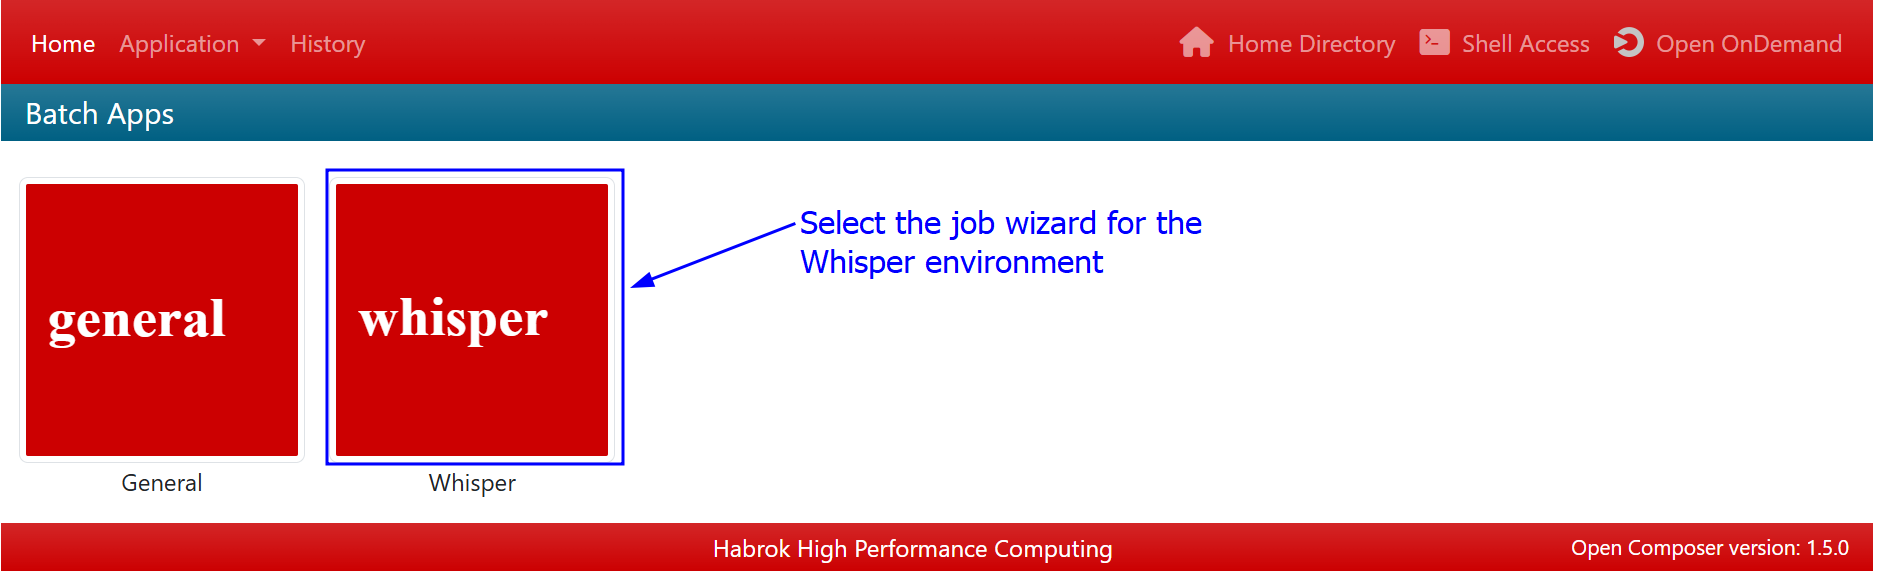
In the new window, select the wizard for Whisper. Note: As of the writing of this guide, there were only two apps available on this part of the portal. You might see more than two, if new ones have been added by the HPC team.
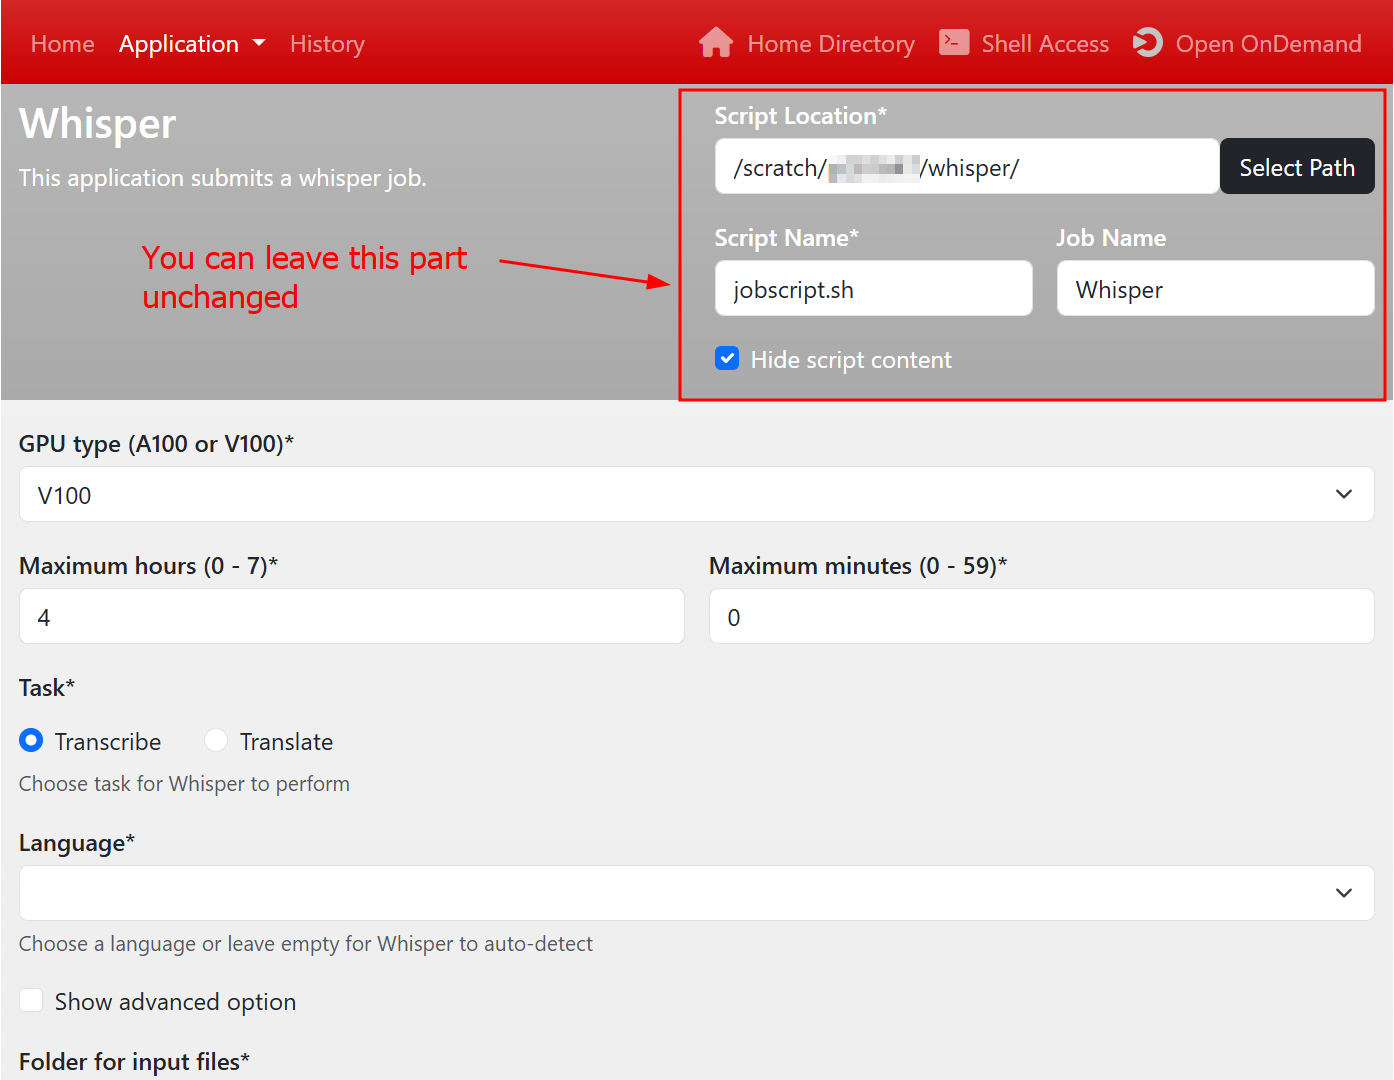
The first part of the interface asks you to specify where you want to save the script you are generating, what the script should be called, and what name to assign to the job when it runs. If you have followed this guide until this point, you can leave this part unchanged and move on to the next screenshot. If you have not followed the previous part of this guide, then the one requirement you need to fulfil for this part to work, is that the location where you want to save the script exists. To ensure this, select Select Path, then follow the instructions until you find the folder you want to use. Finally, you can leave the script content hidden, as it is irrelevant if you use the interface.
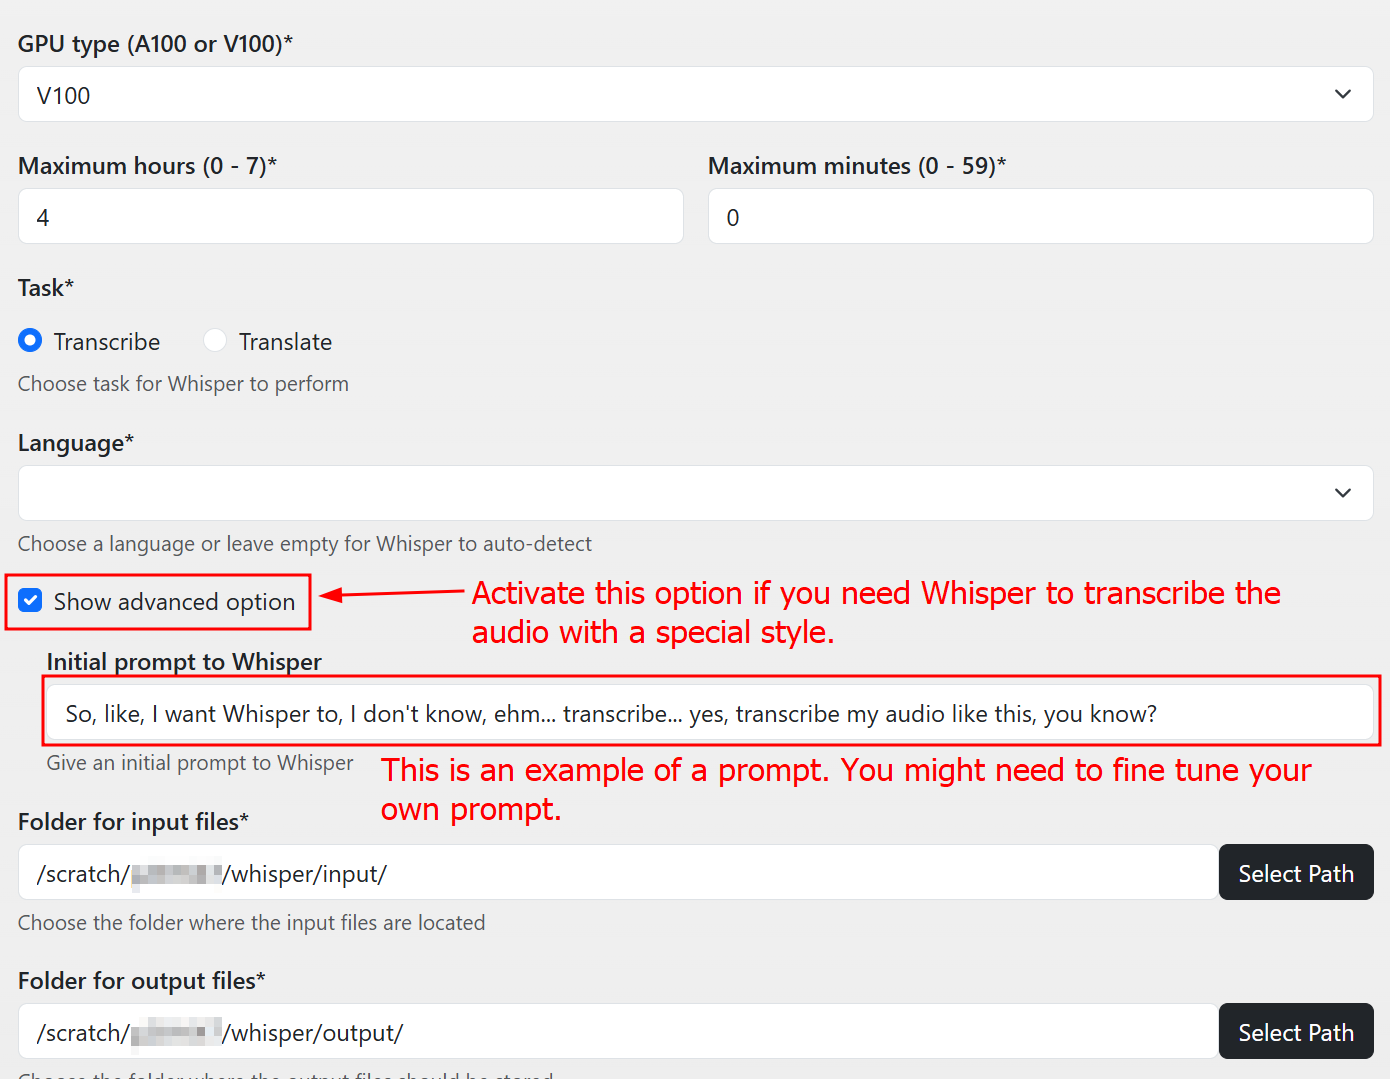
The second part of the interface is where you will select the instructions you wish to pass on to Whisper. Here is the explanation of the entry fields as they are numbered:
- GPU type:
- Maximum hours/minutes:
- Task:
- Language:
- Show advanced option:
- Folder for input files:
- Folder for output files:
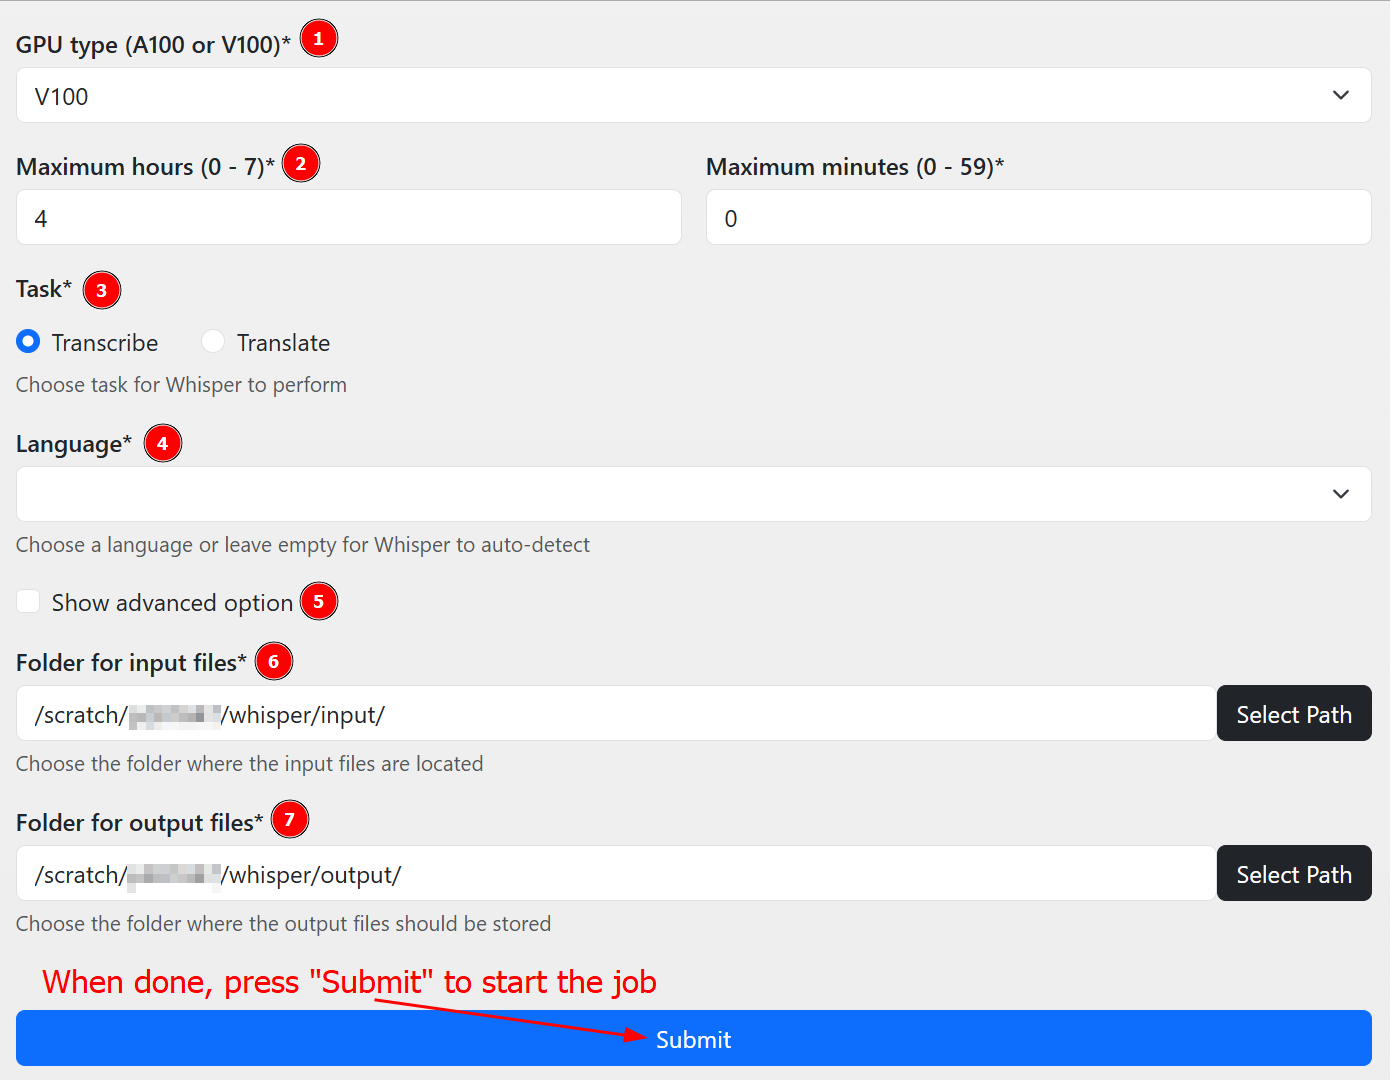
When you are done setting the instructions, press Submit to start the transcription job.
For those users that need the transcription to be done following a certain style, here is the option to add a prompt to the Whisper script. Please note that it might be necessary to try out a few prompts before the transcription works the way you want it to. We advise to choose a relatively short audio to experiment on, before launching the main job.
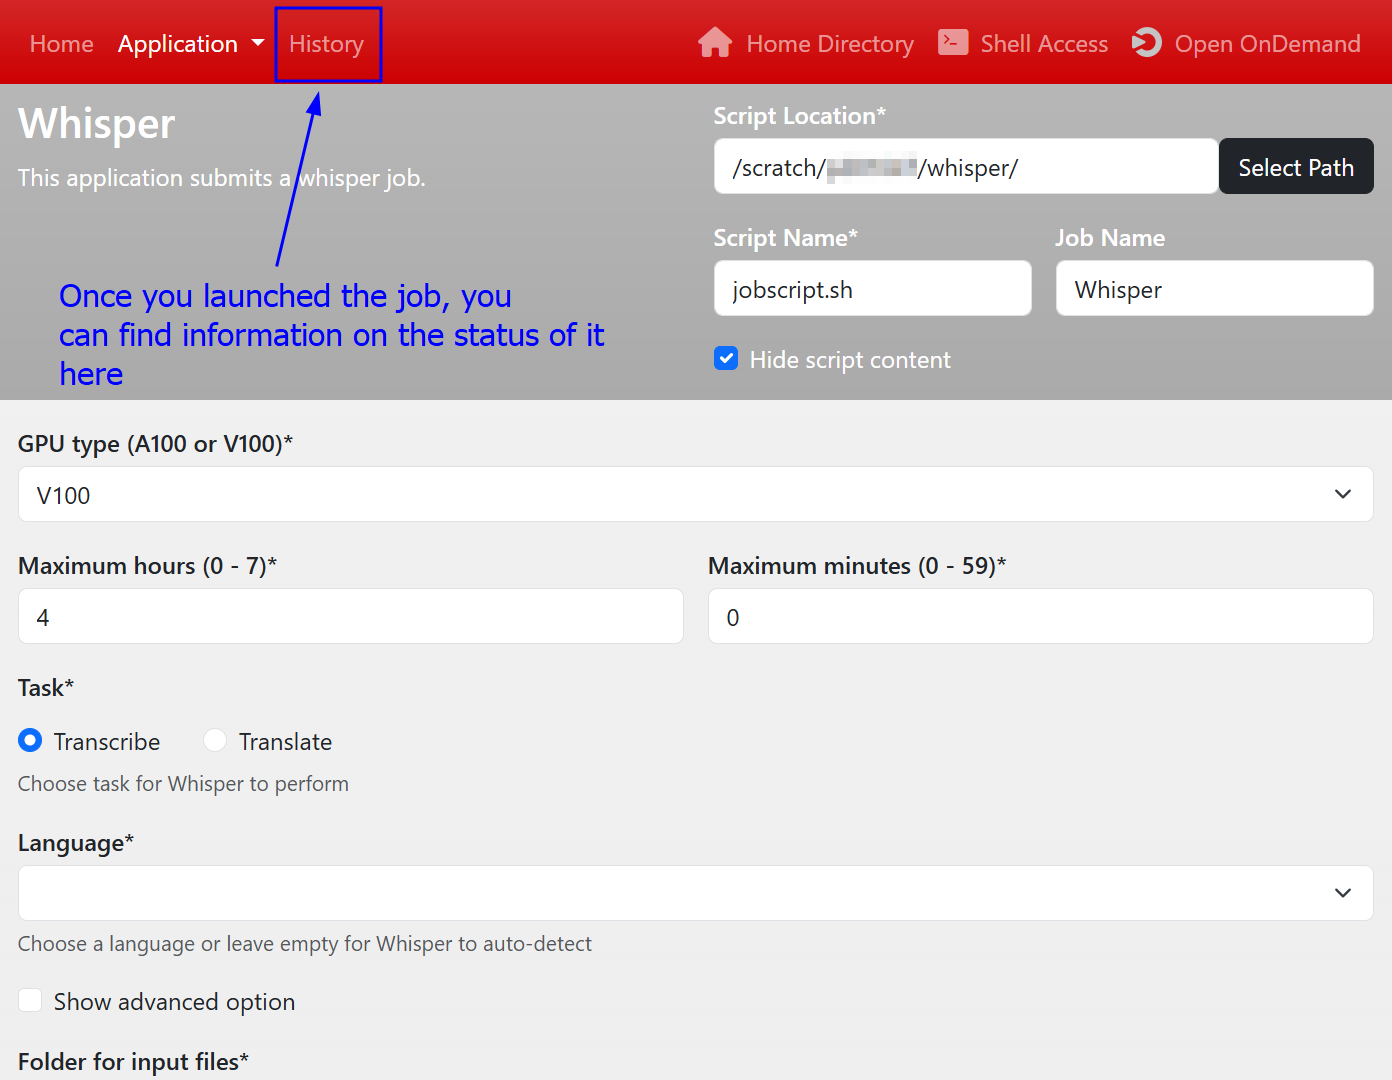
Once you are done creating the script and you pressed Submit, your job will have been added to the HPC queue. What this means is that your job will start running as soon as the requested resources are available in the cluster. This can take some time to happen. We advise to verify that the script is in the queue by selecting History, as shown in the screenshot. This will direct you to a new window.
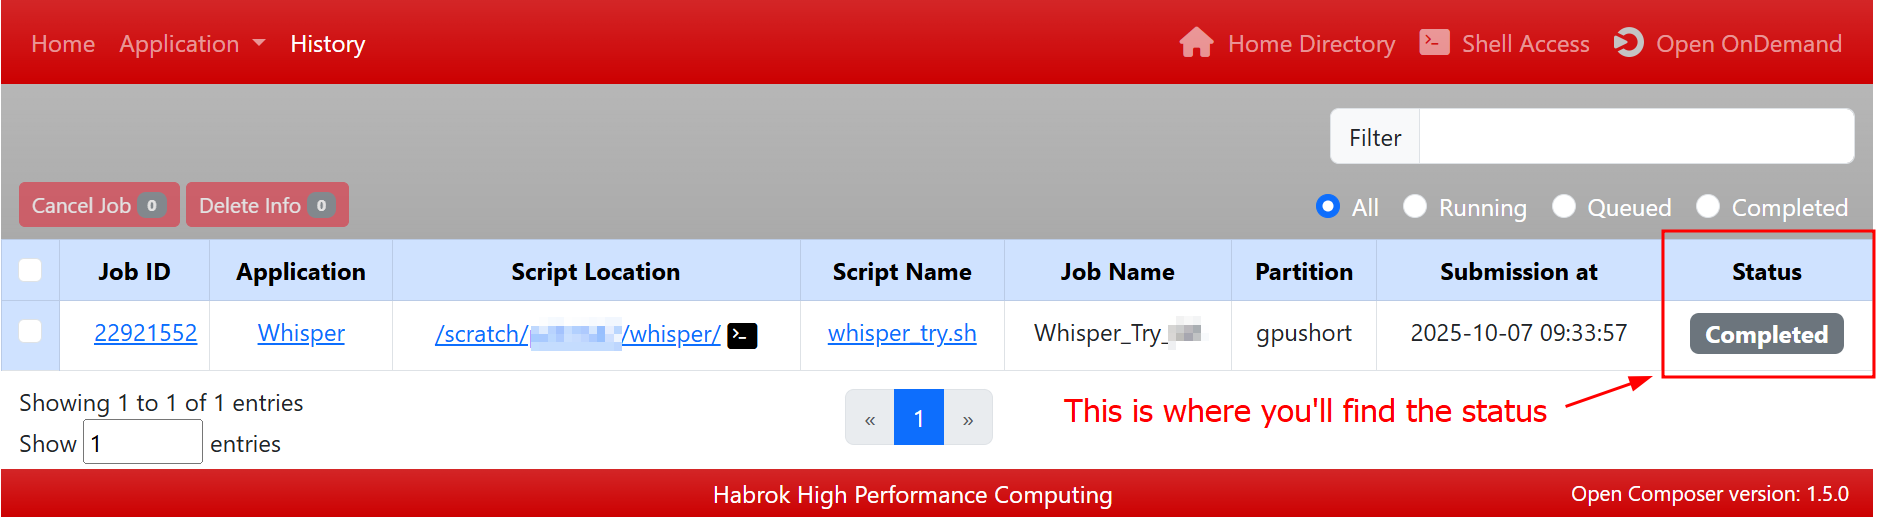
In this new window, you will see the details of your job, such as the JobID or the location of the script. What you care about at this stage is the status, as highlighted in the screenshot. There are three statuses you will most likely see:
- Queued
- Running
- Completed
Once your job shows the status COMPLETED, then you can go back to the main HPC page, select your scratch folder as you have done at the beginning of this guide and download the files in the “output” folder. Please verify that the transcription looks acceptable at first glance before deleting your input data. Once this step is completed, please read the next part of this guide, as there are some data management requirements that you need to follow.
OLD CONTENT
Now that you have your general script ready, all you have to do to run it is to simply copy the command below into your terminal and press enter:
sbatch whisper_runall.sh
The terminal will then confirm that your job has been received and assign it a jobID. The three messages below will appear in your terminal.
sbatch: Job sent to gpu partition
sbatch: Request for one of the default GPU types added
Submitted batch job <jobID>
Please keep the jobID handy, as that is the quickest way to check how the job is going and if it ran successfully. The figure below shows what the terminal will look like upon successfully launching the script. 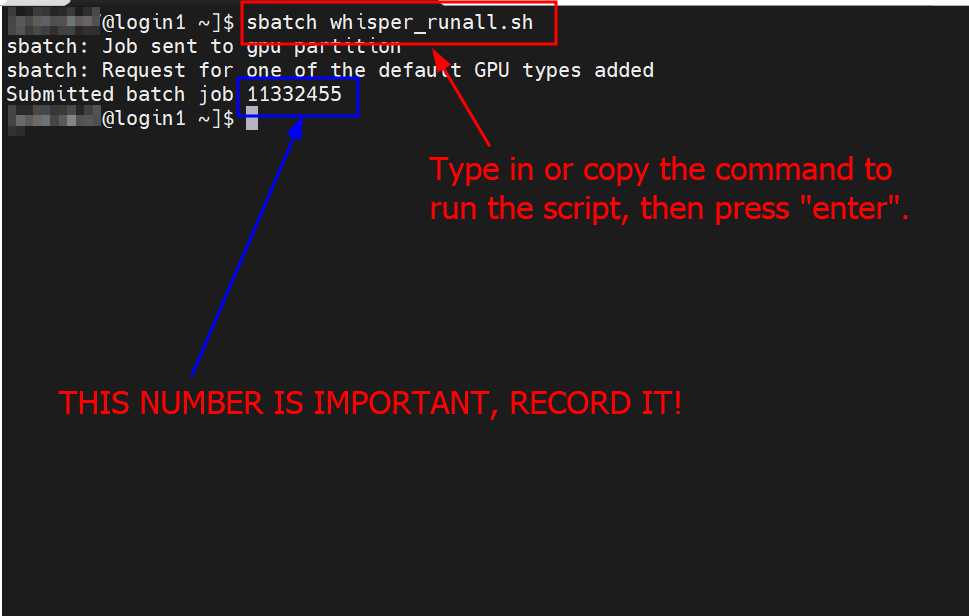
Once the job is complete, you will find the transcribed audio in the output folder you specified in the batch script.
Note: The script shown here will run Whisper on all audio files present in the folder whisper_audio. Please make sure to only have the files that you wish to transcribe in that folder.
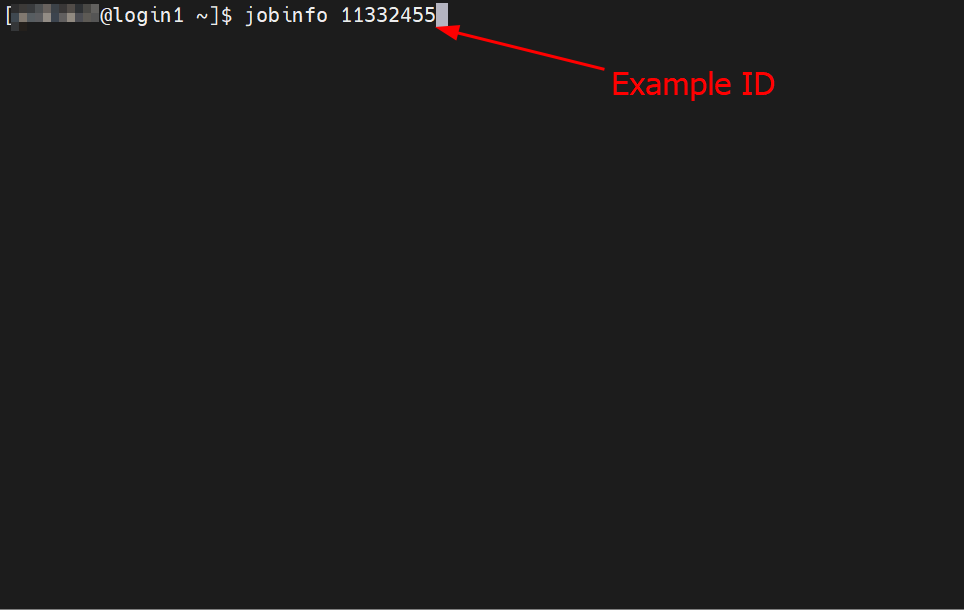
To check if the HPC has finished your job, type the following as shown in the figure below:
jobinfo <jobID>
This will show a list of all the information related to the job. What you want to check is if the “State” parameter says “COMPLETED”, and if the “Reserved walltime” is greater than the “Used walltime”. If both these values are as described here, it means that the HPC has finished processing your audio and that the job ran correctly. 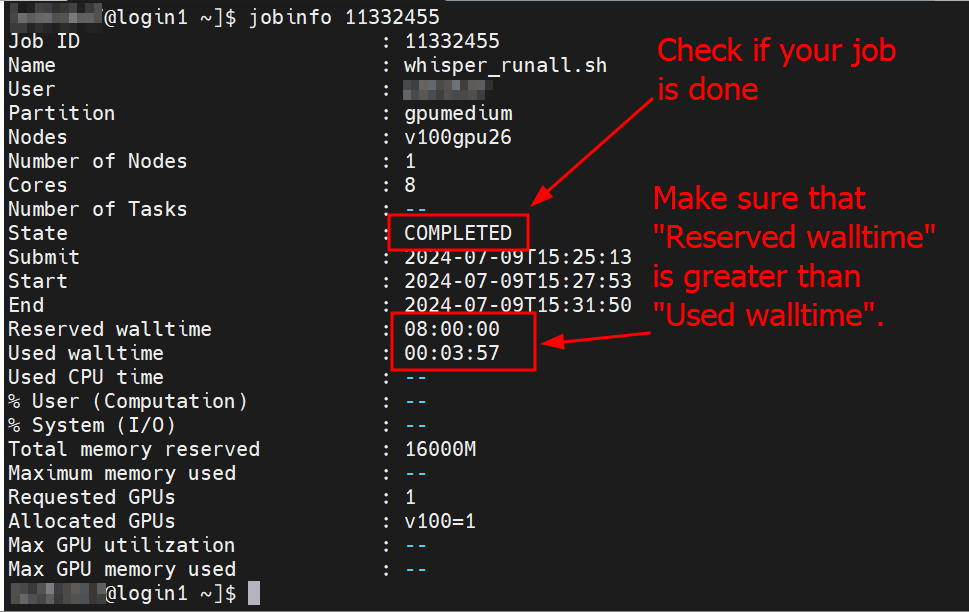
If you have launched multiple jobs (which we do not recommend), or if you simply want to see if the job is done without displaying the details of it, type in the following:
squeue -u (your_pnumber)
This command displays all the active jobs linked to your account. In the list that will appear, look for the jobID that you recorded and, under the column ST, read the letter written there. PD means the job is waiting for resources to be available, R means that the job is running, CG means that the job is completing. If your job does not appear in this list, it means that the HPC cluster has finished processing your audio.