These exercises have been set up for the basic course on using the Hábrók cluster. The course information can be found at Training.
These exercises can be followed by anyone having a Hábrók account, as the required data is available to all users. They may therefore be useful if you need to get started with using the cluster, but are not able to follow the basic course in person.
The accompanying course slides can be found on this wiki by clicking the link. More information on the cluster is also available on the wiki.
The hostname of the Hábrók cluster to use for the exercises is: login1.hb.hpc.rug.nl. Using one of the other login nodes will work as well.
The end goal of these exercises is to submit three jobs and study the
results. The first job will run some R code that generates an animated
GIF file of the Mandelbrot set. The second job will run a Python script
on climate data and generates both text output and a plot of temperature
data of a city. The third job will train a neural network based rice
classifiier, which uses many small files as input.
In the first part of the exercises we are going to use the command-line
to set up some directories and files for these three jobs. The directories
will contain all the input files (scripts, data) for the different jobs
that we are going to submit.
In the second part of the exercises we will write the job scripts for
all three jobs, actually submit them, and, finally, study their results.
Exercise 1 - Logging in and getting the input files
a. Logging in
Log in to the Hábrók cluster using MobaXterm with your university account. Note that you can only login after your account has been activated for the cluster.
A shared directory with all input files for the exercises is available in /scratch/public/hb-courses/basic/inputfiles. Run the following command to get your own copy of this inputfiles directory in your personal scratch directory (which is: /scratch/$USER):
cp -r /scratch/public/hb-courses/basic/inputfiles /scratch/$USER
Note that $USER is a so called environment variable, which will be changed by the system into your actual username.
So if your username would be 'alice', $USER would be transformed by the system in alice.
So the example cp command would be the same as if you had typed:
cp -r /scratch/public/hb-courses/basic/inputfiles /scratch/alice
You can just copy and paste the command given on the command line. Since Ctrl-c means break in Linux, it is not used for copy, and neither is Ctrl-v for paste. In MobaXterm copy and paste can be done in several ways:
Ctrl-Ins for copy, and Shift-Ins for paste.
Right mouse button menu: Copy and later paste.
Select text and use the middle mouse button to paste.
[username@login1 ~]$ cp -r /scratch/public/hb-courses/basic/inputfiles /scratch/$USER
[username@login1 ~]$
c. Check the data
Make sure that the directory is now available by running:
ls /scratch/$USER/inputfiles
You can again just copy and paste the code on the command line:
[username@login1 ~]$ ls /scratch/$USER/inputfiles
dataset.tar.gz  ex1_mandelbrot.R  ex2_inputfile.csv  ex2_script.py  train.py
[username@login1 ~]$
The ls commmand will display the files in the directory that has been given as the argument. As you can see from the output some files have been copied, and now reside in your private directory on /scratch.
Exercise 2 - Command-line: set up a directory for an R job
a. Create a job directory
Create a directory named jobs in your home directory.
After logging in you should be in the home directory. You can make sure of that by checking if you see the ~ character as the current location in your prompt like:
[username@login1 ~]$
If you are not, you can achieve this by running the command cd without arguments:
[username@login1 somelocation]$ cd
[username@login1 ~]$
In order to create the directory jobs we have to use the command mkdir with the directory name as the argument:
[username@login1 ~]$ mkdir jobs
[username@login1 ~]$
As you can see from the examples these commands will not result in any output. This means that they have been running successfully. If the commands were not successful you will see error messages.
b. List the files and directories
List the files and directories in your current working directory and verify that the new directory has been created.
You can run the command ls to see the files and directories. The newly created jobs directory should be visible.
[username@login1 ~]$ ls
jobs
[username@login1 ~]$
c. Change into this new directory.
You can use the command cd to change into this directory. The argument to cd must be the name of the directory you want to change into.
[username@login1 ~]$ cd jobs
[username@login1 jobs]$
Note that the name of the directory you are currently in has been changed from ~ (the home directory) to jobs.
d. Create a job directory
Create a directory named mandelbrot in the jobs directory.
We again have to use the command mkdir to create a directory. The argument will be mandelbrot. Make sure that you are running this from the jobs directory.
[username@login1 jobs]$ mkdir mandelbrot
[username@login1 jobs]$
e. Change to this subdirectory.
Change into the mandelbrot directory, you just created.
In order to change to this directory the command cd must be used. The argument will be mandelbrot.
[username@login1 jobs]$ cd mandelbrot
[username@login1 mandelbrot]$
Notice the location change in the prompt.
f. Copy mandelbrot R file
Copy the file from /scratch/$USER/inputfiles/ex1_mandelbrot.R to your current working directory.
Copying files can be achieved using the command cp. cp needs a source (possibly multiple sources) and a single destination. If multiple sources are used the destination must be a directory. The source is in this case a single file, for which we have been given the full path: /scratch/$USER/inputfiles/ex1_mandelbrot.R. The destination will be the current directory, given that we changed into this directory in the previous step.
The current directory can be reached in two ways. The difficult way is by specifying the full path, which would be $HOME/jobs/mandelbrot. The easy way is by making use of . as the destination; . always points to your current working directory. The command therefore looks as follows:
[username@login1 mandelbrot]$ cp /scratch/$USER/inputfiles/ex1_mandelbrot.R .
[username@login1 mandelbrot]$
g. Rename the R file
Rename the R file to mandelbrot.R.
Renaming and moving are similar operations and therefore the same command mv is used for both. The command needs a source (possibly multiple sources) and a single destination. If multiple sources are given the destination must be a directory.
In this case we only want to rename a single file, so there is a single source ex1_mandelbrot.R, which should be moved into mandelbrot.R. The command looks like:
[username@login1 mandelbrot]$ mv ex1_mandelbrot.R mandelbrot.R
[username@login1 mandelbrot]$
It is worth noting here that Linux does not use file extensions like .R to distinguish file types. The main purpose of the .R extension is to make it clear to humans that this file probably contains R code.
h. List the files
List the files in this directory and verify that the operation was successful.
The command to list file is, again, ls:
[username@login1 mandelbrot]$ ls
mandelbrot.R
[username@login1 mandelbrot]$
If the renaming using mv was successful, ls should show as output: mandelbrot.R.
i. Delete the original file
Delete the original file ex1_mandelbrot.R from /scratch/$USER/inputfiles.
Deleting files should be done using the command rm. The argument to rm must be the file(s) to delete. In this case we only want to delete a single file. Since we are in a directory in the home directory and we want to remove a file from the scratch file system we have to give the full path, starting with a /. The / at the beginning takes us to the root of the directory structure. Without this / the command would look for a directory scratch in the current location, which is the mandelbrot directory. The command looks like:
[username@login1 mandelbrot]$ rm /scratch/$USER/inputfiles/ex1_mandelbrot.R
[username@login1 mandelbrot]$
Exercise 3 - Command-line: set up a directory for a Python job
a. Change back to the jobs directory
Change back to the jobs directory.
The current directory should be $HOME/jobs/mandelbrot. We need to move back to $HOME/jobs. In order to move one step back in the directory hierarchy the destination should be ... The command to use is cd. So we can do the following:
[username@login1 mandelbrot]$ cd ..
[username@login1 jobs]$
b. Create another directory
Create another directory, for the second job that we will submit in the second part of the
exercises, called climate.
Directories can be made using the command mkdir. The directory that needs to be created will be the argument.
[username@login1 jobs]$ mkdir climate
[username@login1 jobs]$
c. Change into the job directory for the climate job
Change into the climate directory.
For changing into a directory we again need cd, with the directory as the argument:
[username@login1 jobs]$ cd climate
[username@login1 climate]$
Again note the location change at the prompt.
d. Move the python code to the job directory
Move the file ex2_script.py, which contains the Python code that we
need for our Python job, from /scratch/$USER/inputfiles into the
climate directory and rename it into script.py.
Hint: this can be done with a single command.
We want to move and rename the file at the same time. This means that we have to use the new name in the destination. The source file will be in /scratch/$USER/inputfiles. We have to combine this with the filename, separated by a /. The source is therefore: /scratch/$USER/inputfiles/ex2_script.py.
As the destination we will use the current directory (which should be climate, check this). The new name of the file must be script.py.
In a previous exercise we used . for pointing the the current directory. We can do that again, but we then will need to add a '/' to the '.', to separate the filename from the directory name. Like ./script.py.
In this case the './' can be omitted, because the filename as a destination is sufficient. This file will then be placed into the current directory, which should be climate. The actual command is:
[username@login1 climate]$ mv /scratch/$USER/inputfiles/ex2_script.py script.py
[username@login1 climate]$
We can check the result using ls if we want.
[username@login1 climate]$ ls
script.py
[username@login1 climate]$
e. Move the data file to your /scratch directory
Move the file ex2_inputfile.csv, which is the input data needed by
the Python script, from /scratch/$USER/inputfiles/ to
/scratch/$USER/climate.csv. Due to the size of this file, we do
not want to store it in our home directory. More details about
this will be explained during the second part.
The easiest way to move and rename the file is by using the given source and destination for the mv command. Like:
[username@login1 climate]$ mv /scratch/$USER/inputfiles/ex2_inputfile.csv /scratch/$USER/climate.csv
[username@login1 climate]$
Hint: Have you tried pressing the <Tab> key for auto-completion of directory and filenames?
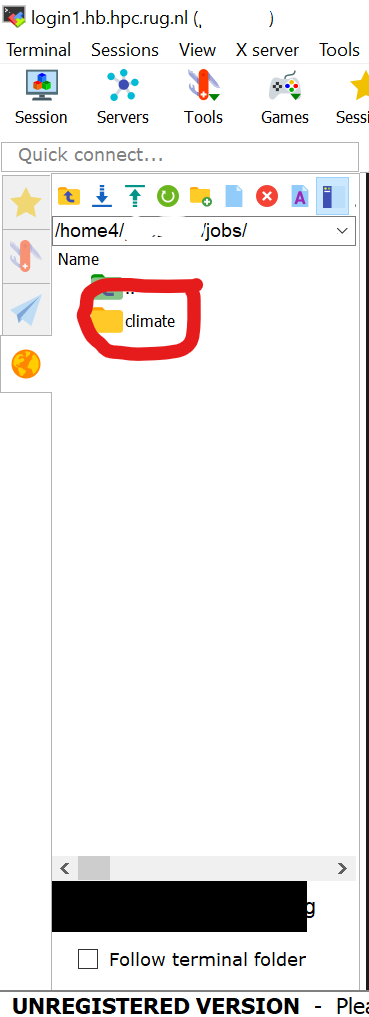
f. Use the MobaXterm file browser
Use the MobaXterm file browser (panel on the left) to change to the
climate directory (use F5 to refresh if the jobs folder is not
there).
If you do not have MobaXterm, for instance when working on a Linux or macOS system, you can use the HPC Web Portal, a graphical file browser / transfer client like FileZilla, or use the terminal.
The file browser in MobaXterm is highlighted in this screenshot:

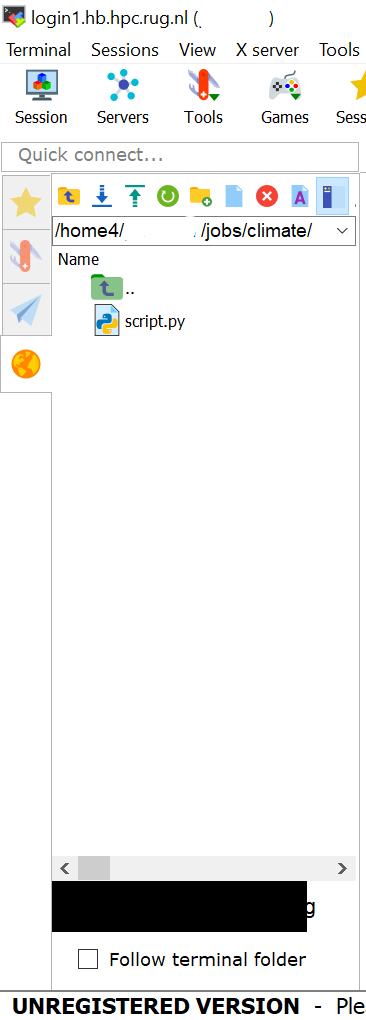
You can double click on the jobs directory to get into this.
After this you can click on the climate directory to get to the files inside. The end result should look like:
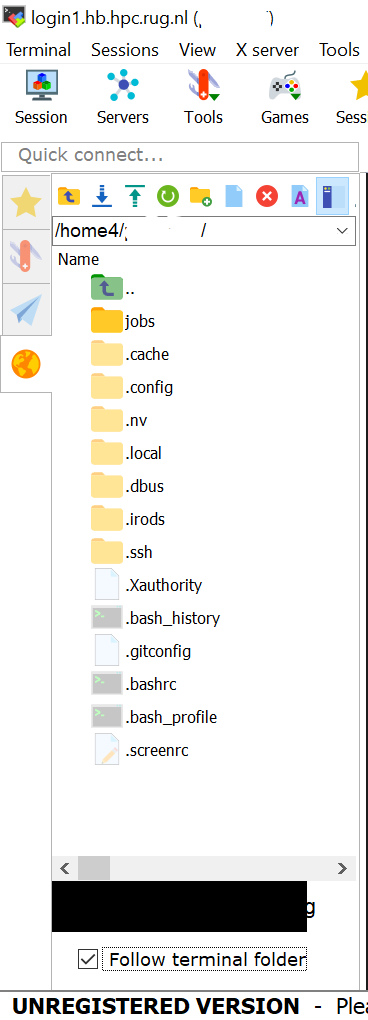
A thing that can be useful is to select the “Follow terminal folder” option. When this is selected the file browser will follow the location of the command line prompt. So if you cd to a directory, the file browser will go there as well.
g. Modify the Python script using the MobaXterm editor
Now open the Python script with the MobaXterm editor.
Hint: use the right mouse button and choose: open with default
text editor.
If you do not have MobaXterm, for instance when working on a Linux or macOS system, you can use the editor of the HPC Web Portal, make use of the edit functionality of some other graphical file transfer client (e.g. FileZilla), or use a terminal editor (e.g. nano or vi).
You can open up the MobaXterm text editor, by right-clicking on a file in the file browser. In the menu you then have to select “Open with default text editor”.

When you perform this action the file will be transferred to your computer and opened up in the text editor included with MobaXterm. In the preferences you can tell MobaXterm to use another editor if you like.
h. Modify the cityname in the Python script
Find the variable cityname in the Python code and replace its
current value (CITYNAME) by a (major) city of your choice. Note
that not all cities are included in the data, but Groningen
(case-sensitive!) should work.
When the file is opened in the text editor you should see this:
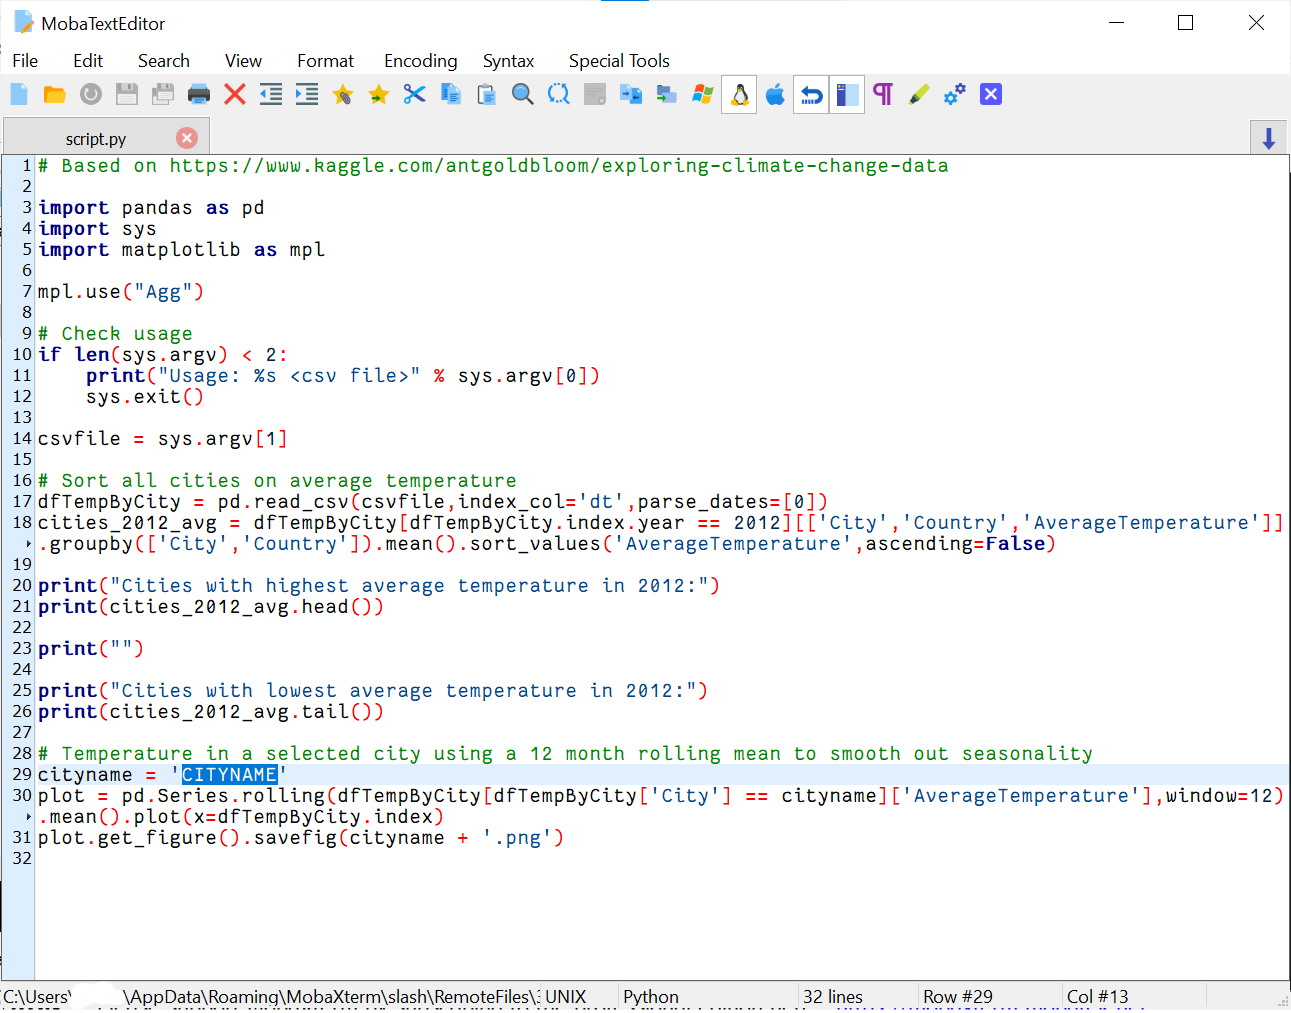
CITYNAME has been highlighted in blue. You should change this name into for example Groningen.
i. Save the file
Save the file and close the editor.
When you save the file the following window will pop up.
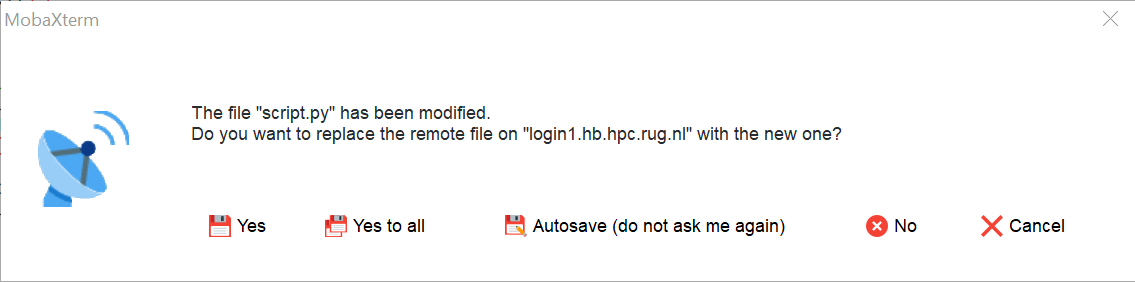
When you click on “Yes” the modified file will be copied back to the Hábrók cluster.
j. Use ls -l
Use the ls -l command and verify that the file was just changed
When you run ls -l you'll see the contents of the current directory, including details on the files.
[username@login1 climate]$ ls -l
total 4
-rw-r--r-- 1 username groupname 1057  2 apr 16:23 script.py
[username@login1 climate]$
The main thing to check is the modification date for the file. This should be very recent, as we changed the file.
For the curious people, the other things in the listing are described below. We won't go into more details, as those can be found online.
total: number of 1024 byte blocks in the file system for the listed items.
-rw-r–r–: file type, followed by permissions. The first '-' means it is a normal file. 'd' would be for directories and 'l' for links.
This is followed by three groups of 'r', 'w' or 'x', each of which may appear or not ('-'). The 'r' means read permissions, the 'w' means write permissions. The 'x' means execute permissions for files or “change into” permissions for a directory.
There are three groups of these. The first gives the permission for the owner, the second for the group, the last for anybody else on the system. It is possible to adjust these permissions.
The next number is the number of hard links to a file.
The first (user)name after that is the owner of the file, which is a user on the system.
The second (group)name after that is for the group of the file. Since each user has a private group, with only that user in it, most files will have the same name appearing for both owner and group. If you are a member of a different group, you may see another group there, which has more than one user. It is possible for the owner of a file to change the group of a file.
Next is the file size in bytes.
Modification date and time are shown.
File- or directoryname.
k. Verify the contents using the command less
Also verify it by opening the script with the less command.
'less' is a quick viewer for text files. You can open it using this command with the filename as an argument:
[username@login1 climate]$ less script.py
After this the viewer will open and show the text like:
# Based on https://www.kaggle.com/antgoldbloom/exploring-climate-change-data

import pandas as pd
import sys
import matplotlib as mpl

mpl.use("Agg")

# Check usage
if len(sys.argv) < 2:
    print("Usage: %s <csv file>" % sys.argv[0])
    sys.exit()

csvfile = sys.argv[1]

# Sort all cities on average temperature
dfTempByCity = pd.read_csv(csvfile,index_col='dt',parse_dates=[0])
cities_2012_avg = dfTempByCity[dfTempByCity.index.year == 2012][['City','Country','AverageTemperature']].groupby(['City','Country']).mean().sort_values('AverageTemperature',ascending=False)

print("Cities with highest average temperature in 2012:")
print(cities_2012_avg.head())

print("")

print("Cities with lowest average temperature in 2012:")
print(cities_2012_avg.tail())

# Temperature in a selected city using a 12 month rolling mean to smooth out seasonality
cityname = 'Groningen'
plot = pd.Series.rolling(dfTempByCity[dfTempByCity['City'] == cityname]['AverageTemperature'],window=12).mean().plot(x=dfTempByCity.index)
plot.get_figure().savefig(cityname + '.png')
script.py (END)
When the window is open you can use the arrow keys on your keyboard to scroll up and down. You can also use the PageUp and PageDown keys.
Another useful feature is searching for text using the '/' key. If you for example type: '/Cities' followed by the Enter key, the text Cities will be searched for and highlighted.
When you want to move to the next occurrence you use the 'n' key. To go back to the prevous occurence you can use uppercase 'N'.
The question you now probably have is how to leave less. This can be achieved by using the 'q' key.
l. Go back to your home directory
Go back to your home directory using the cd command.
Just issue the command 'cd', without arguments:
[username@login1 climate]$ cd
[username@login1 ~]$
Exercise 4 - Command-line: set up a directory for training a Neural Network
a. Change back to the jobs directory
Change back to the jobs directory.
The current directory should be $HOME. We need to move to $HOME/jobs, which we can do with cd like this:
[username@login1 ~]$ cd jobs
[username@login1 jobs]$
b. Create another directory
Create another directory, for the training job that we will submit in the second part of the
exercises, called rice_classifier.
Directories can be made using the command mkdir. The directory that needs to be created will be the argument.
[username@login1 jobs]$ mkdir rice_classifier
[username@login1 jobs]$
c. Change into the job directory for the training job
Change into the rice_classifier directory.
For changing into a directory we again need cd, with the directory as the argument:
[username@login1 jobs]$ cd rice_classifier
[username@login1 rice_classifier]$
Again note the location change at the prompt.
d. Move the python code to the job directory
Move the file train.py, which contains the Python code that we
need to train the neural network, from /scratch/$USER/inputfiles into the
rice_classifier folder.
The source file will be in /scratch/$USER/inputfiles. We have to combine this with the filename, separated by a /. The source is therefore: /scratch/$USER/inputfiles/train.py.
As the destination we will use the current directory (which should be rice_classifier, check this). In a previous exercise we used . for pointing the the current directory. We can do that again, and the file will then be placed into the current directory, which should be rice_classifier. The actual command is:
[username@login1 rice_classifier]$ mv /scratch/$USER/inputfiles/train.py .
[username@login1 rice_classifier]$
We can check the result using ls if we want.
[username@login1 rice_classifier]$ ls
train.py
[username@login1 rice_classifier]$
e. Move the archive file to your /scratch folder
Move the archive file dataset.tar.gz, which is the input data needed by
the training script, from /scratch/$USER/inputfiles/ to
/scratch/$USER/dataset.tar.gz. Due to the size of this file, we do
not want to store it in our home directory. More details about
this will be explained during the second part.
The easiest way to move and rename the file is by using the given source and destination for the mv command. Like:
[username@login1 rice_classifier]$ mv /scratch/$USER/inputfiles/dataset.tar.gz /scratch/$USER/
[username@login1 rice_classifier]$
Hint: Have you tried pressing the <Tab> key for auto-completion of directory and filenames?
f. Check out the contents of the training script using the command less
If curious, have a look at the Neural Network training algorithm by opening the script with the less command.
'less' is a quick viewer for text files. You can open it using this command with the filename as an argument:
[username@login1 rice_classifier]$ less train.py
After this the viewer will open and show a text file starting with:
import os
import time

import numpy as np
from matplotlib import pyplot as plt
from tensorflow import keras
g. Go back to your home directory
Go back to your home directory using the cd command.
Just issue the command 'cd', without arguments:
[username@login1 rice_classifier]$ cd
[username@login1 ~]$
We copied/moved everything we need from /scratch/$USER/inputfiles,
so use the rmdir command to remove the entire directory. Does this work?
We can remove empty directories using rmdir, where we have to supply the directory or directories to remove as arguments. In this case we can do this in one line:
[username@login1 climate]$ rmdir /scratch/$USER/inputfiles
rmdir: failed to remove ‘/scratch/username/inputfiles’: Directory not empty
[username@login1 climate]$
Note that the directory apparently is not fully empty. rmdir won't work in that case.
In most cases you probably would want to perform the action in a few steps, like:
[username@login1 climate]$ cd /scratch/$USER
[username@login1 username]$ ls
inputfiles
[username@login1 username]$ rmdir inputfiles
rmdir: failed to remove ‘inputfiles’: Directory not empty
In this way we first check the existence of the directory we want to remove. Of course the result is the same. The directory can't be removed using rmdir.
b. Show hidden files
Open the manual page for the ls command, using man, and find the option for ls
that shows hidden files too.
Run the command with this option in the inputfiles directory in /scratch/$USER. Does that explain why
rmdir command did not work?
The command for looking at the manual pages for commands is man. You have to give the command you wan't to know about as an argument. In this case:
[username@login1 username]$ man ls
This will result in the following page:
LS(1)                            User Commands                           LS(1)

NAME
       ls - list directory contents

SYNOPSIS
       ls [OPTION]... [FILE]...

DESCRIPTION
       List  information  about  the FILEs (the current directory by default).
       Sort entries alphabetically if none of -cftuvSUX nor --sort  is  speci‐
       fied.

       Mandatory  arguments  to  long  options are mandatory for short options
       too.

       -a, --all
              do not ignore entries starting with .

       -A, --almost-all
              do not list implied . and ..

       --author
 Manual page ls(1) line 1 (press h for help or q to quit)
As you can see from the help information at the bottom the 'q' key will exit man.
You can use the arrow keys, or PageUp and PageDown to scroll through the information.
As with less, you can search using the '/' key, after which you have to type the search text.
'n' will go to the next occurrence and 'N' back to the previous one.
The information we are looking for is -a. This will show files starting with '.', which are normally hidden from view.
If we run it in the inputfiles directory we see a (hidden) file:
[username@login1 inputfiles]$ cd /scratch/$USER/inputfiles
[username@login1 inputfiles]$ ls -a
.  ..  .surprise
[username@login1 inputfiles]$
c. Use a command to recursively delete the entire directory anyway
Use the rm command to recursively delete the entire directory anyway.
The command to use instead of rmdir is rm. So lets try this instead:
[username@login1 inputfiles]$ cd /scratch/$USER
[username@login1 username]$ rm inputfiles
rm: cannot remove ‘inputfiles’: Is a directory
As you might have expected this also does not work. rm will not remove directories, without explicitly being told to do so. For this we need the option -r. This option will recursively delete directories, including files inside. This option can therefore be dangerous to use. Linux does not deploy a thrash bin for keeping deleted files!
[username@login1 username]$ rm -r inputfiles
[username@login1 username]$
We can check with ls what the result of the rm action is:
[username@login1 username]$ ls
climate.csv  dataset.tar.gz
[username@login1 username]$
Final result
After these four exercises, your file structure should look like that on
slide 35 of the presentation, shown below:

Please make sure it does!
In this exercise we will generate an animated image file showing an iterative generation of the Mandelbrot fractal using some code in R. You can find more details on the Mandelbrot set here.
The main purpose of the exercise is to learn how to submit R code using a job script to the cluster. Having a nice image as a result is a bonus.
a. Go to the job directory for the Mandelbrot job
Go to the job directory for the Mandelbrot job that you prepared in the first part.
Changing directories has to be done using cd. A two step approach works fine here:
[username@login1 somedirectory]$ cd
[username@login1 ~]$ cd jobs/mandelbrot/
[username@login1 mandelbrot]$
Note the extra / that appears after mandelbrot in the cd command. This / was inserted by the <Tab> autocompletion. The command will work with or without the extra / at the end.
b. Create a job script for the mandelbrot calculation
Create a new job script. E.g. by going to the right directory in the
MobaXterm file browser and clicking on the “Create new file”
button. Or you can use nano [filename] , where [filename]
should be replaced by the name of the new file.
You can choose any filename you like. Once you have created the file or have the editor open, move to the next step.
Since we already used the MobaXterm editor in a previous exercise, we will now look at how to use nano. Note that you should use the editor, which works best for you!
The main advantage of nano is that it is a relatively simply to use editor, available on the command line. So you can always use this if other options are not available.
nano can be started with the name of a file as an argument. nano will open this file, or start a new one if the file does not exist. So we can use the following to create a jobscript named mandelbrot.sh.
[username@login1 mandelbrot]$ nano mandelbrot.sh
This will start nano, and you will be presented with the following screen:
  GNU nano 2.3.1             File: mandelbrot.sh


                                  [ New File ]
^G Get Help  ^O WriteOut  ^R Read File ^Y Prev Page ^K Cut Text  ^C Cur Pos
^X Exit      ^J Justify   ^W Where Is  ^V Next Page ^U UnCut Text^T To Spell
In this screen you can just start typing at the cursor. You can move around the cursor using the arrow keys (given that there is text to move to). Note that the mouse will not work!
The main commands are listed at the bottom of the screen. The '^' symbol means the 'Ctrl' key. So 'Ctrl' + 'x' will mean Exit. 'Ctrl' + 'o' will write the file to disk (normally denoted as 'Save'). 'Ctrl' + 'G' will display some useful help information. This includes the way to search for text, the way to delete lines and much more.
We will now move to the next step for actually filling in the lines we need.
c. Construct the job script
Open this job script with an editor (MobaXterm editor or nano) and make sure it will do the following:
Define the following requirements / properties for the job:
Maximum wall clock time of 20 minutes.
1 core on a single node.
Memory limit of 1 gigabyte.
Nice name.
Perform the following actions:
Load the R module for version R/4.2.1-foss-2022a
Start R using the command: Rscript mandelbrot.R
Did you forget to include the Shebang! line at the top of the file? Better do it now, then.
You can write the jobscript with the text editor you prefer. Note that instructions for the batch scheduler have to be given in lines starting with #SBATCH. You should not make typos in these lines, as they may either be ignored (if you get the #SBATCH wrong) or will lead to errors.
Here is the information you need to put in:
Job properties
Wallclock time of 20 minutes. The option is
--time, the time has to be specified in the format
[days]-hours:minutes-seconds, where the number of days is optional. For 20 minutes it will look like:
#SBATCH --time=00:20:00
One core on a single node. Since this is the default, we could leave it out. To make it more clear we can add it explicitly using the sbatch options
--nodes for the number of computers/nodes, and
--ntasks-per-node for the number of cores per computer.
#SBATCH --nodes=1
#SBATCH --ntasks-per-node=1
The memory limit has to be specified using the option
--mem. This will specify the amount of memory we want to have on each computer used for our job. The option needs a memory specification. By default this will be in megabytes, unless we specify a different unit. Units can be kilobytes (K), megabytes (M), gigabytes (G) or terabytes (T). We need 1 gigabyte
#SBATCH --mem=1G
In order to distinguish the job from other jobs in the scheduler a name can be attached to it. This is done using the option
--job-name.
#SBATCH --job-name=mandelbrot_job
Job actions
Next we need to put in the lines that will be executed when the job starts.
First we have to load the module for R. That needs to be done using the
module command. That command needs two arguments. The first is the subcommand that we want to run, the second the argument for that subcommand. In this case we want to load a module. This can be done using the
load or
add subcommand. These subcommands are exactly the same. The second name is the name of the module, which is in this case
R/4.2.1-foss-2022a.
The whole line is:
module load R/4.2.1-foss-2022a
The second action is to run R, using
Rscript, which will execute the R code in the file we give as an argument. This line is already given:
Rscript mandelbrot.R
Shebang!
The final line that we need, but which should be at the top of the script, is the so called shebang:
#!/bin/bash
This line tells the system which program should read and execute the script. In most cases the bash interpreter is
a good choice. In a bash script you can use the same commands you could give on the command line directly.
You now have put them together in a script, which will execute them in the order given.
The ordering of the script should be:
Shebang: #!/bin/bash
Sbatch lines: #SBATCH ….
Job actions: module load …, etc.
For clarity you can insert empty lines in between the job actions. Comments can be added using lines starting with #. E.g.:
# Load the module for R
Lines starting with # will not be executed by the bash interpreter. This is also true for the lines starting with #SBATCH. These are ignored by bash, and only recognized and translated into job properties by the sbatch command of the scheduling system.
The full script will look like follows:
#!/bin/bash
#SBATCH --time=00:20:00
#SBATCH --nodes=1
#SBATCH --ntasks-per-node=1
#SBATCH --mem=1G
#SBATCH --job-name=mandelbrot_job

# Load the module for R
module load R/4.2.1-foss-2022a

# Run R using the code from mandelbrot.R
Rscript mandelbrot.R
Finally save the full jobscript to disk.
d. Submit the job
Submit the job. The job ID will be displayed after you submitted the job.
The job script must be submitted using the command sbatch. The argument for sbatch is the name of the jobscript. Since the jobscript in these solutions has been named mandelbrot.sh, this will be the argument to use in this example.
[username@login1 mandelbrot]$ sbatch mandelbrot.sh
Submitted batch job 1450128
[username@login1 mandelbrot]$
The id of the job is returned by the command. In this case it is 1450128. Keep in mind that you don't have to remember the id. You can find back the job id in other ways.
You may encounter errors if the job specification in the #SBATCH lines is wrong. For example
batch: unrecognized option '--memory=4G'
Try "sbatch --help" for more information
means that we put the memory requirement in using the wrong sytnax of --memory, instead of --mem.
If we leave out a '-' sign in the #SBATCH line we get:
sbatch mandelbrot.sh
sbatch: error: Invalid --distribution specification
In general, if you get complaints from sbatch, check the job properties for syntax errors.
e. Find the job with squeue
Find the job with squeue and check its status. If it is not there, your job might have finished already.
In order to look at running jobs the command squeue can be used. If you run it without arguments it will display all the jobs in the system. When you try this, you will see that the list is unmanageably long.
To only look at the jobs you've submitted yourself you can use the option -u and specify the username as an argument. Like:
[username@login1 mandelbrot]$ squeue -u $USER
             JOBID PARTITION     NAME     USER ST       TIME  NODES NODELIST(REASON)
           1450128 regularsh mandelbr username  R       0:02      1 node107
[username@login1 mandelbrot]$
In this overview you can see the jobid, the partition the job is running in, the username, the status (R is running, PD means pending), the time the job has been running, the number of nodes/computers requested for the job and the node the jobs is running on or the reason it is still waiting.
The most common reasons for waiting can be lack of Priority or Resources.
When the job has finished it will disappear from the overview:
[username@login1 mandelbrot]$ squeue -u $USER
             JOBID PARTITION     NAME     USER ST       TIME  NODES NODELIST(REASON)
[username@login1 mandelbrot]$
f. Study the resulting output file
Study the resulting output file to see if everything went smoothly.
When the job starts the output file is generated and information is being appended to it while the job is running. When you haven't specified a different output file name the output file will be called slurm-[jobid].out.
In this case the outputfile will be slurm-10674730.out. We can use the commands less (which can scroll through the file) or cat to look at the output. cat will just dump the contents of the file to the terminal.
[username@login1 mandelbrot]$ cat slurm-10674730.out
[1] "Starting Mandelbrot calculation"
[1] "Finished, wrote output to Mandelbrot.gif"

###############################################################################
Hábrók Cluster
Job 1450128 for user 'username'
Finished at: Mon May 15 18:44:24 CEST 2023

Job details:
============

Job ID              : 1450128
Name                : mandelbrot_job
User                : p233780
Partition           : regularshort
Nodes               : node107
Number of Nodes     : 1
Cores               : 1
Number of Tasks     : 1
State               : COMPLETED
Submit              : 2023-05-15T18:44:19
Start               : 2023-05-15T18:44:20
End                 : 2023-05-15T18:44:24
Reserved walltime   : 00:20:00
Used walltime       : 00:00:04
Used CPU time       : 00:00:01 (efficiency: 42.73%)
% User (Computation): 81.80%
% System (I/O)      : 18.14%
Mem reserved        : 1G
Max Mem (Node/step) : 0.00  (Node unknown, N/A)
Full Max Mem usage  : 0.00
Total Disk Read     : 0.00
Total Disk Write    : 0.00

Acknowledgements:
=================

Please see this page for information about acknowledging Hábrók in your publications:

https://wiki.hpc.rug.nl/habrok/introduction/scientific_output

################################################################################
The first two lines show the output of the job itself. The rest is the status output which is appended to each job output once a job has stopped. The details of this output will be described in the next step.
A common error you may encounter is that Rscript cannot find the R code you want to run. In these exercises the R file must be named mandelbrot.R, but it is easy to misspell this name. This will lead to an error message in the output like:
Fatal error: cannot open file 'mandelbort.R': No such file or directory
The way to fix errors like this is to either correct the name in the jobscript (like you should in the example above), or to rename the actual file to the file with the expected name.
g. Use jobinfo
Use the jobinfo command to find the maximum memory usage of your job.
The command jobinfo will show detailed information on the waiting, running or finished job. It needs the jobid as the argument.
[username@login1 mandelbrot]$ jobinfo 1450128
Job ID              : 1450128
Name                : mandelbrot_job
User                : p233780
Partition           : regularshort
Nodes               : node107
Number of Nodes     : 1
Cores               : 1
Number of Tasks     : 1
State               : COMPLETED
Submit              : 2023-05-15T18:44:19
Start               : 2023-05-15T18:44:20
End                 : 2023-05-15T18:44:24
Reserved walltime   : 00:20:00
Used walltime       : 00:00:04
Used CPU time       : 00:00:01 (efficiency: 42.73%)
% User (Computation): 81.80%
% System (I/O)      : 18.14%
Mem reserved        : 1G
Max Mem (Node/step) : 0.00  (Node unknown, N/A)
Full Max Mem usage  : 0.00
Total Disk Read     : 0.00
Total Disk Write    : 0.00
[username@login1 mandelbrot]$
The following items are especially useful:
Cores: The number of CPU cores used for the job
State: 'COMPLETED' means the job finished without noticeable issues. This does not necessarily mean that the calculation ran correctly, only that the scheduler did not encounter issues, and that the job script exited normally. If the state is 'TIMEOUT' it means the job took longer than the requested time and was forcefully quit. 'FAILED' means that the jobscript returned with an error code, which was produced by the last action in your script.
Used walltime: The time the job was running.
Used CPU time: The time used up by the CPU cores working on the job. The efficiency shown after this is the time spent by the CPU cores divided by the walltime and divided by the number of CPU cores requested. Ideally it should be close to 100%. In this case the job took only a few seconds, so the starting overhead affects the efficiency.
If the efficiency is low for jobs requesting multiple CPU cores this may mean that your program is not running in parallel. Check in the program documentation if the program really supports parallelism and that you started it in the right way.
Max Mem used: The memory actually used by the running job. Since this number is obtained by checking the memory usage at regular intervals it may underestimate the actual memory usage. This is clear from this output as the job finished before the memory usage was actually measured.
h. Copy the resulting image file back to your local system
Copy the resulting gif image file to your local desktop or laptop for inspection.
The Mandelbrot.gif image file can be transfered to your local computer by using the MobaXterm file browser. You will have to move inside the file browser to the mandelbrot directory. And then you can select the Mandelbrot.gif image and either click on the download arrow, or drag it to a location on your local computer.
When you open the file on your local computer you will see an animated version of the Mandelbrot fractal set.
Details on this calculation can be found here.
i. Produce the same image with higher resolution
Produce the same gif file again, but this time with a resolution of
2000×2000. You can do this by editing the mandelbrot.R file and
changing the dx and dy value. If you do not want to overwrite
the existing gif file, you could also change the filename of the
gif file in the last line of the script. Finally, resubmit the
job.
For this exercise we have to modify mandelbrot.R using a text editor. In this file we have to change the lines setting the values for dx and dy and set the value for both to 2000.
We can also change the filename in the write.gif statement to Mandelbrot_large.gif. If we do this it is best to also change the filename in the output message.
The resulting code should look like:
library(caTools)           # external package providing write.gif function
print("Starting Mandelbrot calculation")
jet.colors <- colorRampPalette(c("#00007F", "blue", "#007FFF", "cyan", "#7FFF7F",
                                 "yellow", "#FF7F00", "red", "#7F0000"))
dx <- 2000                  # define width
dy <- 2000                  # define height
C <- complex( real=rep(seq(-2.2, 1.0, length.out=dx), each=dy ),
              imag=rep(seq(-1.2, 1.2, length.out=dy), dx ) )
C <- matrix(C,dy,dx)	   # reshape as square matrix of complex numbers
Z <- 0                     # initialize Z to zero
X <- array(0, c(dy,dx,20)) # initialize output 3D array
for (k in 1:20) {          # loop with 20 iterations
  Z <- Z^2+C               # the central difference equation
  X[,,k] <- exp(-abs(Z))   # capture results
}
write.gif(X, "Mandelbrot_large.gif", col=jet.colors, delay=100)
print("Finished, wrote output to Mandelbrot_large.gif")
After this we can resubmit the job using sbatch:
[username@login1 mandelbrot]$ sbatch mandelbrot.sh
Submitted batch job 1450124
[username@login1 mandelbrot]$
j. Fix any issues you encounter
Study the output file again and fix any issues that you encounter.
If we look at the job output we will see error messages. Below are a few relevant lines:
...
[1] "Starting Mandelbrot calculation"
/var/spool/slurmd/job1450135/slurm_script: line 12: 563675 Killed                  Rscript mandelbrot.R
slurmstepd: error: Detected 1 oom-kill event(s) in StepId=1450135.batch. Some of your processes may have been killed by the cgroup out-of-memory handler.
...
...
State               : OUT_OF_MEMORY
...
The first lines show the error message from the scheduler which has detected that the system killed the running program, because it used more memory than it was allowed to. This is also reflected in the State line for the finished job.
In order to fix this we have to increase the memory request. Unfortunately we just have to guess how much is actually needed. 4GB of memory should do the trick. For this we need to change the memory request in the job script. This line now should look like:
#SBATCH --mem=4G
If we then resubmit the job, it should run fine and generate Mandelbrot_large.gif, which is now a 2000×2000 pixel image of the mandelbrot fractal.
In this exercise we will run a Python script that will analyze some temperature data for cities around the world stored in a csv file. The result will be a graph showing the average temperature over a period of time for the city of your choosing.
a. Go to the climate job directory
Go to the job directory for the climate job that you prepared in
the first part.
We again have to use the cd command to achieve this. To do this in one action, without moving back to the home directory first (using cd without arguments) we can use the following command:
[username@login1 mandelbrot]$ cd ~/jobs/climate
[username@login1 climate]$
Here we make use of ~ as a shortcut for the home directory. This needs to be followed by / to make clear that what follows is inside this directory. And then we specify the directory we need to move to.
b. Start editing a new file for the job script
Create a new and empty file in the editor that will be the job script for this
exercise. Choose any filename you want.
Open up your preferred editor to work on a new file, just as in the previous exercise.
c. Complete the job script
Construct the job script in the editor and make sure it will do the
following:
Define the following requirements / properties for the job:
Maximum wall clock time of 10 minutes.
1 core on 1 node.
Memory limit of 2 gigabyte.
Nice name.
Performs the following actions:
Purge any existing modules from the environment to make sure we have the right environment for the job. If we do not do this any modules loaded while submitting the job will be also loaded when the jobscript runs. This can easily lead to issues.
Load the modules:
Python/3.10.8-GCCcore-12.2.0
matplotlib/3.7.0-gfbf-2022b
List the loaded modules for logging the software that was used in the job output.
Run: python script.py PATH_TO_CSV_FILE
Replace PATH_TO_CSV_FILE by the full path to the climate.csv file.
Hint: see the schematic overview shown after exercise 4.
The command echo can be used to display some text. This command is useful for diagnostic messages in the job script. Add the following lines to your script before the command will be run that the message refers to:
echo Overview of modules that are loaded
echo Starting Python program
You forgot the Shebang! again, didn't you? Back to top…
For the job requirements we need the following lines:
Wall clock time of 10 minutes:
#SBATCH --time=00:10:00
1 Core on one node
#SBATCH --nodes=1
#SBATCH --ntasks-per-node=1
Memory limit of 2 gigabyte
#SBATCH --mem=2G
Nice name
#SBATCH --job-name=Climate_job
For the actions we need to add the following lines:
Purging existing modules from the environment can be done using the
purge subcommand for
module.
module purge
Load the two modules given:
module load Python/3.10.8-GCCcore-12.2.0
module load matplotlib/3.7.0-gfbf-2022b
For listing the loaded modules the subcommand
list must be used:
module list
We need to start the Python code using:
python script.py /scratch/$USER/climate.csv
The diagnostic messages are given, but have to be moved to the right location, which is shown in the full job script later:
echo Overview of modules that are loaded
echo Starting Python program
And finally we should have the shebang at the beginning of the job script:
#!/bin/bash
We need to combine all of this into a job script. This job script should look like:
#!/bin/bash
#SBATCH --time=00:10:00
#SBATCH --nodes=1
#SBATCH --ntasks-per-node=1
#SBATCH --mem=2G
#SBATCH --job-name=Climate_job

module purge
module load Python/3.10.8-GCCcore-12.2.0
module load matplotlib/3.7.0-gfbf-2022b

echo Overview of modules that are loaded
module list

echo Starting Python program
python script.py /scratch/$USER/climate.csv
Note the use of blank lines to make it more readable.
d. Make sure you have a valid city name and submit the job
Make sure that you have replaced CITYNAME in script.py by a
major city (see exercise 3h of the first part), and submit the job.
Modifying the city name is already explained in exercise 3h. For submitting the job we need to use sbatch, with as argument the name of the job script. In this example it was named climate.sh
[username@login1 climate]$ sbatch climate.sh
Submitted batch job 1450177
[username@login1 climate]$
The jobid is returned, which we can use for jobinfo later on.
e. Use squeue or jobinfo for the job status
Use squeue or jobinfo to find the job status and wait until it completes.
If you want to find back your jobs using squeue it is best to use the -u option to limit it to a specific user. Like:
[username@login1 climate]$ squeue -u $USER
             JOBID PARTITION     NAME     USER ST       TIME  NODES NODELIST(REASON)
           1450181 regularsh Climate_  username  R      0:00      1 node107
[username@login1 climate]$
In this case the job is still running. When it disappears from squeue the job will have finished.
We can also check the status using jobinfo, but then we have to give the jobid as an argument:
[username@login1 climate]$ jobinfo 1450181
Job ID              : 1450181
Name                : Climate_job
User                : p233780
Partition           : regularshort
Nodes               : node107
Number of Nodes     : 1
Cores               : 1
Number of Tasks     : 1
State               : COMPLETED
Submit              : 2023-05-15T19:21:42
Start               : 2023-05-15T19:21:43
End                 : 2023-05-15T19:21:53
Reserved walltime   : 00:10:00
Used walltime       : 00:00:10
Used CPU time       : 00:00:07 (efficiency: 73.12%)
% User (Computation): 89.92%
% System (I/O)      :  0.00%
Mem reserved        : 2G
Max Mem (Node/step) : 0.00  (Node unknown, N/A)
Full Max Mem usage  : 0.00
Total Disk Read     : 0.00
Total Disk Write    : 0.00
[username@login1 climate]$
Since the State is COMPLETED the job has finished.
f. Study the output file
Study the SLURM output file and solve any errors, if necessary.
If everything went right no error messages should appear in the output file. Two common errors will be described here:
Wrong city name. If you have a missing or wrong city name you will get a Python traceback in your output after a list of cities with average temperatures is displayed. The final error message is:
TypeError: Empty 'DataFrame': no numeric data to plot
The other error that may occur is that the
climate.csv data cannot be found. You will then see an error like:
FileNotFoundError: File b'/scratch/username/climate2.csv' does not exist
Note that the Python traceback makes it hard to understand what is going on. This can, and probably should, be fixed in the Python code. But in real life you'll encounter issues like this quite often.
The solution for the issues is to fix the city name in script.py or the path to the csv file in your job script.
g. Copy the output image to your local computer
Copy the resulting png image file to your local desktop or laptop for inspection.
You can use the MobaXterm file browser for downloading the file to your desktop or laptop for inspection. For this you need to move the file browser to the climate job directory. Select the png file and click on the download button with the arrow pointing downwards.
In this exercise we will train a neural network to recognize the type of rice from a picture of a rice grain. The training data set consists of 14,000 pictures for each type of rice grain, for 5 types. The types being Jasmine, Basmati, Arborio, Ipsala and Karacadag. Next to this the data set has 1,000 pictures for each grain to test the quality of the resulting neural network.
The data set can be found at: https://www.kaggle.com/datasets/muratkokludataset/rice-image-dataset
Here are a few sample images:
 |  |  |
| Karacadag | Arborio | Jasmine |
The main purpose of the exercise is to show you how to handle data sets containing many small files. In this case 75,000. If you would extract the data set on the /scratch file system, you'll already notice that this is quite slow as /scratch works poorly for handling many small files, as it has been optimized for streaming large files.
We will therefore not go into more detail about how to use the resulting neural network.
a. Go to the rice_classifier job directory
Go to the job directory for the rice_classifier job that you prepared in
the first part.
We again have to use the cd command to achieve this. To do this in one action, without moving back to the home directory first (using cd without arguments) we can use the following command:
[username@login1 climate]$ cd ~/jobs/rice_classifier
[username@login1 rice_classifier]$
Here we make use of ~ as a shortcut for the home directory. This needs to be followed by / to make clear that what follows is inside this directory. And then we specify the directory we need to move to.
b. Start editing a new file for the job script
Create a new and empty file in the editor that will be the job script for this
exercise. Choose any filename you want (we will use rice_classifier.sh)
Open up your preferred editor to work on a new file, just as in the previous exercise.
c. Complete the job script
Construct the job script in the editor and make sure it will do the
following:
Define the following requirements / properties for the job:
Maximum wall clock time of 30 minutes.
16 core on 1 node.
Memory limit of 16 gigabyte.
Nice name.
Performs the following actions:
Purges any existing modules from the environment to make sure we have the right environment for the job. If we do not do this any modules loaded while submitting the job will be also loaded when the jobscript runs. This can easily lead to issues.
Loads the modules:
TensorFlow/2.11.0-foss-2022a-CUDA-11.7.0
matplotlib/3.5.2-foss-2022a
Lists the loaded modules for logging the software that was used in the job output.
Creates a temporary folder on the local storage called $TMPDIR/dataset for the data.
Creates temporary folders on the local storage called $TMPDIR/results/logs and $TMPDIR/results/plots.
Extracts the compressed dataset to the newly created $TMPDIR/dataset folder on local storage.
Runs the training
Creates folders on the shared storage for the results
Copies the results back to the shared storage in compressed form
The command echo can be used to display some text. This command is useful for diagnostic messages in the job script. Add the following lines to your script before the command will be run that the message refers to:
echo Overview of modules that are loaded
echo Starting training
For the job requirements we need the following lines:
Wall clock time of 30 minutes:
#SBATCH --time=00:30:00
16 Cores on one node
#SBATCH --nodes=1
#SBATCH --ntasks-per-node=16
Memory limit of 16 gigabyte
#SBATCH --mem=16G
Nice name
#SBATCH --job-name=rice_classifier
For the actions we need to add the following lines:
Purging existing modules from the environment can be done using the
purge subcommand for
module.
module purge
Load the two modules given:
module load matplotlib/3.5.2-foss-2022a
module load TensorFlow/2.11.0-foss-2022a-CUDA-11.7.0
For listing the loaded modules the subcommand
list must be used:
module list
Create the temporary folders:
mkdir $TMPDIR/dataset
mkdir -p $TMPDIR/results/logs $TMPDIR/results/plots
Extract the compressed dataset to the right location on the local storage:
tar xzf /scratch/$USER/dataset.tar.gz -C $TMPDIR/dataset
Run the training:
python train.py
Create folders on the shared storage for the results:
mkdir -p /scratch/$USER/job_${SLURM_JOBID}
When the training is finished, we need to copy the results back to the shared storage:
tar czvf /scratch/$USER/job_${SLURM_JOBID}/results.tar.gz $TMPDIR/results
The diagnostic messages are given, but have to be moved to the right location, which is shown in the full job script later:
echo Overview of modules that are loaded
echo Starting Python program
And finally we should have the shebang at the beginning of the job script:
#!/bin/bash
We need to combine all of this into a job script. This job script should look like:
#!/bin/bash
#SBATCH --job-name=rice_classifier
#SBATCH --time=00:30:00
#SBATCH --nodes=1
#SBATCH --ntasks-per-node=16
#SBATCH --mem=16GB
#SBATCH --partition=regular

# Setup the module environment
module purge
module load matplotlib/3.5.2-foss-2022a
module load TensorFlow/2.11.0-foss-2022a-CUDA-11.7.0

echo Overview of modules that are loaded
module list

# Create temporary folders on the local storage
mkdir $TMPDIR/dataset
mkdir -p $TMPDIR/results/logs $TMPDIR/results/plots

# Extract the compressed data file to local storage
tar xzf /scratch/$USER/dataset.tar.gz -C $TMPDIR/dataset

echo Starting Python program

# Train the classifier
python train.py

# Create the results folder on the shared storage
mkdir -p /scratch/$USER/job_${SLURM_JOBID}

# Copy the results back to the shared storage in compressed form
tar czvf /scratch/$USER/job_${SLURM_JOBID}/results.tar.gz $TMPDIR/results
Note the use of blank lines to make it more readable.
d. Make sure your job doesn't run for too long and submit the job
By default the job will run for 32 epochs, which will exceed the allocated time. Edit the train.py file to change this to 2 epochs.
Hint: Search for epochs=32 within the train.py file and change that to epochs=2.
Modifying a file has already been explained in exercise 3h.
For submitting the job we need to use sbatch, with as argument the name of the job script.
[username@login1 rice_classifier]$ sbatch rice_classifier.sh
Submitted batch job 1450177
[username@login1 climate]$
The jobid is returned, which we can use for jobinfo later on.
f. Study the output file
Study the SLURM output file and solve any errors, if necessary. Note that tensorflow gives several warnings about not being able to use the CUDA library for a Nvidia GPU, which can be ignored.
If everything went right no error messages should appear in the output file.
g. Copy the results to your local computer
The output of the training will be stored in the folder /scratch/$USER/job_JOBID (where JOBID is the ID of the job), and will be a file called results.tar.gz. Go to that folder
cd /scratch/$USER/job_JOBID
and extract the archive
tar xzvf results.tar.gz
This is generally not a good idea, since the results might be large / contain lots of files, but it is fine for this particular example.
Copy the contents of the tmp/results/plots/ folder to your local computer and have a look at the plots therein.
You can use the MobaXterm file browser for downloading the file to your desktop or laptop for inspection. For this you need to move the file browser to the climate job directory. Select the png file and click on the download button with the arrow pointing downwards.
There will be three plots. One showing the accuracy for the training epochs for both the training and testing data set. The second plot will show the loss function, which is another measure for the accuracy of the neural network. The third plot will show the confusion matrix, which counts how the images in the testing data set where labeled, comparing the predicted labels to the real labels.
Congratulations! You have submitted your first jobs to the Hábrók cluster. With what you've learned you should be able to write your own job scripts and run calculations on the Hábrók cluster.