Windows
Available software
Windows users will need to install client software in order to be able to login into the cluster. The following pieces of software are useful:
MobaXterm
MobaXterm is a free for personal use SSH client, SFTP client and X server. If it is not available on your machine, it can be downloaded from http://mobaxterm.mobatek.net/download.html. It comes as a Windows installer or as a portable edition, which you can just unpack and run. The latter also works on the university workstations.
SSH client only: PuTTY
PuTTY, another option, is a free open source SSH client. PuTTY is also available on the standard RUG Windows desktops. If you are not using these, PuTTY can be downloaded from http://www.chiark.greenend.org.uk/~sgtatham/putty/download.html. For most users, getting and installing the installer version is the easiest.
Using the software
Since MobaXterm includes all the required functionality we will describe how to use this program here.
SSH login
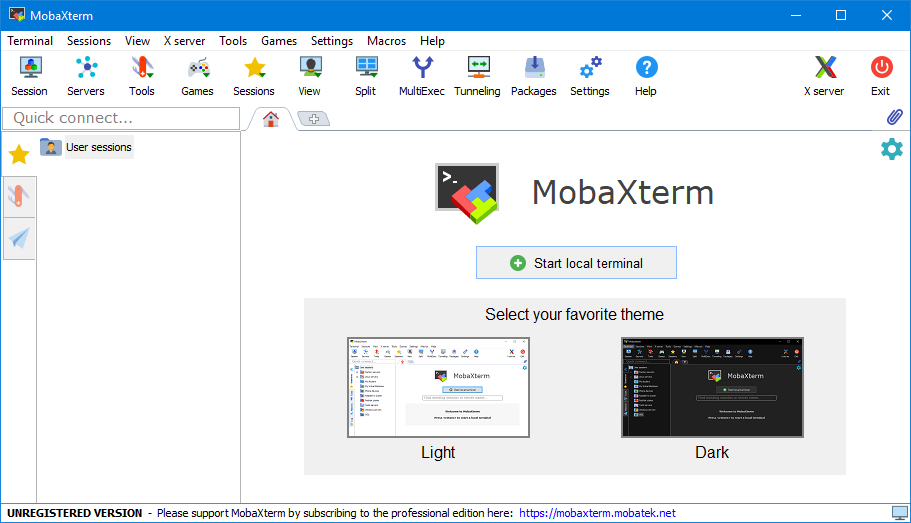
When starting up MobaXterm you will be confronted with the screen in the following picture.
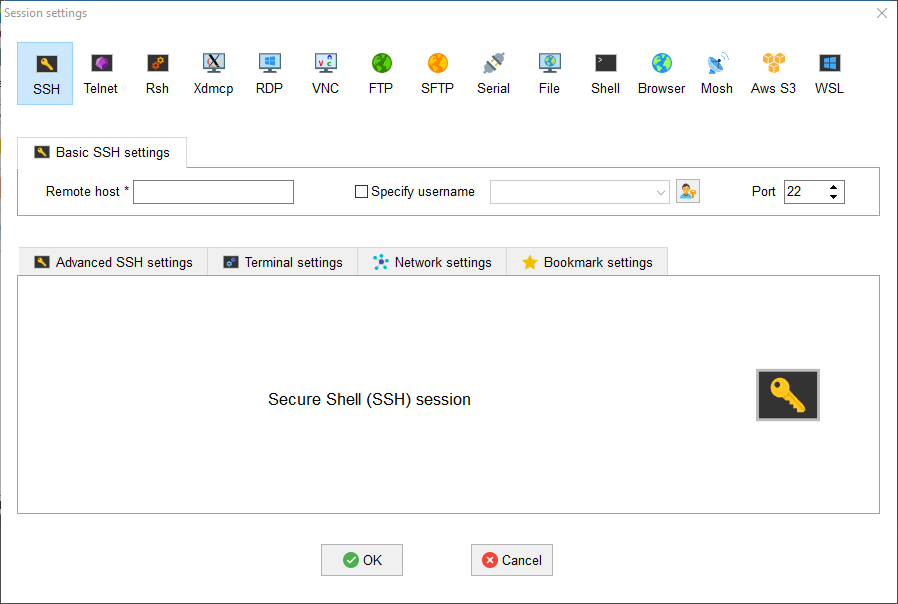
For starting a new session you can select the button labeled “Session”. After that you have to select “SSH” as shown in the following picture:
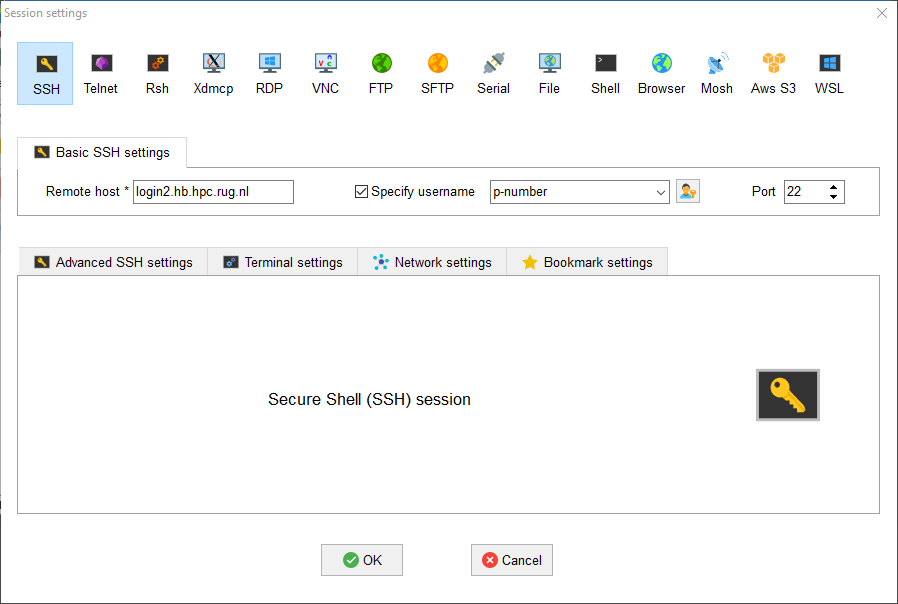
You have to fill in the hostname “login1.hb.hpc.rug.nl” and your username (normally your p or s number, in lowercase, e.g. p123456).
After clicking on OK you will be presented with a password prompt:
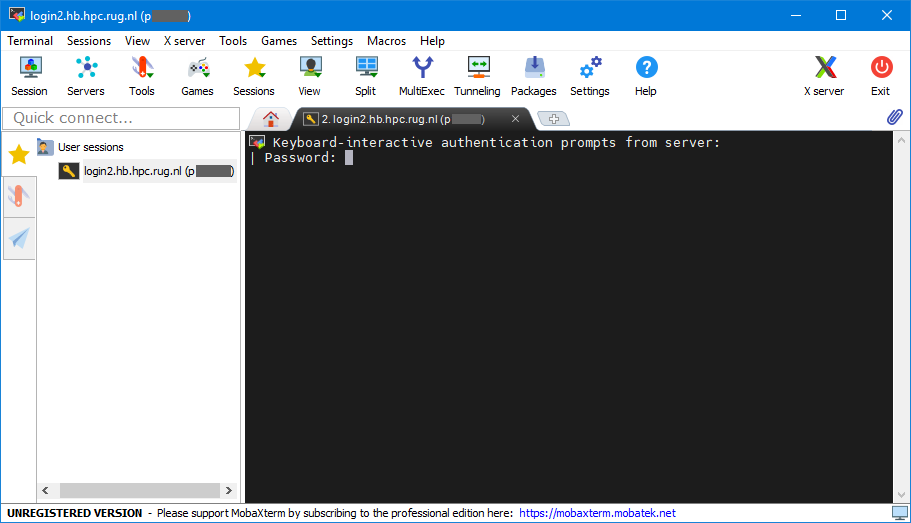
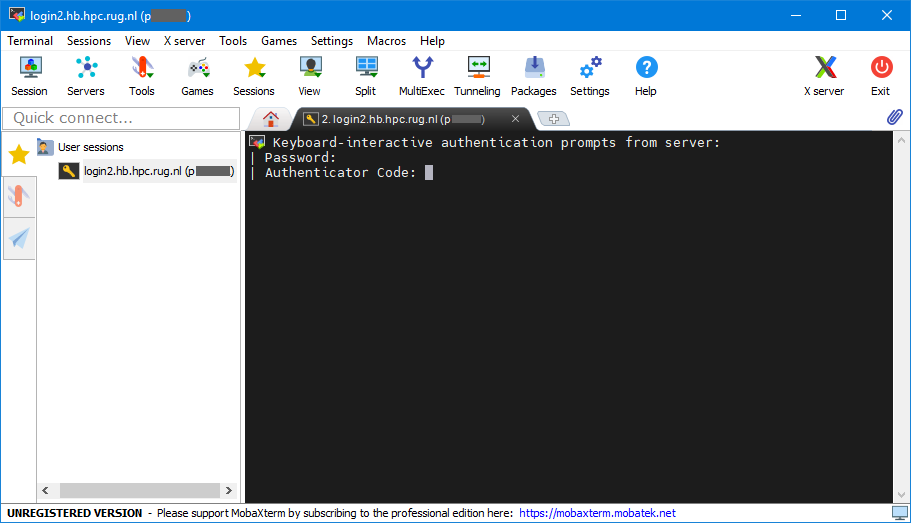
Here you have to enter the password for your university account, followed by Enter. Note that what you type here will not be shown to you!
After that you will be prompted for the authenticator token, which you should obtain from the authenticator app (e.g. Google Authenticator) you are using for your RUG account.
After having successfully authenticated you will be asked if you want to save the password using the following dialog:
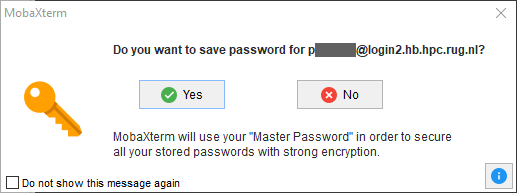
We recommend you not to save the password using the MobaXterm Personal edition. This because the password will be stored unencrypted. If you do not want to type in the password every time you login we recommend to use an ssh key using a password.
After logging in you will be presented with a prompt where you can type in your commands as shown here:
