Running Whisper
To run Whisper on HPC, you need to load an environment into your HPC session and build a script to specify what you want the software to do. The HPC Team has built an interface in their portal to make this task clear and easy for you. For this reason, we will describe how to use the interface in this part of the guide. Should you want to modify the script and the instructions to Whisper beyond what the interface allows you to do, then you are, of course, free to write your own script or contact dcc@rug.nl with your question.
To access the interface, log into the HPC portal and scroll down until you see the Jobs Wizard button shown in the screenshot. Click it to open a new window.
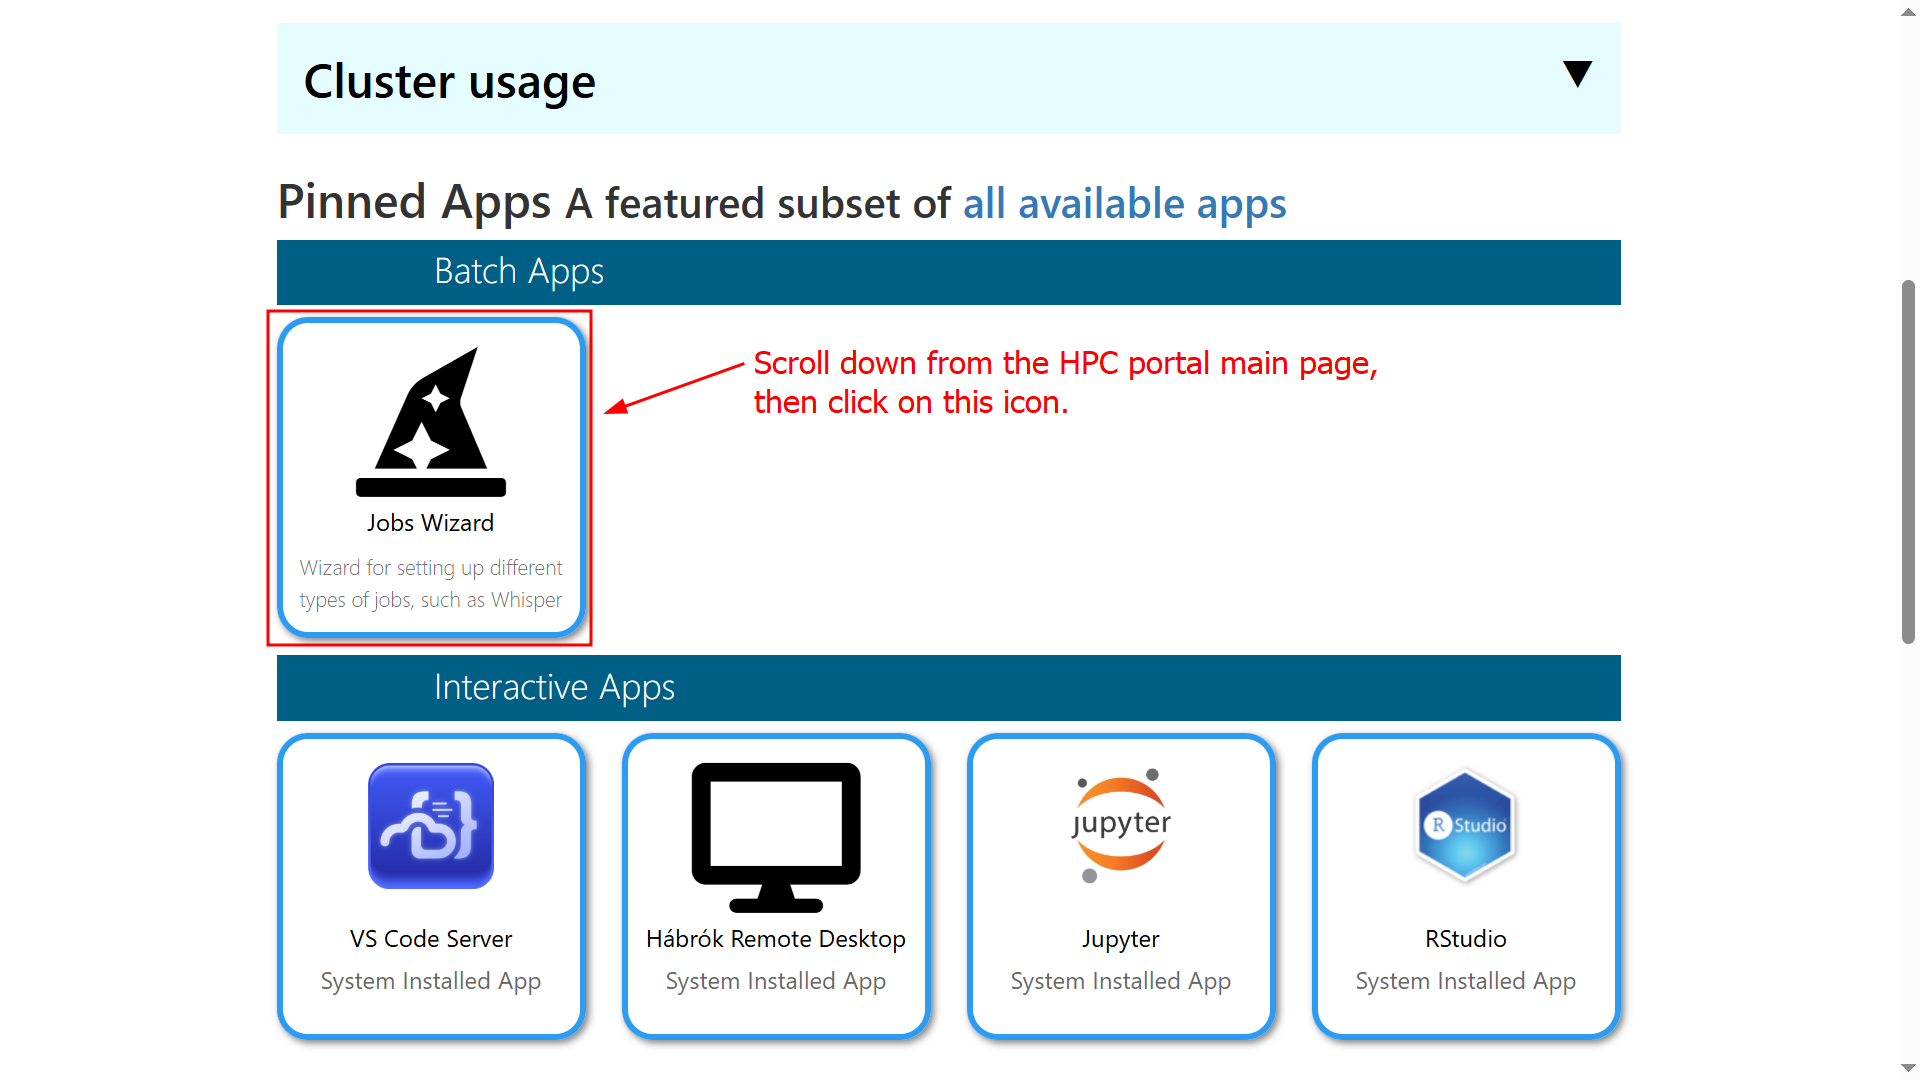
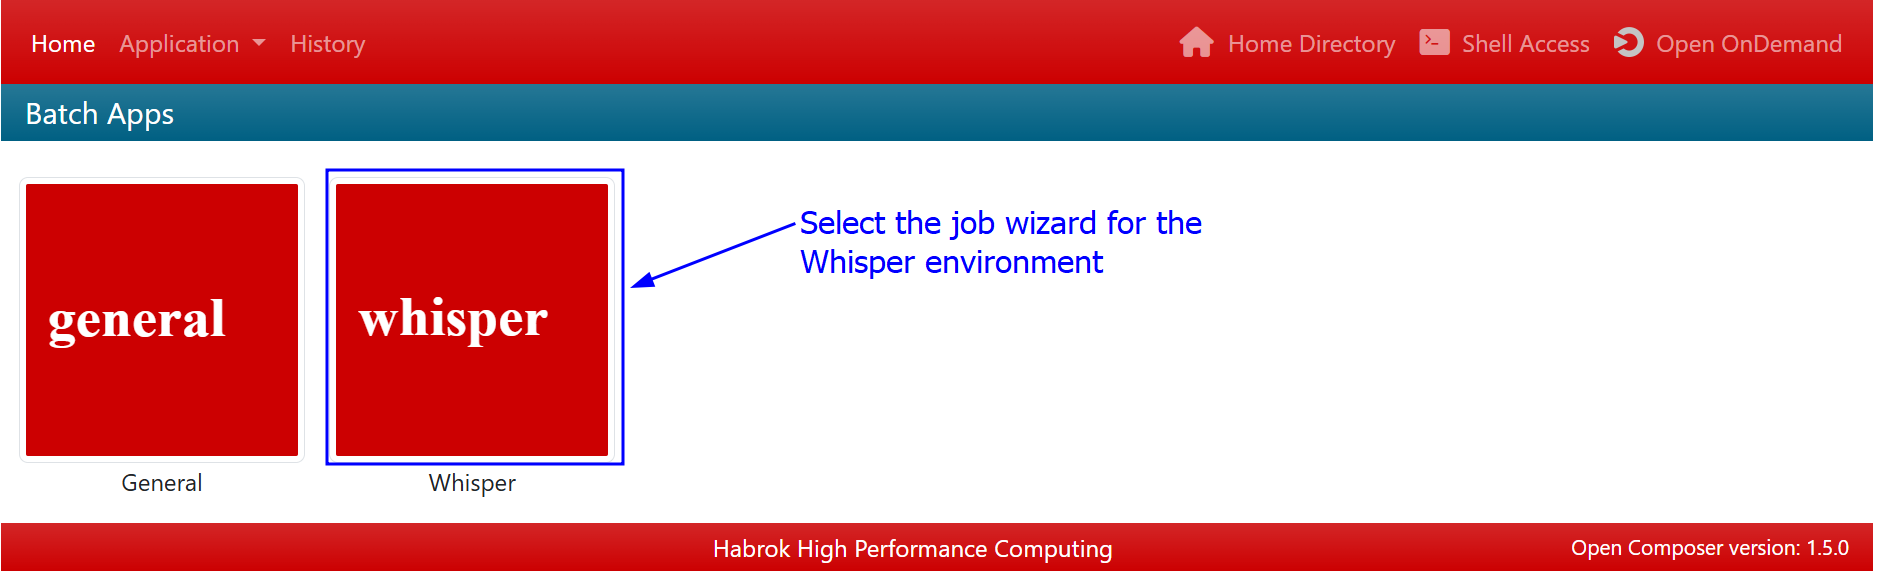
In the new window, select the wizard for Whisper. Note: As of the writing of this guide, there were only two apps available on this part of the portal. You might see more than two if the HPC team has added new ones in the meantime.
The first part of the interface prompts you to specify where you want to save the generated script, what name you want to assign to the script, and what name to assign to the job when it runs. If you have followed this guide until this point, you can leave this part unchanged and move on to the next screenshot. If you have not followed the previous part of this guide, then the one requirement you need to fulfil for this part to work is that the location where you want to save the script exists. To ensure this, select Select Path, then follow the instructions until you find the folder you want to use. Finally, you can leave the script content hidden, as it is irrelevant if you use the interface.
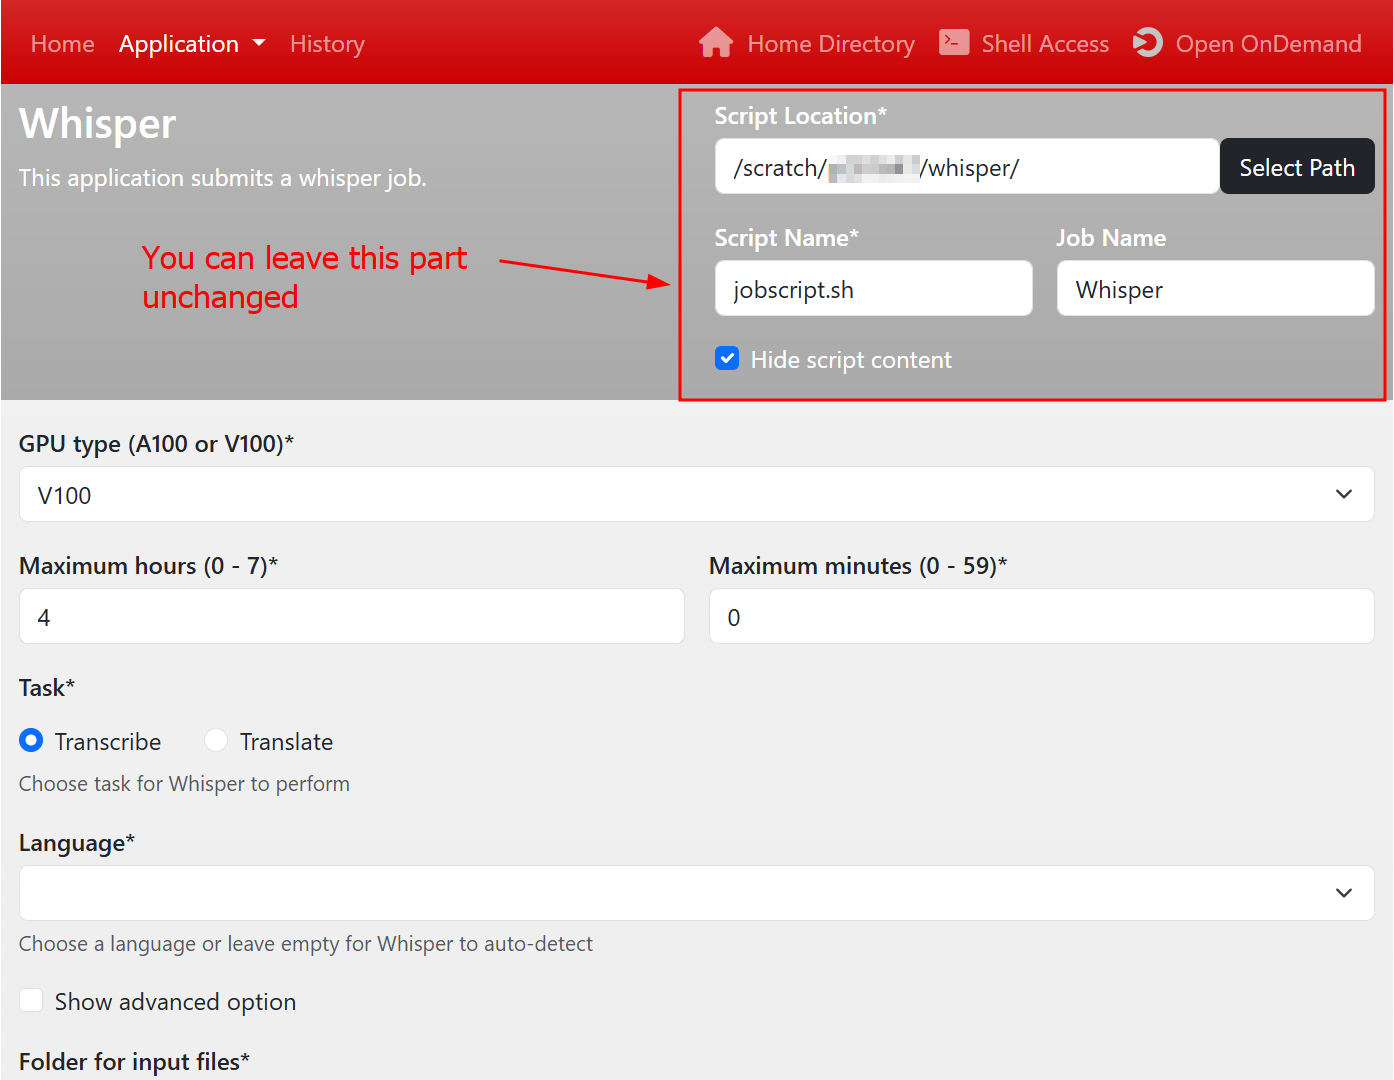
The second part of the interface is where you will select the instructions you wish to pass on to Whisper. Here is the explanation of the entry fields as they are numbered in the screenshot below:
- GPU type: This drop-down menu selects the physical resource used to run your job on the cluster. The abbreviation GPU stands for Graphical Processing Unit, and you can keep the selected default as your input (V100).
- Maximum hours/minutes: This entry determines the maximum amount of time your job will run on the cluster. We advise always requesting the maximum of 7 hours and 59 minutes (a normal workday), as it will ensure that your job will finish before the maximum time allocated is reached. We put a limit on the amount of time your job can take in order to avoid occupying resources for a long time in the cluster. As an indication, previous tests on our end have shown that ~8 hours of runtime equate to about 15-20 hours of audio. If you have more than 20 hours of audio to transcribe, we suggest that you split the audio files into two groups and run subsequent jobs on them.
- Task: In this entry, you can select if you wish to transcribe text or translate it. Please keep in mind that Whisper can only translate X language to English.
- Language: This entry lets you decide if Whisper is going to auto-detect the language spoken in the audio or if it is going to transcribe a language you select. If you leave the option blank, then Whisper is going to use the first 30 seconds of audio to determine the language. This can go wrong sometimes, depending on the audio quality and the accent of the speaker. If you select a language here, then Whisper is going to transcribe the audio in that language. This can be problematic if the audio contains multiple languages.
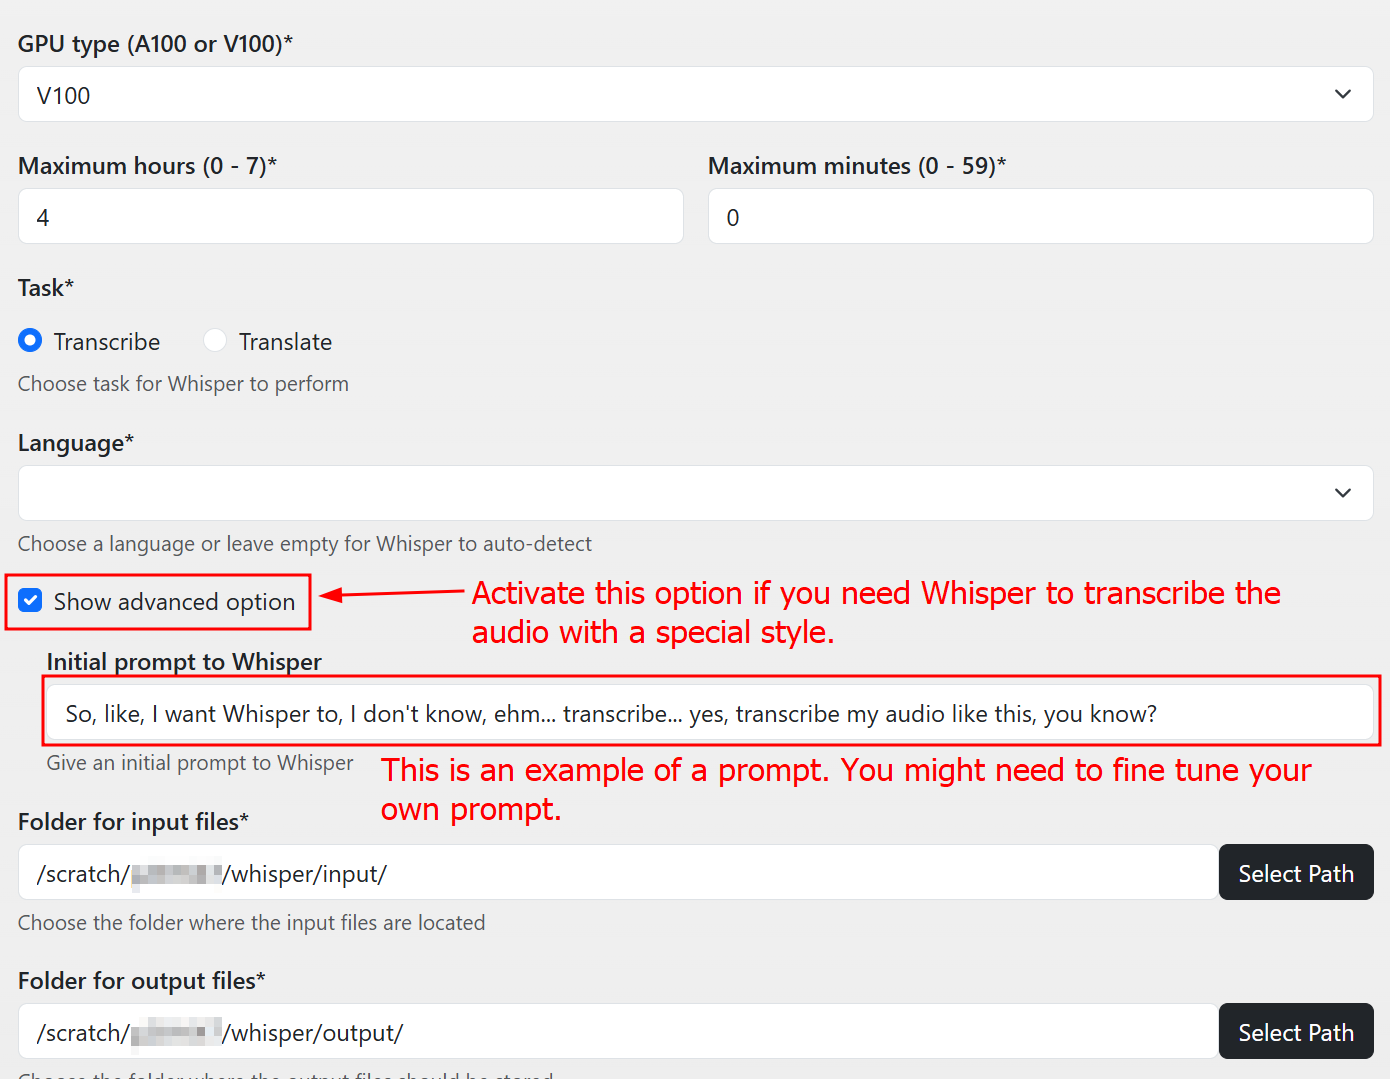
- Show advanced option: Checking this box will allow you to input a prompt for Whisper to use as a guideline in the transcription. See the description of the next screenshot for more details.
- Folder for input files: This entry selects the folder containing the audio that Whisper is going to transcribe or translate. If you followed this guide from the beginning, you can leave the default option selected. Please keep in mind that you cannot select which audio to transcribe. All audio files contained in this folder will be processed by Whisper. Make sure to clear out your input folder before starting a new job; otherwise, you will transcribe old data as well. Note: You have a maximum time to do the transcription; keeping old data in this folder will eventually make the job last too long to complete.
- Folder for output files: This entry selects the folder where Whisper is going to save the transcripts of your audio. If you followed this guide from the beginning, you can leave the default option selected. Once your job is complete, you can retrieve the transcripts from here. To see what formats Whisper outputs, please go to the next page of this guide.
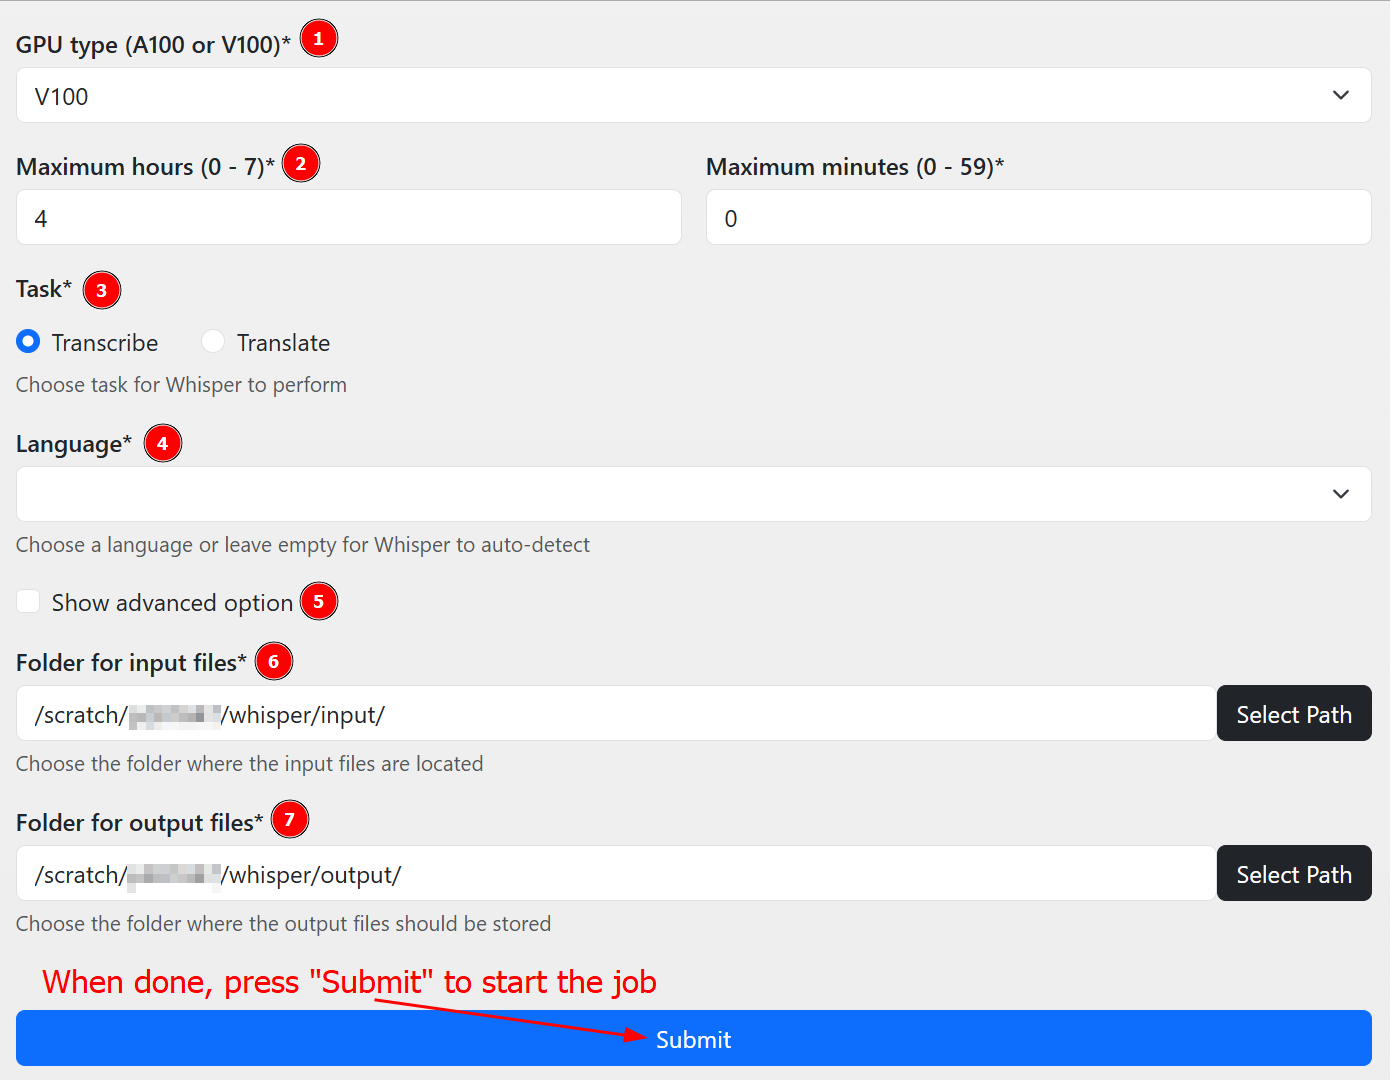
When you are done setting the instructions, press Submit to start the transcription job.
For those users who need the transcription to be done following a certain style, here is the option to add a prompt to the Whisper script. Please note that it might be necessary to try out a few prompts before the transcription works the way you want it to. We advise choosing a relatively short audio to experiment with before launching the main job.
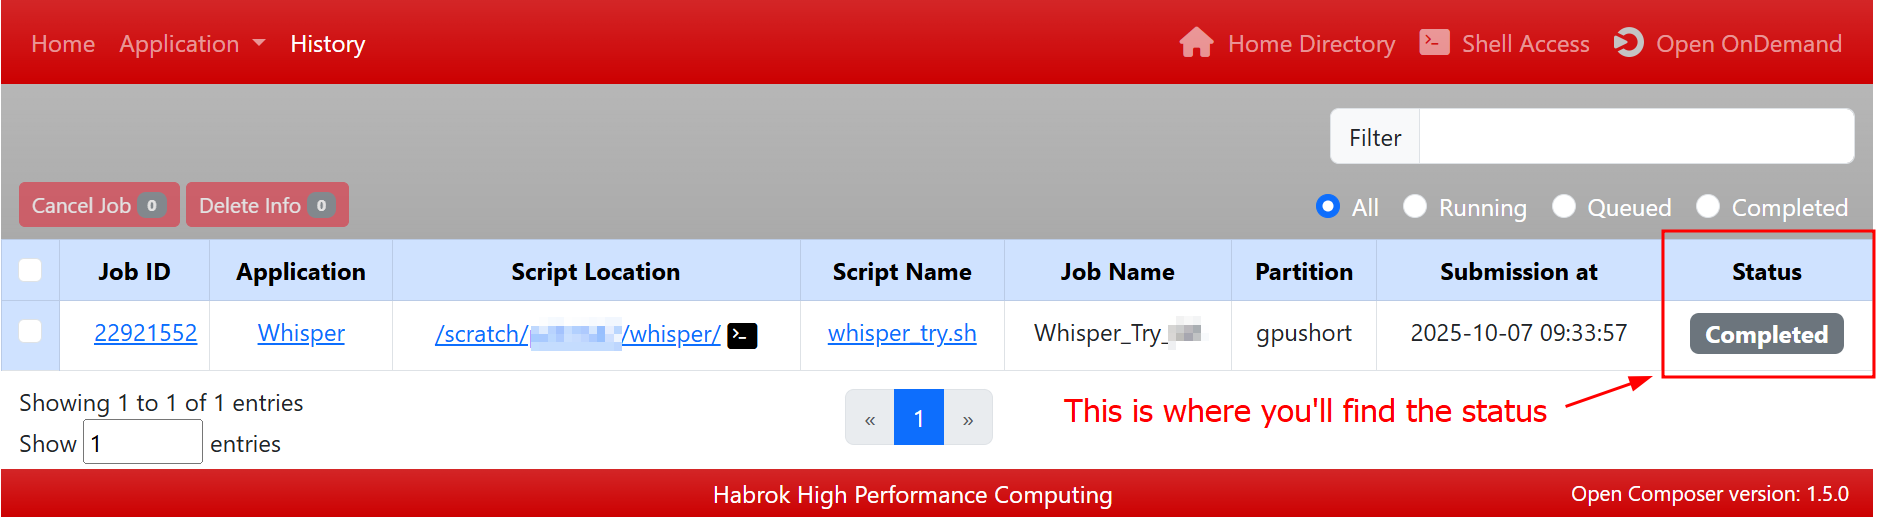
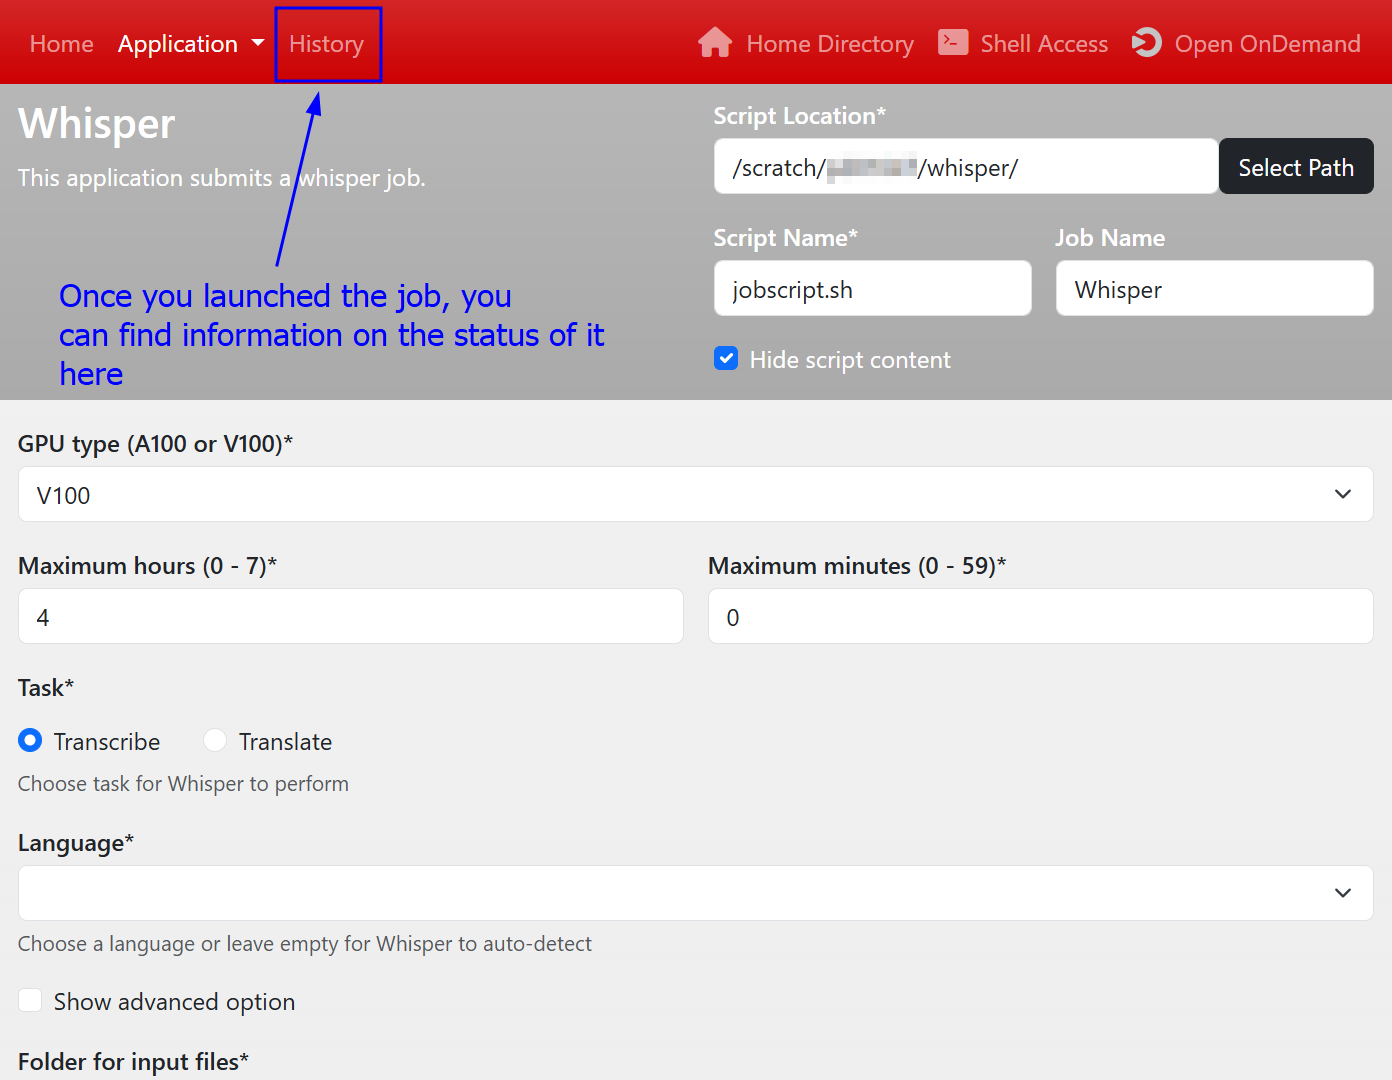
Once you are done creating the script and you press Submit, your job will have been added to the HPC queue. What this means is that your job will start running as soon as the requested resources are available in the cluster. This can take some time to happen. We advise verifying that the script is in the queue by selecting History, as shown in the screenshot. This will direct you to a new window.
In this new window, you will see the details of your job, such as the JobID or the location of the script. What you care about at this stage is the status, as highlighted in the screenshot. There are three statuses you will most likely see:
- QUEUED: Your job is in the queue, but the resources needed are not yet available.
- RUNNING: Your job is running, but has not yet finished.
- COMPLETED: Your job is finished, and you can retrieve your data.
Once your job shows the status COMPLETED, then you can go back to the main HPC page, select your scratch folder as you have done at the beginning of this guide, and download the files in the “output” folder. Please verify that the transcription looks acceptable at first glance before deleting your input data. Once this step is completed, please read the next part of this guide, as there are some data management requirements that you need to follow.