This is an old revision of the document!
Advanced: Connecting to Hábrók with Visual Studio Code
Microsoft Visual Studio Code (VS Code) is a popular source code editor and IDE that is available for free and which can run on Linux, Windows and macOS systems. It allows connecting to remote environments and working from them and the installation of extensions to support different programming languages and make use of additional development tools. Because of this, it is suitable for connecting to Hábrók to perform software development tasks.
Connecting with VS Code to a login node
- If you haven't already you will need to install the Remote-SSH extension for VS Code: Remote-SSH
- Open the Settings UI press
Ctrl+PorCommand+Pif on macOS and write "Settings" to go to the Settings page. - On the Settings page, search for
remote.SSH.showLoginTerminal. Enable this setting so that you can fill in the two factor authentication code on the console later.
- Press
Ctrl+Shift+Pand write: Connect to Host
- You can then fill in the ssh command. Let's say you want to connect to
interactive1.hb.hpc.rug.nl, then you would writepNUMBER@interactive1.hb.hpc.rug.nl - You will see a new window appear with a drop-down menu asking which platform type you are connecting to. Choose "Linux".
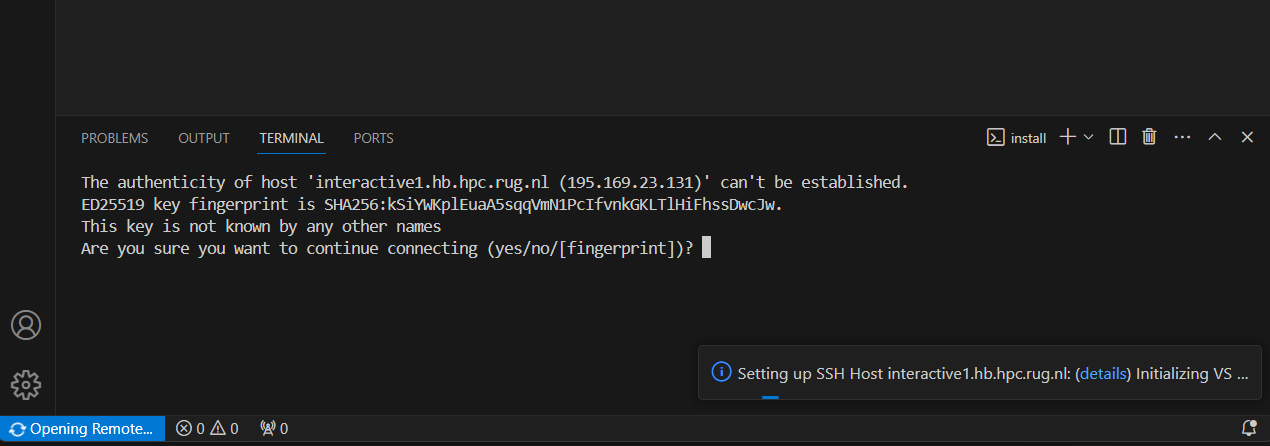
- At the bottom of that window, a console will appear and show you the same prompt when you first connected to Hábrók, if you want to accept the host key. Write 'yes' and press
Enter.
- On the same console you will see a prompt for your password and then for the authenticator code. Fill those in as you normally would.
- You are now connected! You can use the terminal on Hábrók as you would when connecting via 'ssh' through your computer's terminal. You will see a pop-up informing you that the platform type 'linux' was stored in the settings. You don't need to take any action about this.
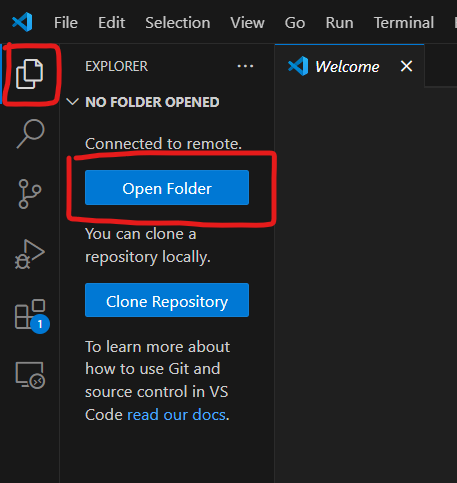
- To use the file explorer press the files icon on the left hand side and then press on "Open Folder". A drop-down menu will appear at the top and will have the path to your home directory already filled in. Press
Enter.
- You will possibly see a large pop-up asking if you accept the the authors of files in the folder, as usually happens when you open a new folder on VS Code. You should press "Yes, I trust the authors".


Connecting with VS Code to a compute node
In addition to connecting to one of the login or interactive nodes, you may choose to connect directly to a compute node in order to have a similar environment and restrictions as you have for your compute jobs. You could even use a debugger to interactively debug your program in an identical environment as those your jobs run in. To do so, you should follow the same instructions as above, but there are a few extra steps and details to take into account:
- Connect to Hábrók to any of the login nodes as normal (via a terminal, MobaXterm, or the web portal) and submit a job to the desired node type and with the desired settings. This job should not do anything, so you can use the
sleepcommand to ensure it stays open. Here is an example:
  #!/bin/bash
  #SBATCH --time=00:30:00
  #SBATCH --partition=regular
  #SBATCH --nodes=1
  #SBATCH --cpus-per-task=4
  #SBATCH --mem=8GB

  sleep 1800
- Once the job is running, you can find out what node has been assigned to it with
squeue. You will need this information later. - Press
Ctrl+PorCommand+Ponce more and enter "Connect to Host". - From the drop-down menu, select "+ Add New SSH Host…".
- Input the
sshcommand to connect, but this time with the information to connect to the relevant compute node. Assuming your job is running onnode2, you would write:ssh -J pNUMBER@login1.hb.hpc.rug.nl node2. - You will then be asked what configuration file to save the information at. Any of the suggested options should work, the
.ssh/config/you presumably have on your home directory is a good option. - Again press
Ctrl+PorCommand+Pand write "Connect to Host". Then, choose the appropriate connection, in this casenode2. - You will very likely be asked to accept a host key on the terminal. Unless this is not the first time you are connecting you should accept it. Then, input your password and MFA code as usual.
- You are now connected! You can follow the same process to connect to other specialized nodes, like GPU, high memory or parallel nodes, by submitting jobs to those partitions instead.
Visual Studio Code, VS Code, and the Visual Studio Code icon are trademarks of Microsoft Corporation. All rights reserved.