Table of Contents
Initial Setup
Setting up on HPC using the portal
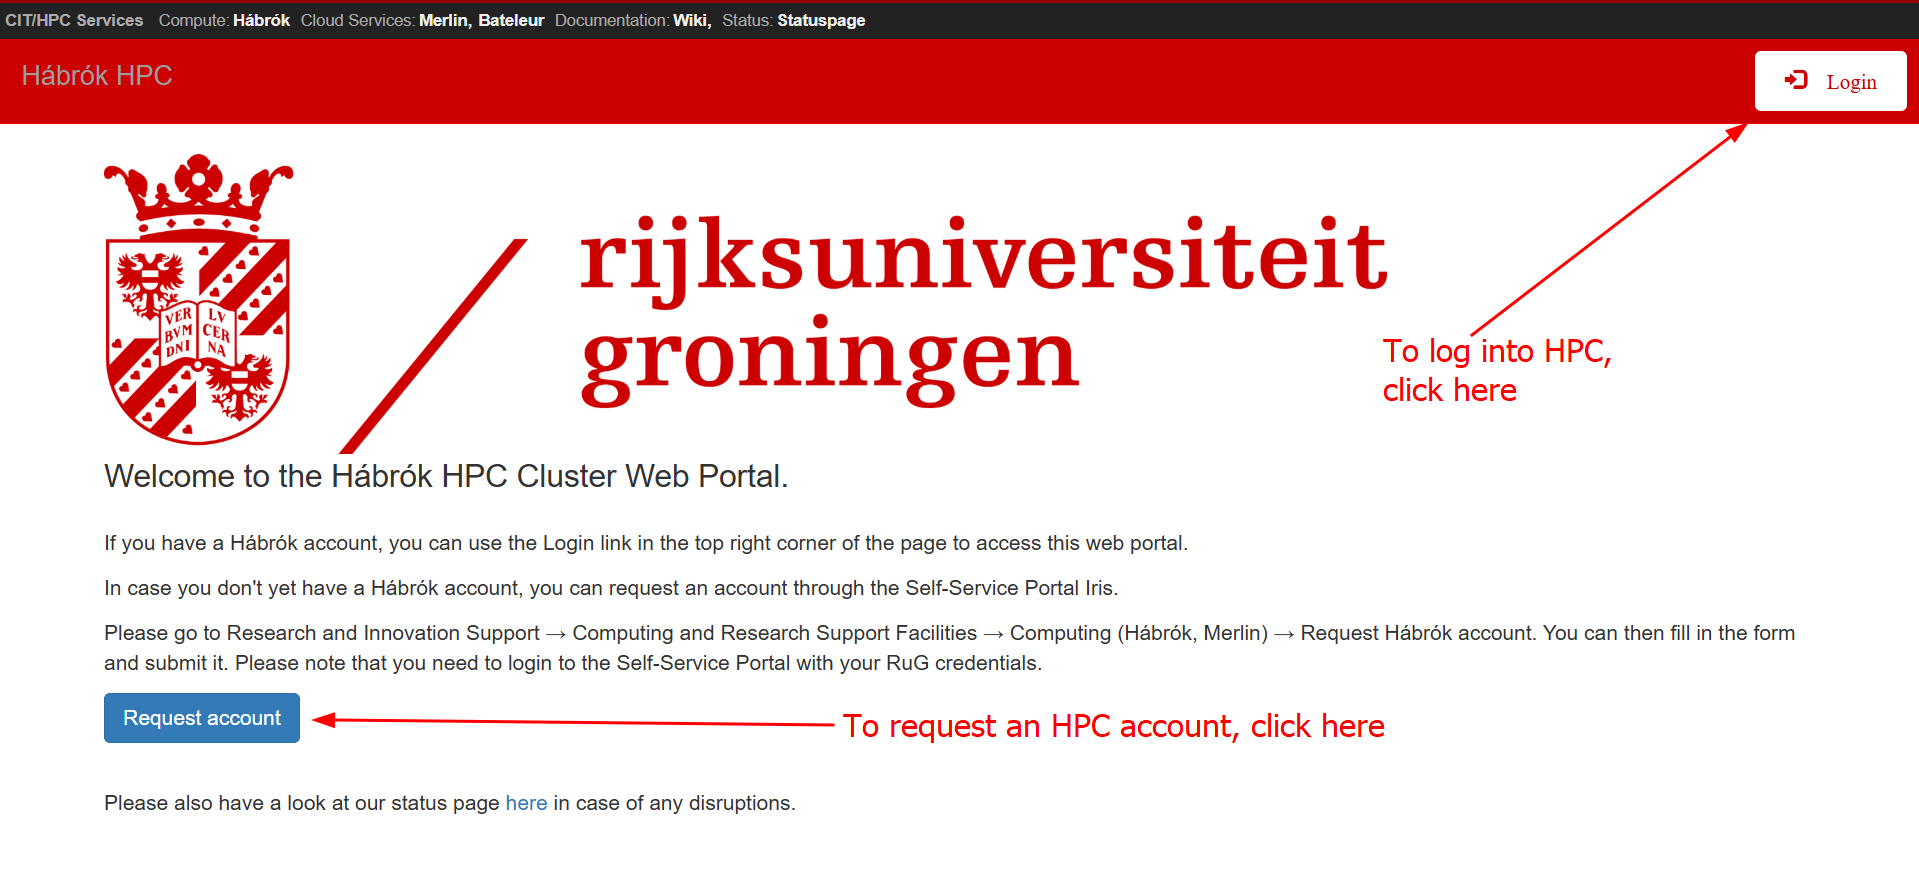
The guide below will take you through some basic steps to start running automatic transcription jobs on the High Performance Computing (HPC) cluster from a Windows computer. Before you can get started with setting Whisper up, you need to first Request a Hábrók (HPC) account or log into the HPC portal
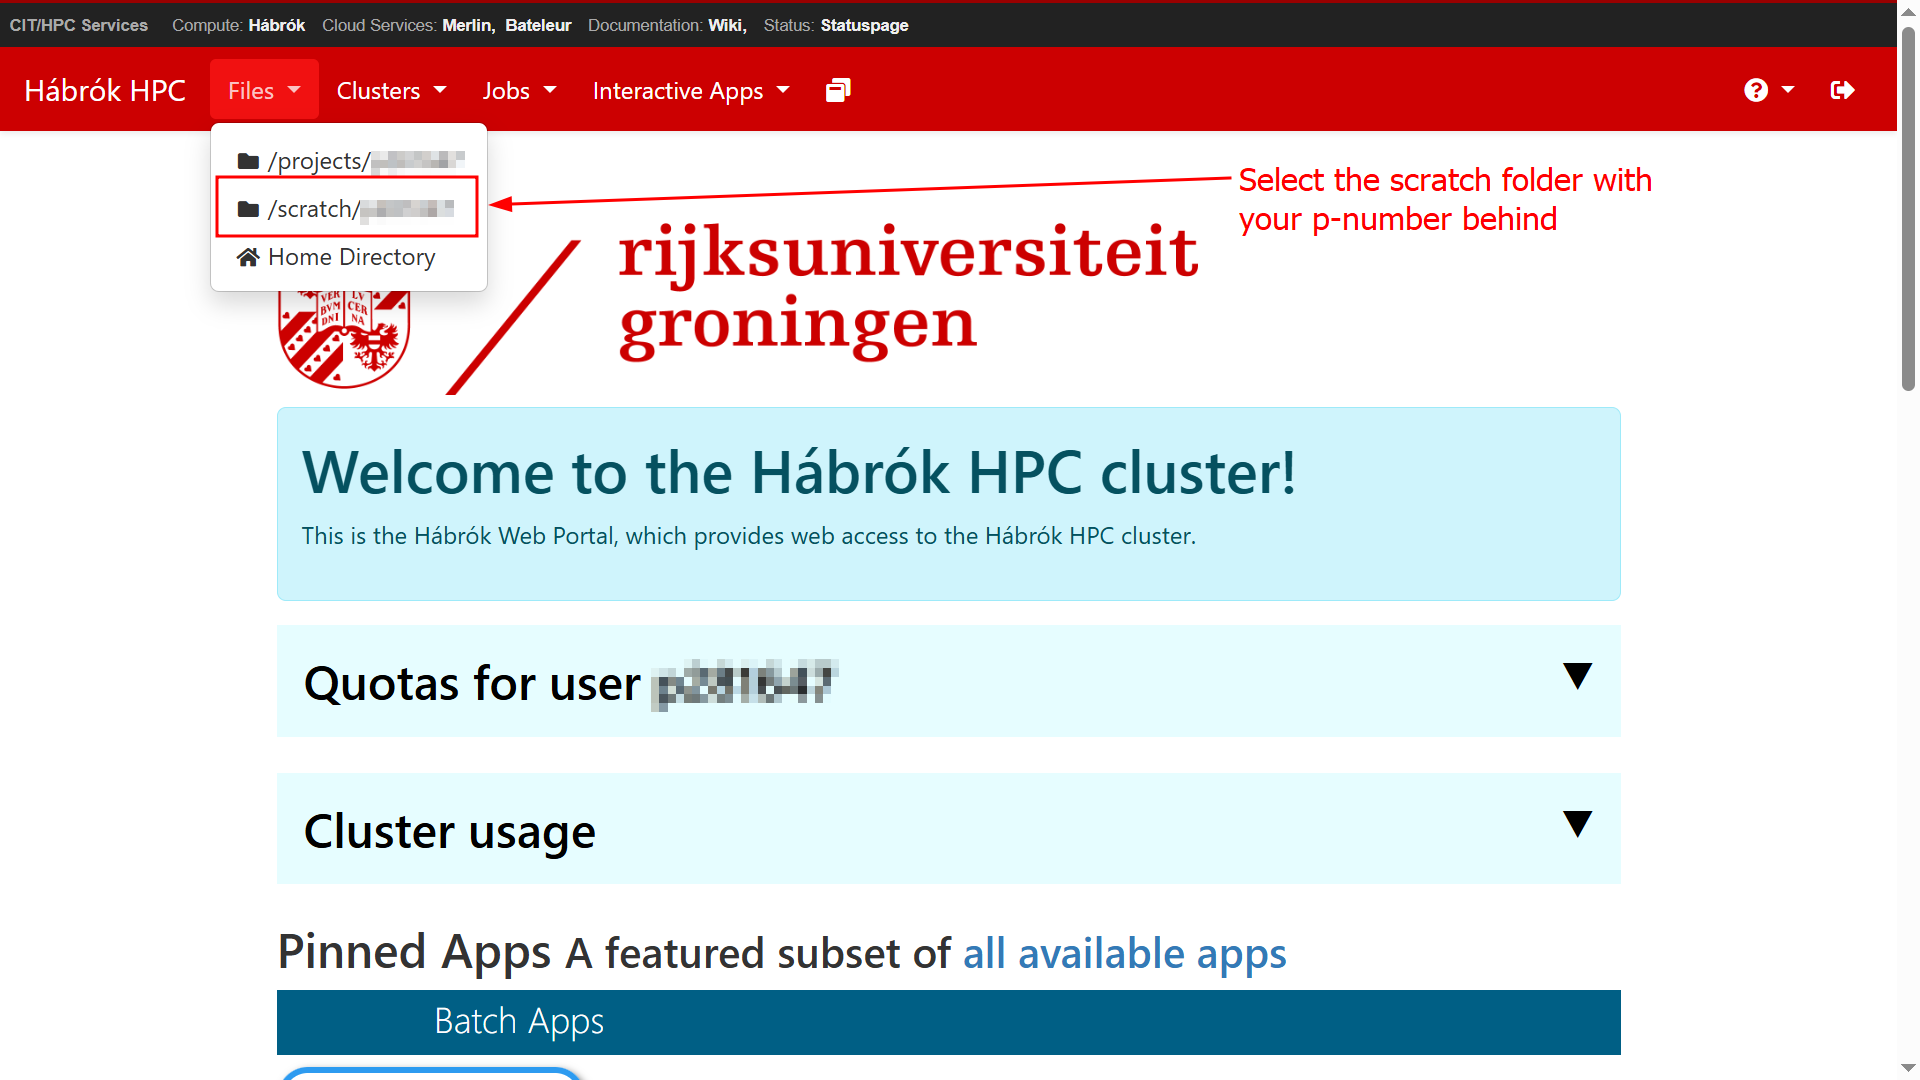
Once you have an HPC account, you can navigate to the Files tab in the top menu bar and select /scratch/p-number. Before we can run the script for the transcription, we need to make sure that the folders are set up correctly in your HPC environment.
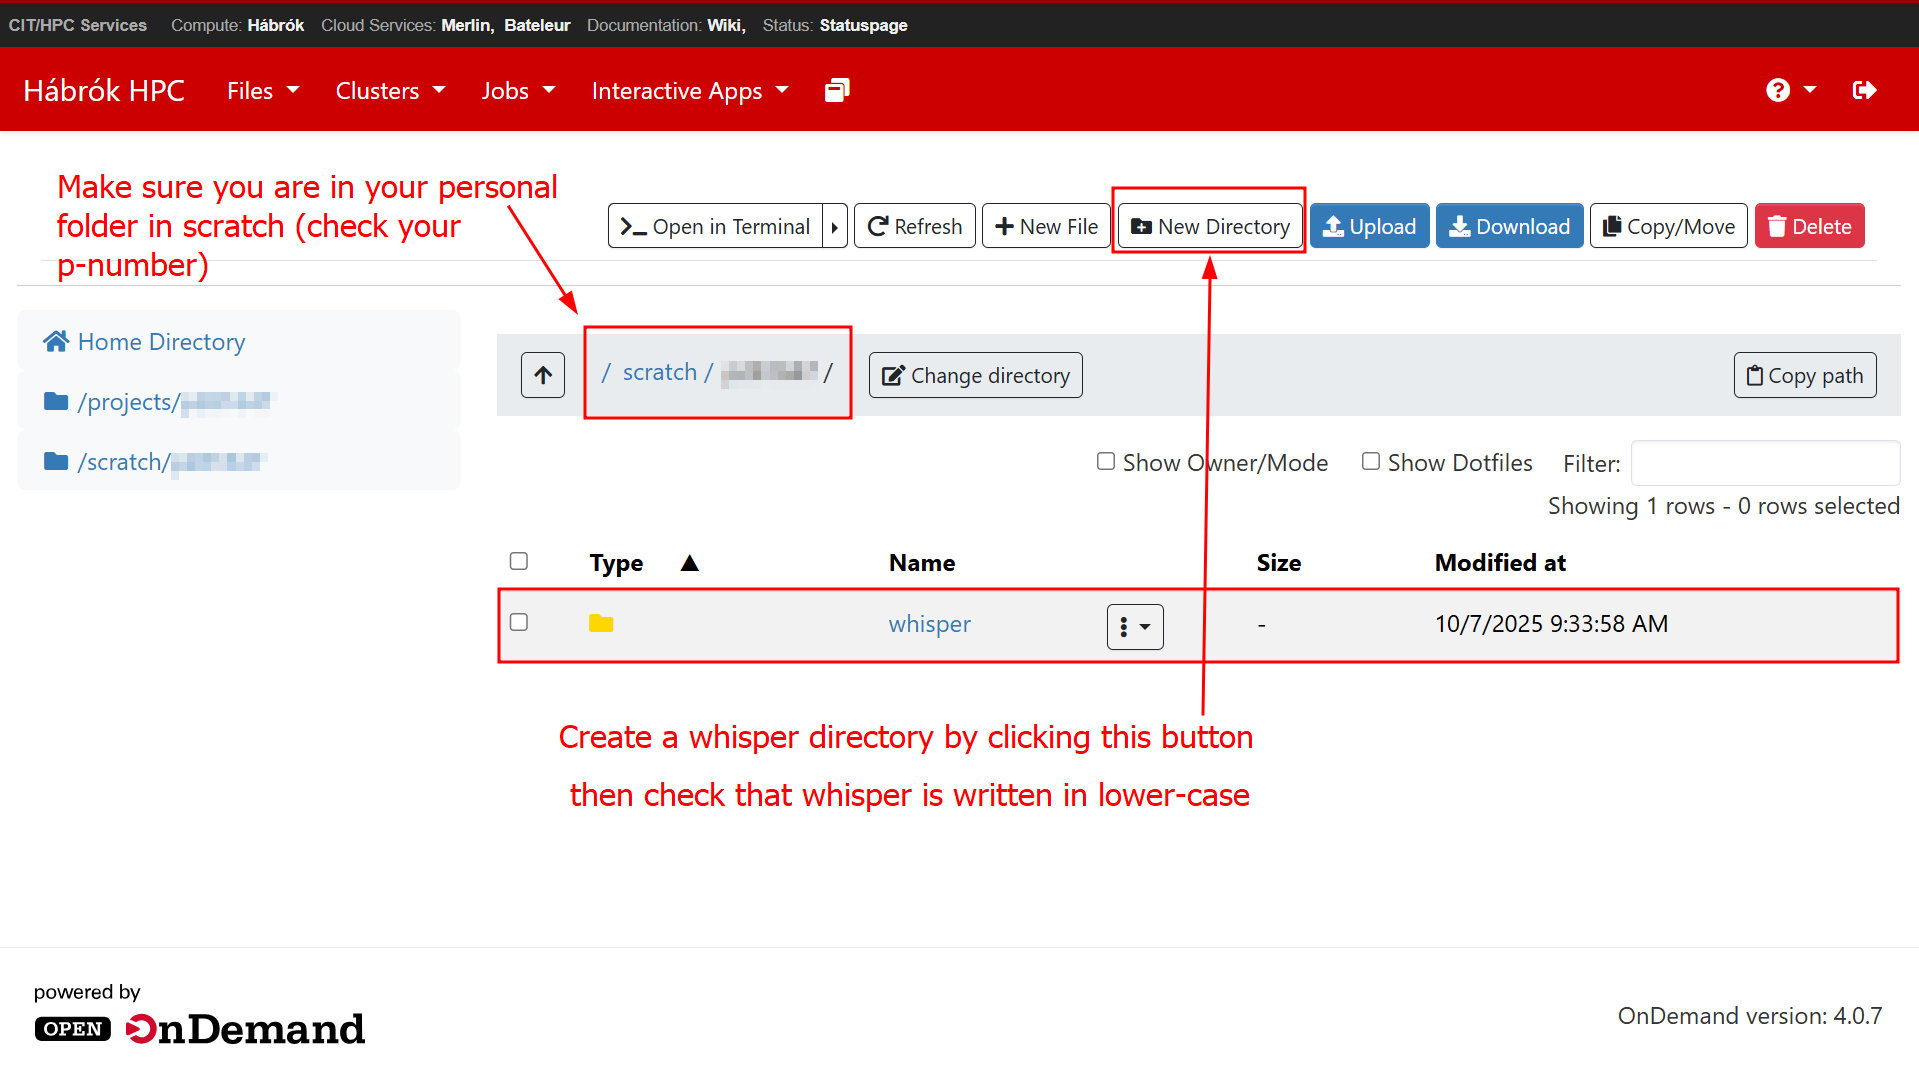
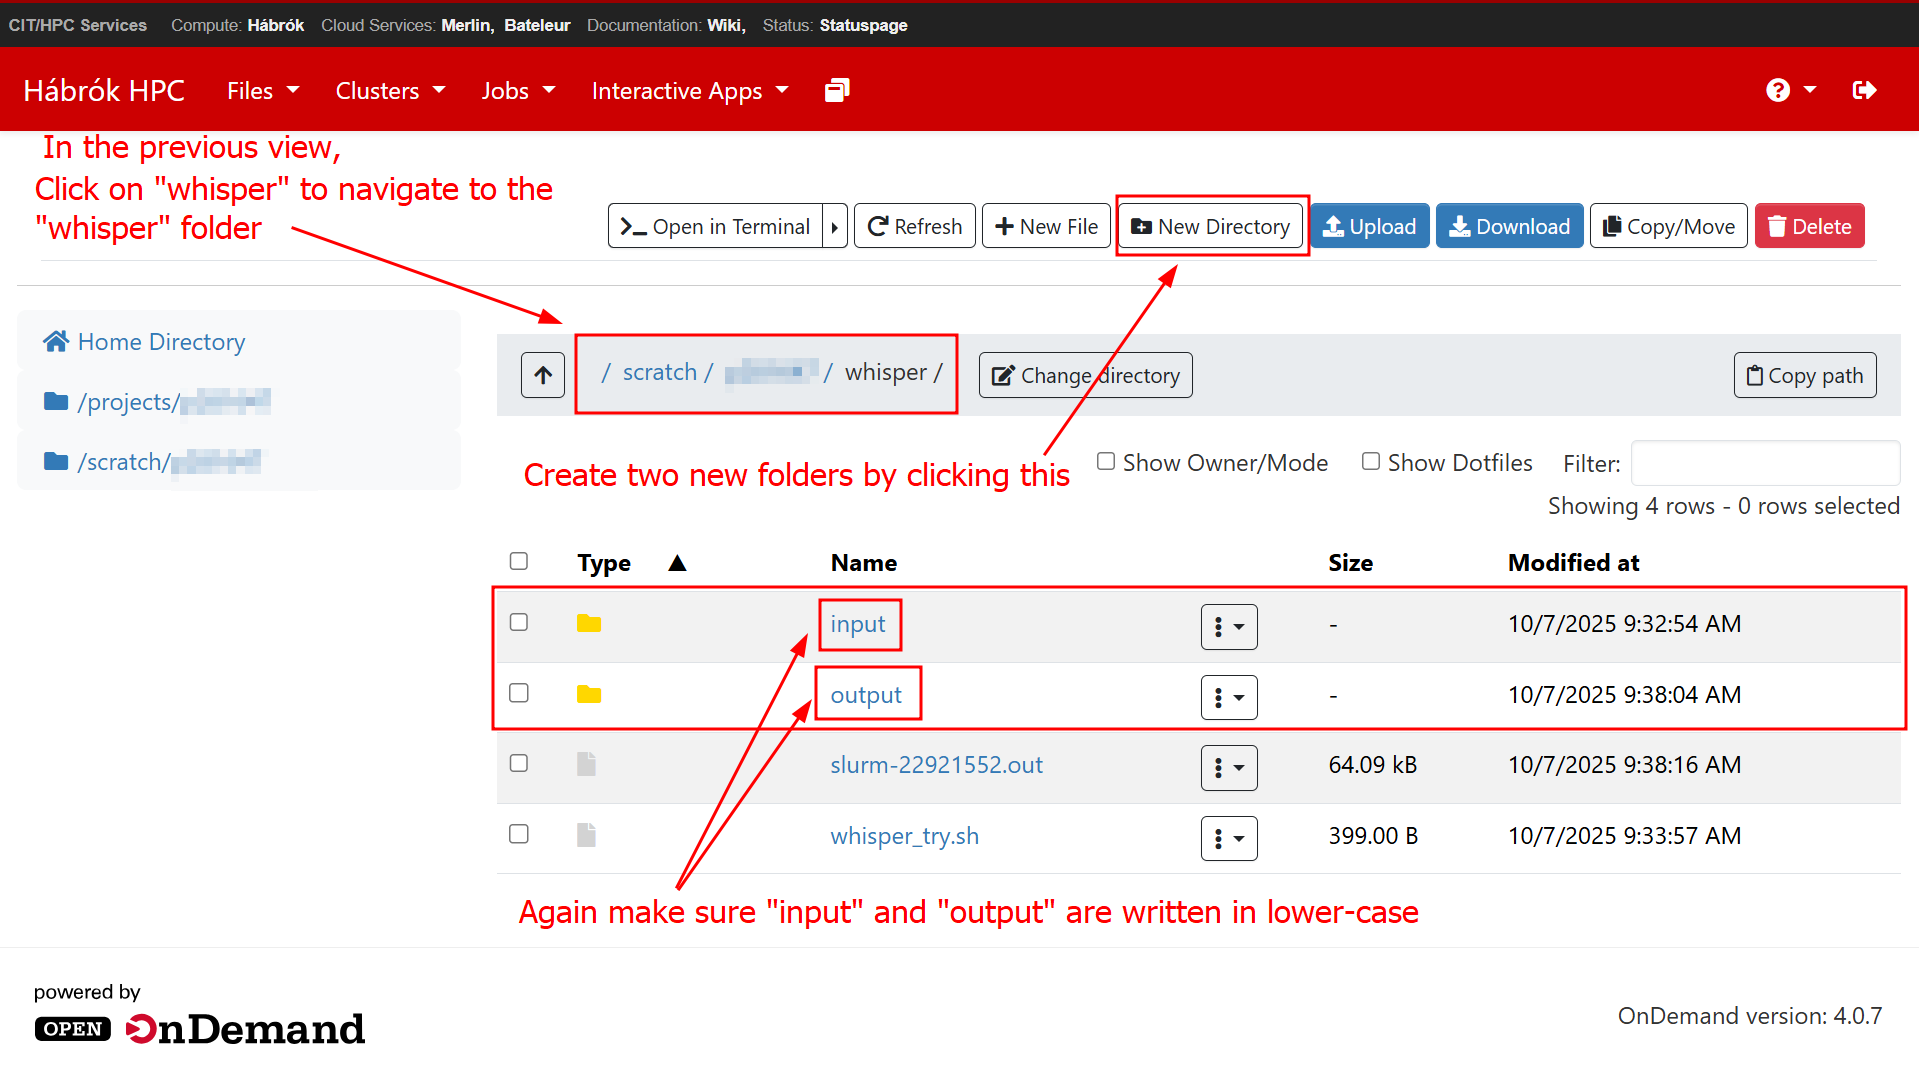
In this window, you will be able to manage your files and folders in HPC. To begin with, make sure that you are in the folder with your p-number in the /scratch/ partition of Hábrók. In the next steps, you will need to create a main folder for Whisper, then two subfolders for the input and output data. To create the main folder, click on New Directory as shown below. Please make sure that you write "whisper" in lower case. When the folder appears in your window, click on its name to open the next window.
Once inside the Whisper main folder, you need to create two subfolders. Once again, use New Directory to create each new folder. Call them "input" and "output", respectively, taking care to use lowercase letters. Do not worry if you do not see any .sh file or slurm file in your file view. They will come later.
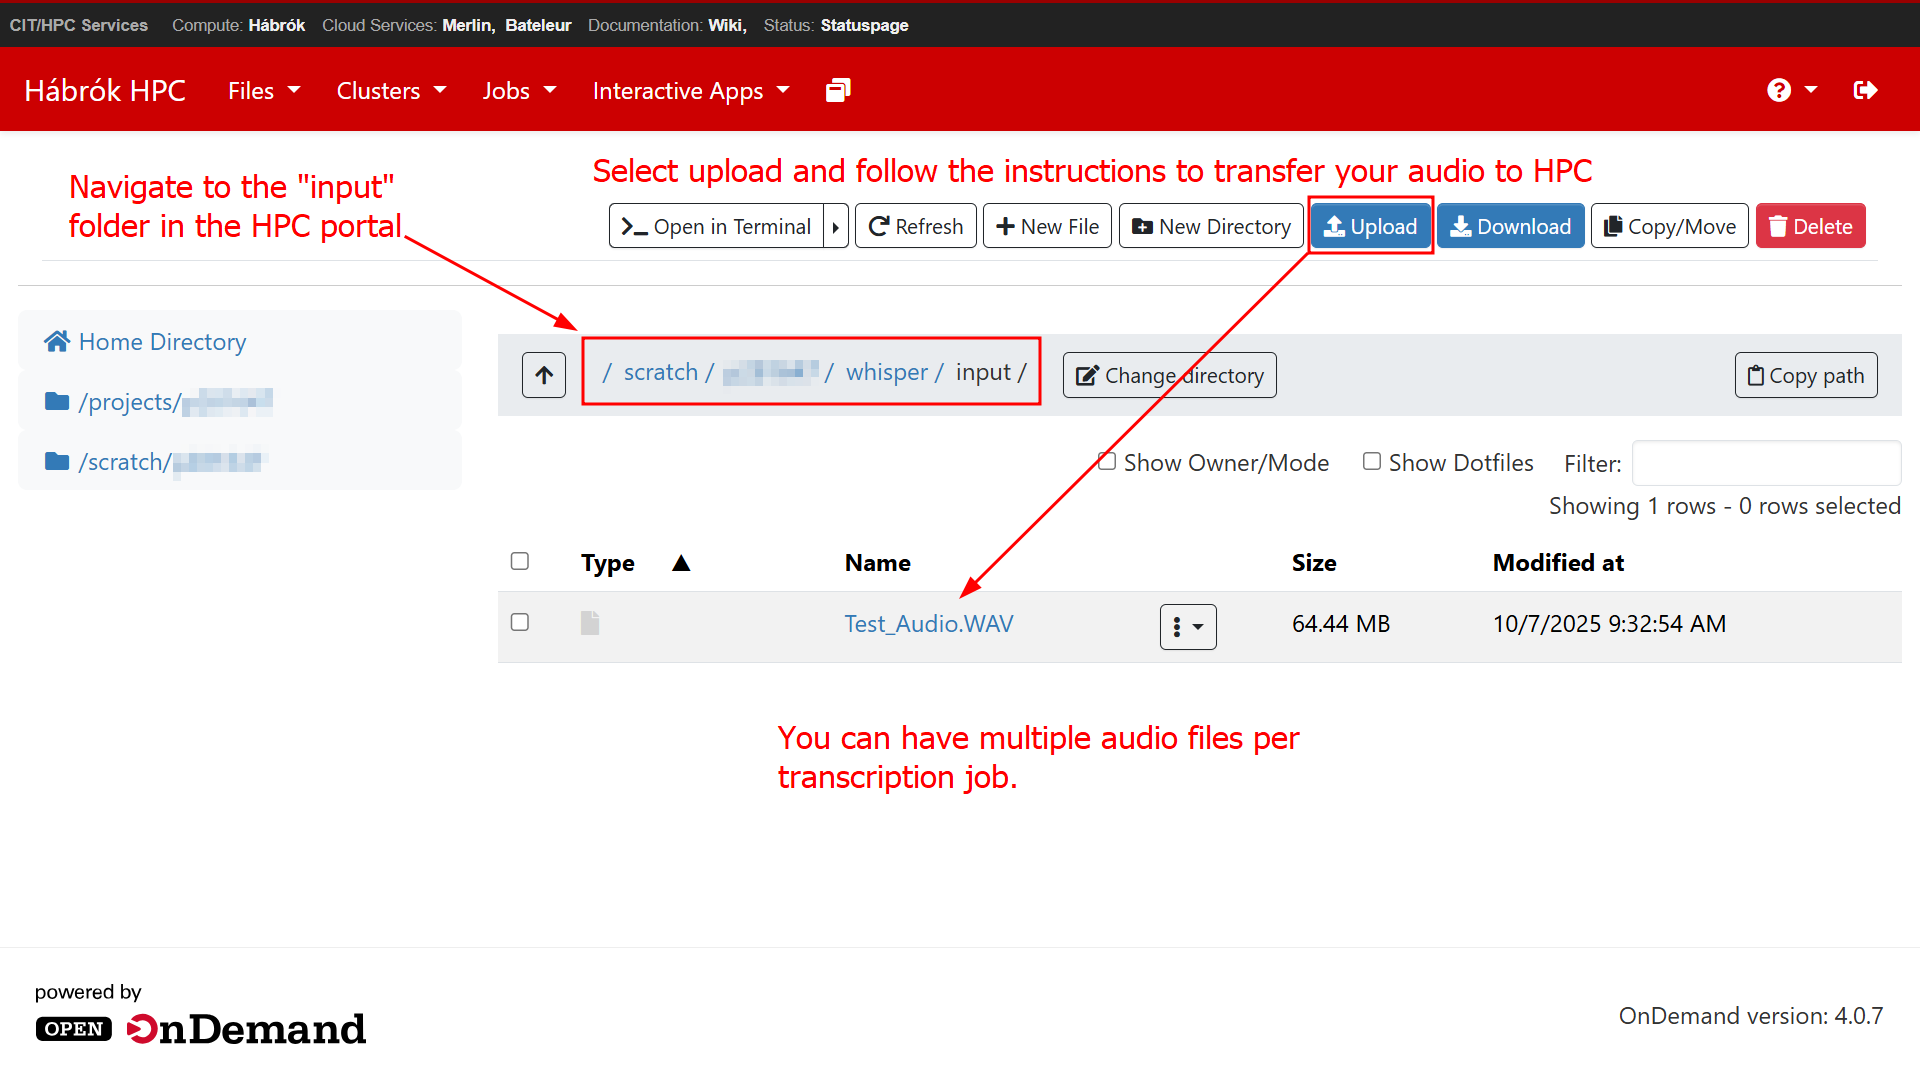
Upload your data before launching the job
Now that you have the folder structure ready, you can upload the audio file(s) you wish to transcribe. Click on the "input" folder to open its window view, then click Upload and follow the instructions to transfer your audio to the HPC environment. Please note that the example here contains a single file, but that Whisper can transcribe multiple files in the same job. Feel free to upload as many audio files as needed. The only limitation you have is that the maximum runtime of Whisper, as it is set up now, covers about 20 hours of interviews. If you need to transcribe more than this amount of time, please consider splitting the data into two separate batches and launching two separate jobs.