Accessing the LWP with the NoMachine App
As with the VWP and the Citrix Workspace app, you can also access the vLWP using a dedicated client. In this case, it is the NoMachine client. The client can be downloaded from its official website.
The LWP wiki provides a detailed manual on how to install and configure NoMachine to access the vLWP, please consult this manual to set up NoMachine on your local device.
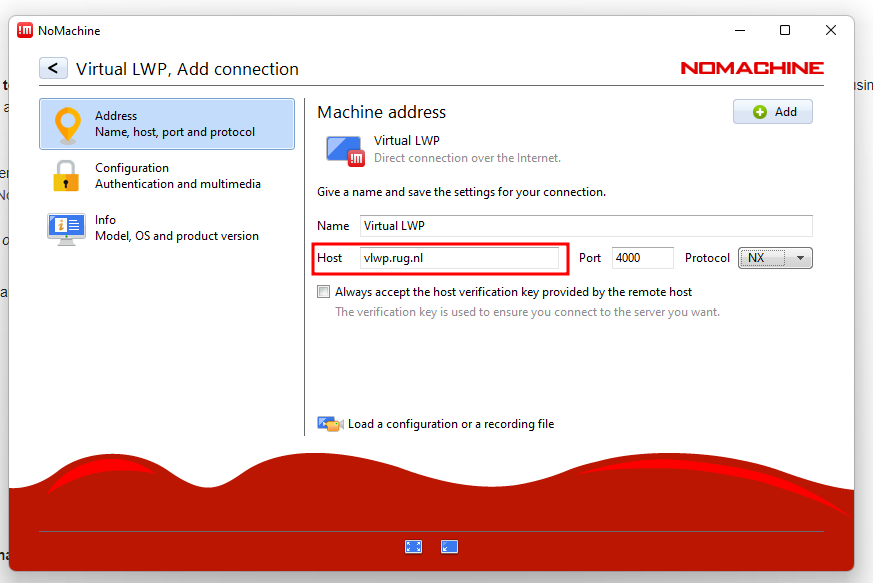
Note: The LWP wiki does not specify the name/address of the hostname to configure in NoMachine. This depends on which LWP you want to connect to. With NoMachine, you have the option to connect to either the general vLWP or to a remote, but locally installed LWP. In this manual, we assume that you want to connect to the general vLWP, which means that the name of the remote host has to be specified as vlwp.rug.nl.
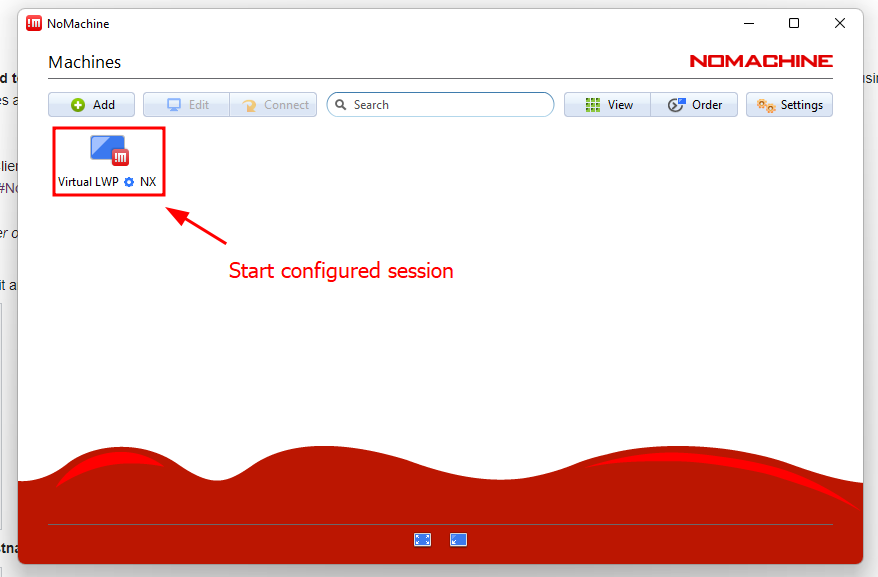
After you add a new host, you can connect to it by clicking on the respective button (see screenshot). NoMachine will then ask you for your UG credentials, and start the remote session once you have authenticated.
The virtual environment in the NoMachine app is very similar to the vLWP session in the browser, but it comes with some additional functions. One important additional feature is the ability to access data on your local system directly from your remote session.
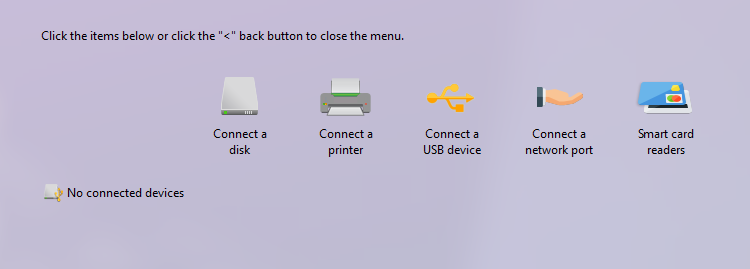
Accessing local Data with NoMachine App
To access your data locally, first open the NoMachine settings (accessible via hovering on the top-right of your virtual session). In this menu, you will now find an option called Devices. If you access this same menu from a browser session, you will notice that this option is not present there.
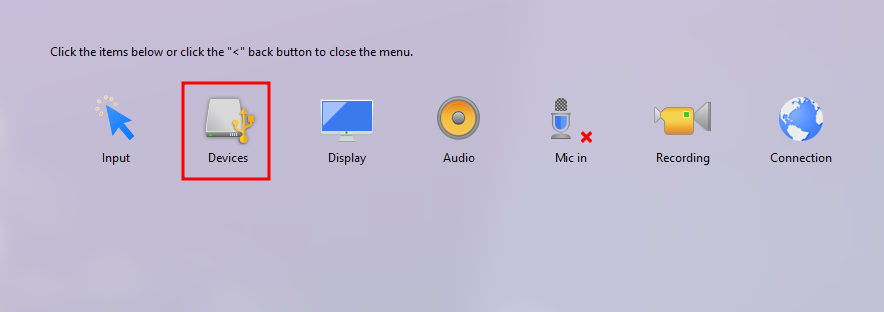
If you select it, it will present you with the option to add different devices to your virtual environment. To make local data accessible, use the Connect a disk option.
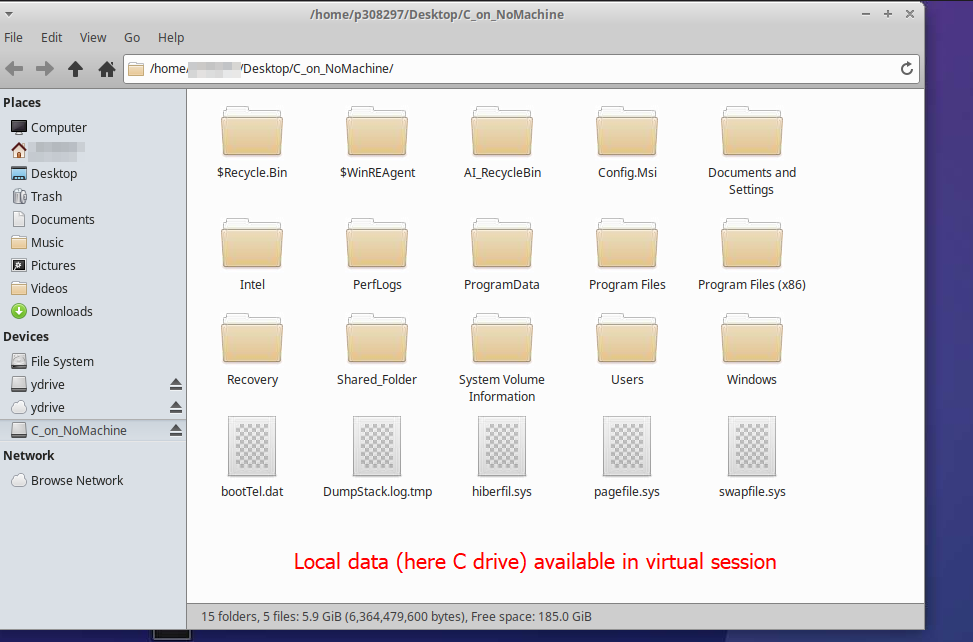
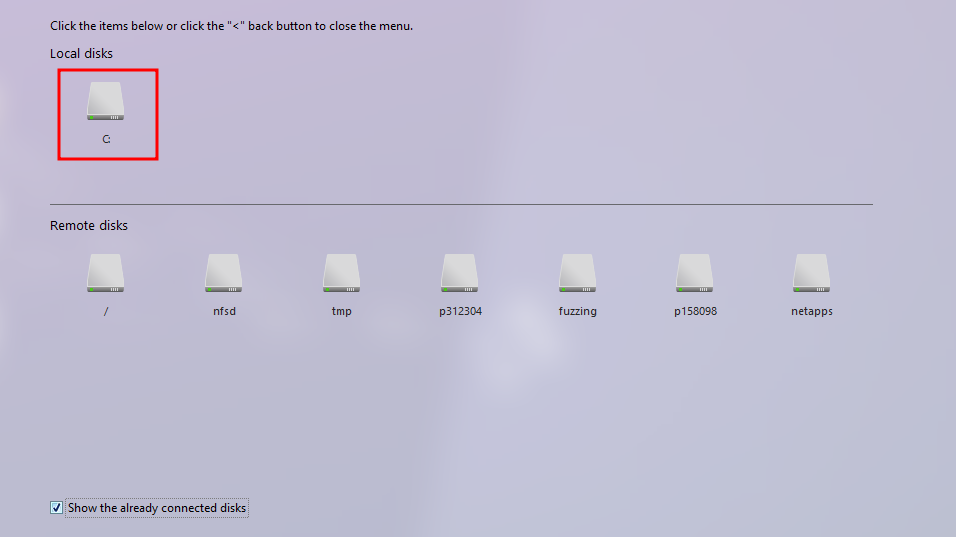
This will present you with available disks that you can make available in your virtual environment. What you see here depends on the available drives in your disk. In the provided example, only one drive (C:) is available and will be selected.
The selected drive will be made available by default in your user's Desktop which is located at /home/<p_or_s_number>/Desktop. You can specify a name and also adjust settings on who should be able to see your drive. After making these selections, confirm via Connect.
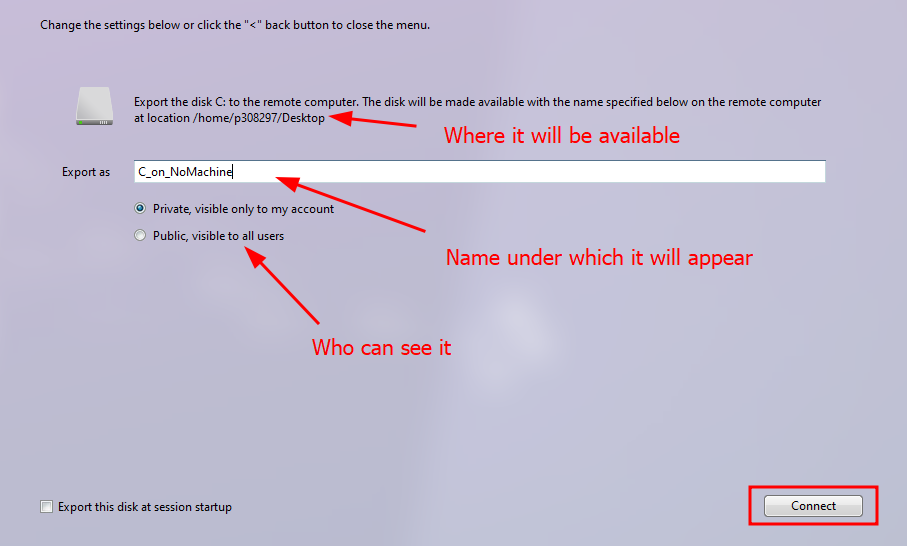
Your data is now available under the assigned name at its default location in the virtual environment. You can now transfer data between your local and virtual environment, but also open local data with the tools available in the virtual LWP directly.